Arduino BLE Accelerometer Tutorial for Beginners
Arduino BLE Accelerometer Tutorial – Introduction
In the previous post, I showed you how you can send Battery status to your phone using Arduino Nano 22 BLE Sense. In this post, I will show you how you can send Arduino Nano 33 IOT Sensor Data to your phone. If you haven’t seen that post yet, or if you want to know more about the basics of Arduino and BLE, check out the link below.
Why not make a PCB for your Project?
Making a PCB for your DIY project is not hard nowadays. PCB helps to get rid of all messy wires and stuff and gives your project an awesome look. And it’s cool to make your own PCB for your project right?
I use Altium Designer to draw the circuit and design the PCB. It is a powerful tool that can be used to design and create your own PCBs for your project as well as complex and multiplayer PCBs for industrial use. Here is the link to the Altium trial version. So make sure you check it out.
I use Altium Designer to draw the circuit and design the PCB. It is a powerful tool that can be used to design and create your own PCBs for your project as well as complex and multiplayer PCBs for industrial use. Here is the link to the Altium trial version. So make sure you check it out.
Arduino BLE Example 1 – Battery Level Indicator
Arduino Nano 33 BLE Sense
Today, I am here with a new version of Arduino Nano – Arduino Nano 33 BLE Sense, Nano with BLE connectivity focussing on IOT, which is packed with a wide variety of sensors such as 9 axis Inertial Measurement Unit, pressure, light, and even gestures sensors and a microphone.
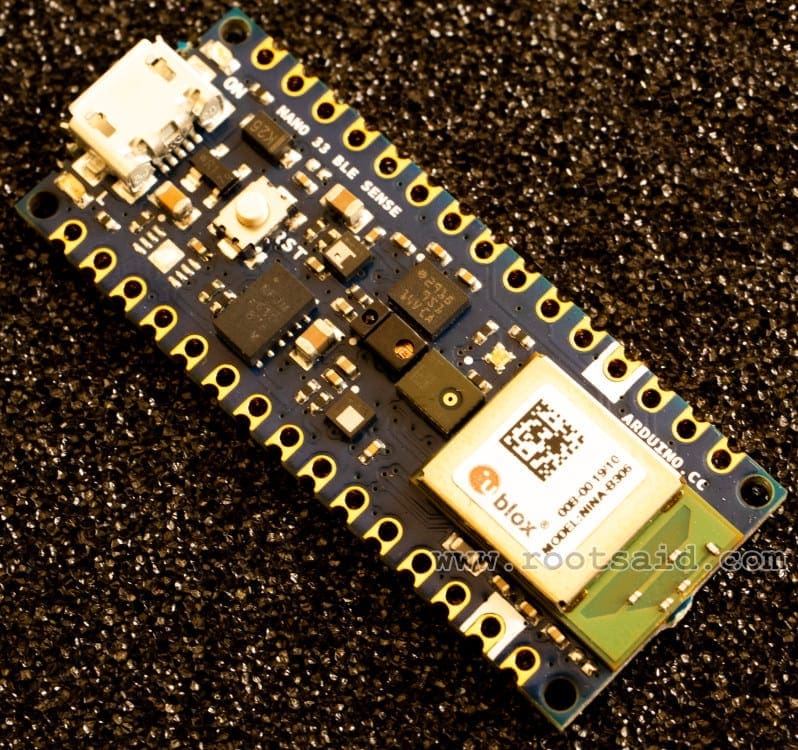
It is powered by Nina B306 module that support BLE as well as Bluetooth 5 connection. The inbuilt Bluetooth module consumes very low power and can be easily accessed using Arduino libraries. This makes it easier to program and enable wireless connectivity to any of your projects in no time.You won’t have to use external Bluetooth modules to add Bluetooth capability to your project. Save space and power.
Learn Arduino the Easy Way
Are you new to Arduino? Do you want to improve your skills in Arduino programming? You are in the right place. We have a complete beginner-level tutorial for Arduino which covers everything from scratch. In this free Arduino Tutorial for Beginners guide, we will be taking a look at Introduction to Arduino platform, getting started with Arduino IDE, different types of Arduino boards, and a lot of DIY projects using Arduino. Check it Out!
Example 2 – Arduino BLE Accelerometer Tutorial
Step 0 – Try Example 1 (Optional)
In the previous example, I showed you a very easy example to show you jpw you can send simple data via Bluetooth. If you are new to this, try this example first. It will help to give you a better understanding of the BLE.
Step 1 – Installing Libraries
For this example, we will need two libraries –
- ArduinoBLE – To Send Data via Bluetooth
- LSM9DS1 – To Read data from inbuilt Accelerometer
Both these libraries are available in library manager. Simply search for that using the name and click on install.
Step 2 – Test Accelerometer Code (Optional)
Now we will try running the accelerometer code to make sure that these data are being read properly. For that, use the below code.
#include <Arduino_LSM9DS1.h>

void setup() {
Serial.begin(9600);
while (!Serial);
Serial.println("Started");

if (!IMU.begin()) {
Serial.println("Failed to initialize IMU!");
while (1);
}

Serial.print("Accelerometer sample rate = ");
Serial.print(IMU.accelerationSampleRate());
Serial.println(" Hz");
Serial.println();
Serial.println("Acceleration in G's");
Serial.println("XtYtZ");
}

void loop() {
float x, y, z;

if (IMU.accelerationAvailable()) {
IMU.readAcceleration(x, y, z);

Serial.print(x);
Serial.print('t');
Serial.print(y);
Serial.print('t');
Serial.println(z);
}
}
Once uploaded, start the serial monitor. You will see the data being populated. Try tilting the board in all direction and you will see the value changes accordingly.
Step 3 – Upload the Code
Now its time to upload the complete code. Copy the code below and paste it in the IDE.
#include <ArduinoBLE.h>
#include <Arduino_LSM9DS1.h>

int accelX=1;
int accelY=1;
float x, y, z;

BLEService customService("1101");
BLEUnsignedIntCharacteristic customXChar("2101", BLERead | BLENotify);
BLEUnsignedIntCharacteristic customYChar("2102", BLERead | BLENotify);

void setup() {
IMU.begin();
Serial.begin(9600);
while (!Serial);

pinMode(LED_BUILTIN, OUTPUT);

if (!BLE.begin()) {
Serial.println("BLE failed to Initiate");
delay(500);
while (1);
}

BLE.setLocalName("Arduino Accelerometer");
BLE.setAdvertisedService(customService);
customService.addCharacteristic(customXChar);
customService.addCharacteristic(customYChar);
BLE.addService(customService);
customXChar.writeValue(accelX);
customYChar.writeValue(accelY);

BLE.advertise();

Serial.println("Bluetooth device is now active, waiting for connections...");
}


void loop() {

BLEDevice central = BLE.central();
if (central) {
Serial.print("Connected to central: ");
Serial.println(central.address());
digitalWrite(LED_BUILTIN, HIGH);
while (central.connected()) {
delay(200);
read_Accel();

customXChar.writeValue(accelX);
customYChar.writeValue(accelY);

Serial.print("At Main Function");
Serial.println("");
Serial.print(accelX);
Serial.print(" - ");
Serial.println(accelY);
Serial.println("");
Serial.println("");
}
}
digitalWrite(LED_BUILTIN, LOW);
Serial.print("Disconnected from central: ");
Serial.println(central.address());
}

void read_Accel() {

if (IMU.accelerationAvailable()) {
IMU.readAcceleration(x, y, z);
accelX = (1+x)*100;
accelY = (1+y)*100;

}
}
Select the right port and board. Click on upload.
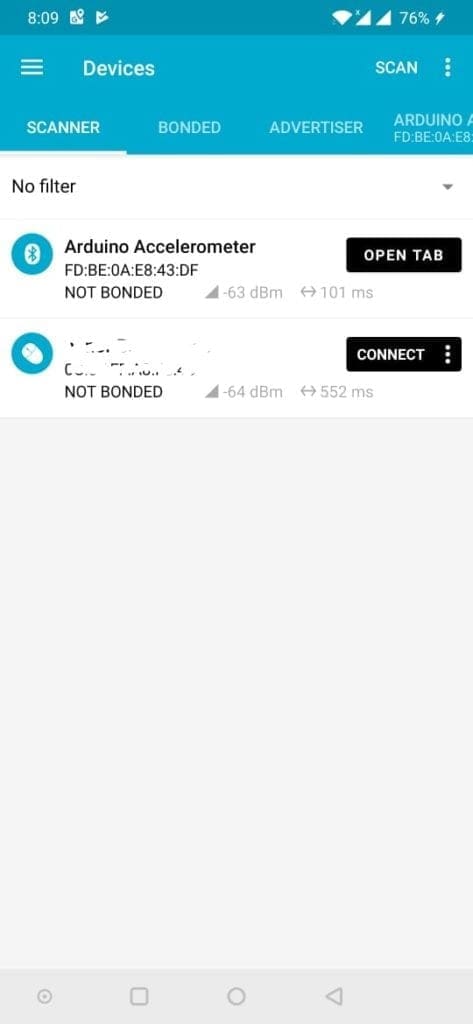
Step 4 – Testing Arduino BLE Accelerometer
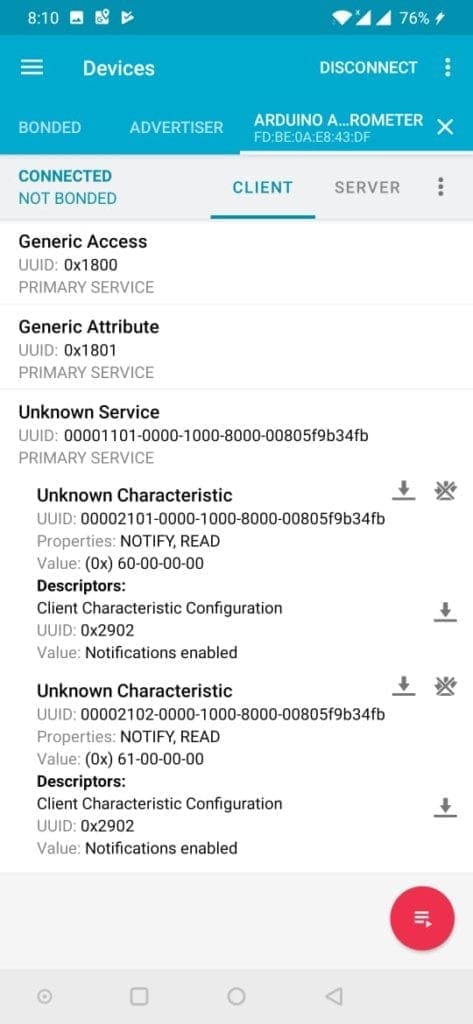
In your Android smartphone, install the app “nRF Connect”. Open it and start the scanner. You will see the device “Arduino Accelerometer” in the device list. Now tap on connect and a new tab will be opened.
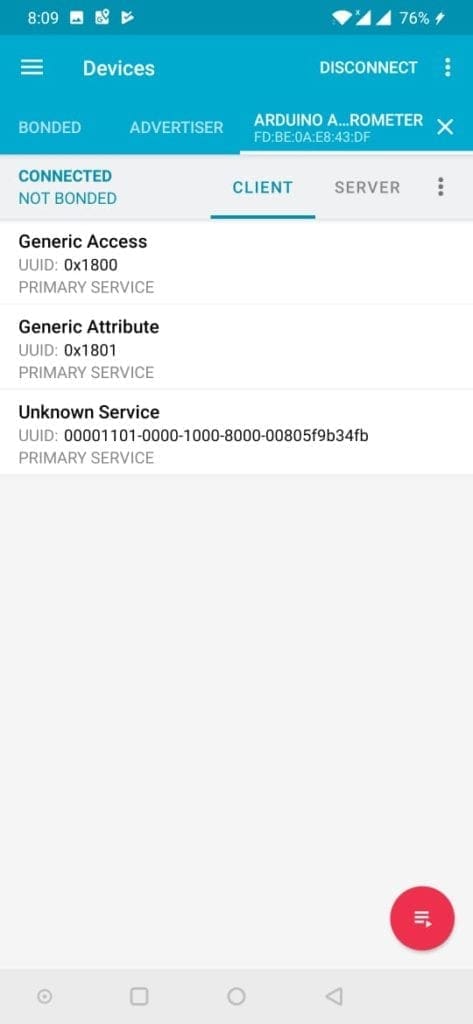
Go to that and you will see the services and characteristics of the device.
Tap on Unknown Service and you will see the accelerometer values being read from the Arduino
In the next post, I will show you how you can send inbuilt sensor values such as accelerometer, gyroscope, color sensor and gesture sensor from the Arduino to your phone as well as another Arduino via BLE.
Awesome Arduino Projects you DONT WANNA MISS!
Here is a list of the creative Arduino Projects implementing newer sensors and boards, which can be followed easily and are really interesting to implement. Even if you are a beginner and just started learning Arduino-based projects, following these tutorials will be easy. All of the below Arduino-based projects are well-explained step by step, with detailed tutorials on how to get started from scratch.

DigiSpark as HID Keyboard – Complete DigiKeyboard Commands Explained
Building a Home Automation using Arduino and Arduino IOT Cloud | Arduino IOT Projects
We Have the New Arduino UNO R4 Minima | Everything You Need to Know

Let’s Use Arduino To Take Charge Of The Bittle| Petoi Bittle The Arduino Programmable Robot
Hey, guys welcome back. How about making a DIY Arduino robot dog? What if the…

DIY Motion Triggered Halloween Prop using Arduino/Digispark | Halloween Project 2022

Control your Home Devices using Arduino and your Favorite Personal Assistant!
Introduction In the previous video, we build an Alexa-controlled Door Locking System. So many people…
Give me more Awesome Projects!
Learning DIY Robotics has Never been so EASY!
DIY Robotics is a fun and easy thing you can learn within a matter of minutes if you have a proper guide. Do you want to learn Robotics but don’t know where to start? Then THIS is for you. Here, we will help you get started with DIY Robotics with easy-to-follow, 100% FREE, step-by-step instructions starting from Robotics basics, parts of Robot, and then we will start complete step-by-step tutorials. Here you will also find an awesome collection of Robotics Project Tutorials from beginner level to advanced for you to get started with DIY Robotics.

These DIY Robots are Really Awesome

Google Mobile ALOHA: The Future of Household Robotics

Robotic Revelations: 36 Fun Facts About the World of Robots 2024

Transforming Learning through Robotics with mBot 2 Neo – Robot Kit for Beginners
Nature’s Blueprint: Bio-Inspired Robots Redefining Innovation
Best DIY Affordable Arduino Robot Dog | Get your own Boston Dynamics Spot!
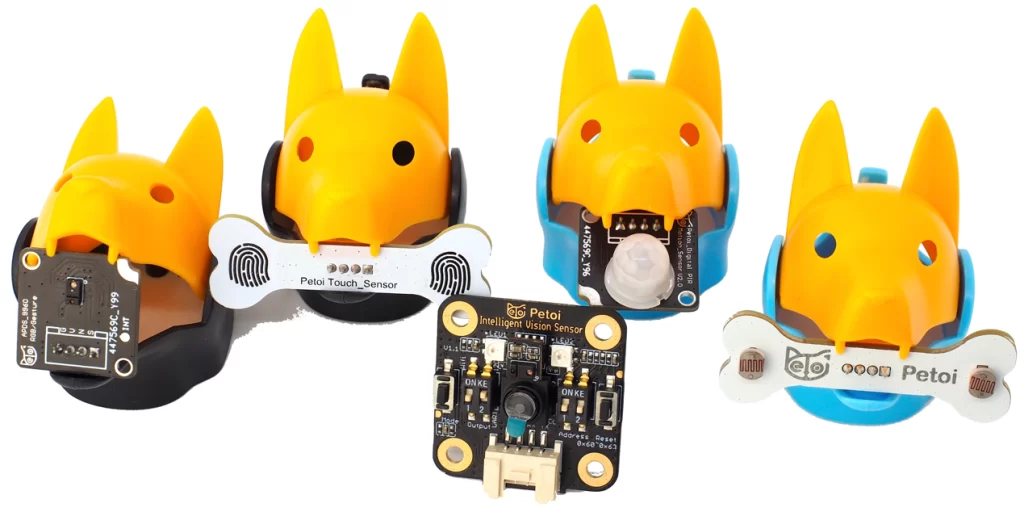
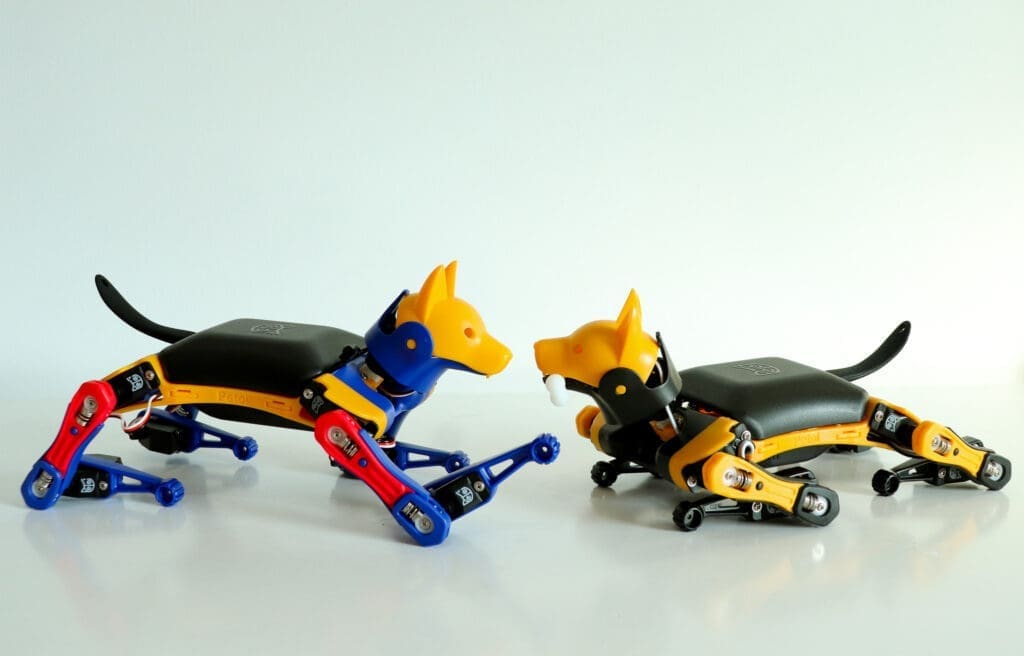
Bittle: The Robot Dog Companion Now with Supercool Sensor Pack

Next-Generation Robots – The New Era!
As technology continues to advance at an unprecedented pace, the next generation of robots is…
Let’s Use Arduino To Take Charge Of The Bittle| Petoi Bittle The Arduino Programmable Robot
Hey, guys welcome back. How about making a DIY Arduino robot dog? What if the…

Petoi Bittle – The Robot Dog Inspired by Boston Dynamics Spot
Hey guys, are you interested in doing a robot dog project? Then, I just wanna…
Engineers Create Perching Bird-Like Robot

Latest Robotics Innovations | Robots you don’t want to miss in 2022


how should I connect this to the computer? I dont have any extra devices. I just want to connect it directly to the computer. Will I be able to read data using ble after uploading the code through cable, can I disconnect the cable and connect using the ble and make this program run is that a possibility?
I had a similar question. It connects to my phone without any problem but I am having trouble connecting to laptop. I want to be able to extract the data using a serial monitor.