Raspberry Pi Pico vs Arduino | Read this before starting your next project!
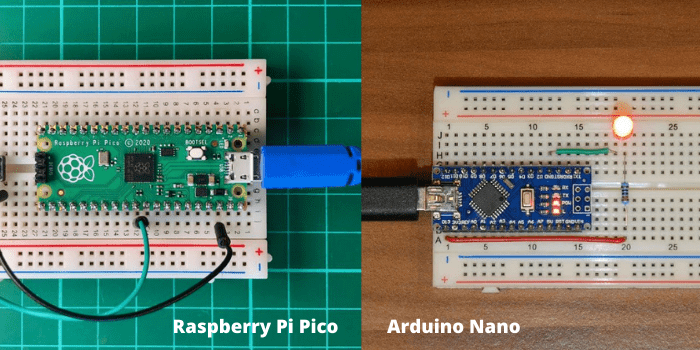
Raspberry Pi Pico vs Arduino Comparison Guide
No matter your preference, Raspberry Pi Pico and Arduino are legit tools when it comes to reliably operating projects – be that a simple switch, motor, or sensor. With no overheads that may arise running a full-on operating system, these can even be combined into systems to do higher-level AI tasks even. But what about an answer to the question Raspberry Pi Pico or Arduino for my next project? Don’t worry, you will definitely find the answer to your question here in this Raspberry Pi Pico vs Arduino comparison guide.
Even though Raspberry Pi Pico and Arduino are almost the same, there are differences in these microcontrollers, and these could sometimes come in the way of choosing the right option for your project. let’s see how each of these fare at some very basic features – ease of use, reliability, costs, and more.
Why not make a PCB for your Project?
Making a PCB for your DIY project is not hard nowadays. PCB helps to get rid of all messy wires and stuff and gives your project an awesome look. And it’s cool to make your own PCB for your project right?
I use Altium Designer to draw the circuit and design the PCB. It is a powerful tool that can be used to design and create your own PCBs for your project as well as complex and multiplayer PCBs for industrial use. Here is the link to the Altium trial version. So make sure you check it out.
I use Altium Designer to draw the circuit and design the PCB. It is a powerful tool that can be used to design and create your own PCBs for your project as well as complex and multiplayer PCBs for industrial use. Here is the link to the Altium trial version. So make sure you check it out.
1. Raspberry Pi Pico vs Arduino on Functionality and GPIO
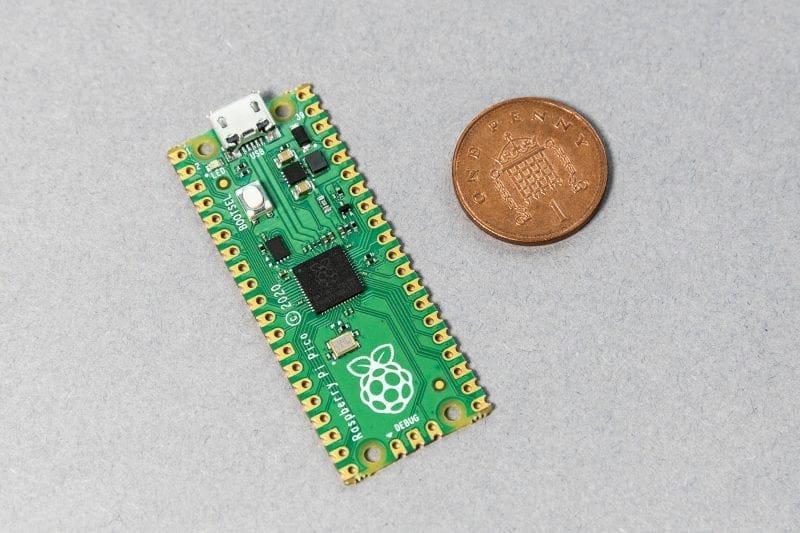
With a new 40 pin DIP style PCB, the Raspberry Pi Pico has a completely new form factor than all the previous Raspberry Pis. These pins are neatly branched around the perimeter of the board with spaced castellation for easy soldering to carrier boards.
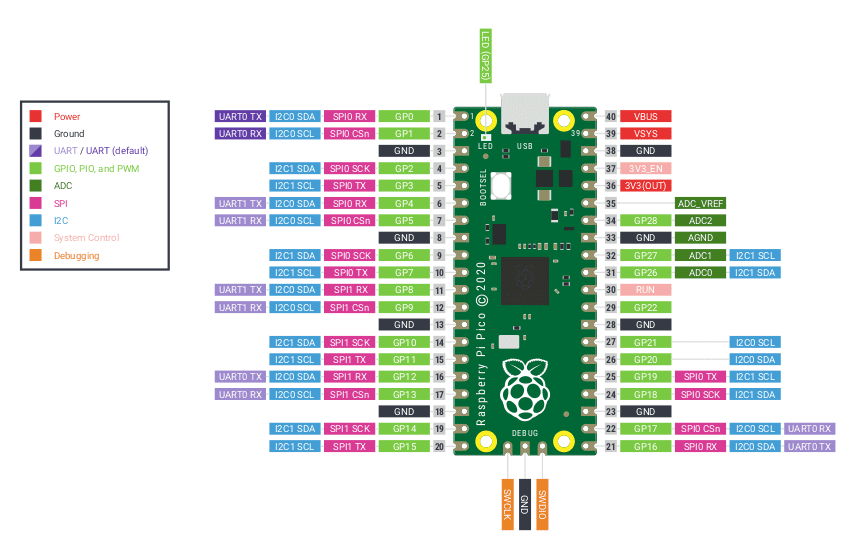

When considering other Arduino boards like Micro, the DIP style if surely not something new. But it’s a more convenient style compared to Arduino Uno layouts and other Raspberry Pi setups. The biggest advantage of the DIP style is that it enables surface mounted electronics and favors a much smaller layout altogether.
You’ll find plenty of digital IO, multiple 12C, SPI, and UART connections, and even three analog inputs for the Raspberry Pi Pico GPIO. There are also plenty of programmable IO pins that can be fashioned to mimic other interfaces or protocols, say a WS2812 Neopixels. You could also use them to run complex tasks in the background – all within a $4 board.
2. Raspberry Pi Pico vs Arduino on SoC
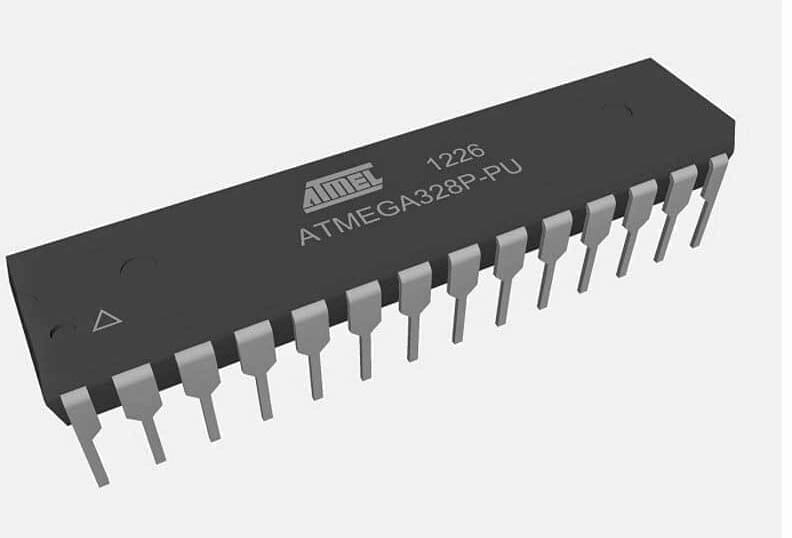
Arduino sure has the lineage to boast here. While older versions of Arduino boards had Atmel chips such as ATMega 328P, modern ones now feature Arm CPUs. While Arm is new and powerful than an ATMega328, the chip is actually quite reliable for projects as it was a staple for much of the earlier projects on offer.
Arm chips are slowly taking over the microcontroller scene, as we we can see Seeed, SparkFun and Adafruit all using them in their boards. But you need to know that multiple cores and faster speeds do not always translate into a more useful microcontroller as they are usually incorporated into single parts of projects.
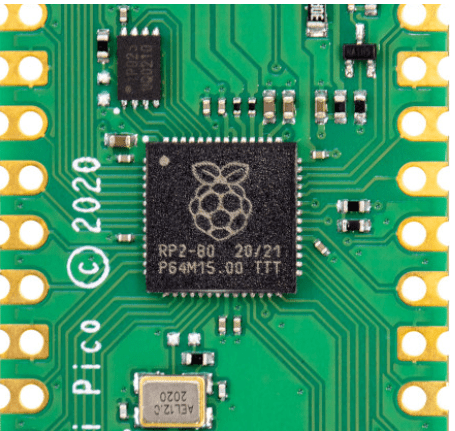
With all that, the RP2040 in a Raspberry Pi Pico is certainly better than an average microcontroller. It has a dual core Arm Cortex M0+ running close to 133Mhz – a figure much faster than UNO’s 16Mhz 328P. RP2040 excels in SRAM with 264KB, way more than UNO’s 2KB. With just 32KB of flash storage, UNO falls short by a margin to the 2MB storage found on Pico.
We could argue that a Portenta H7 could easily beat a Pico in this area. Surely the best of Arduino could beat Raspberry Pi Pico. But at what cost? The Portenta H7 comes at around $110, thanks to the Wifi, Bluetooth, camera interface and GPU. With so much extra features squeezed into one, it’s a product of great value. But a Raspberry Pi Pico comes at a measly $4. The result is obvious isn’t it?
3. Coding in Raspberry Pi Pico compared to Arduino
All of us are familiar with the Arduino IDE, so much so that most of the alternatives lay hidden in the shadow cast by the towering IDE. PlatformIO and Arduino Create are all alternatives if you were wondering.
Arduino IDE has bettered itself over the years with much needed feature upgrades like multiple board management and provisions to search and install libraries of packages as well. Arduino Create is the same but a cloud version of IDE and is mostly used for IOT projects.

The Raspberry Pi Pico on the other hand officially supports two languages – C and MicroPython. MicroPython is suggested for beginners and C/C++ is best suited for advanced users.
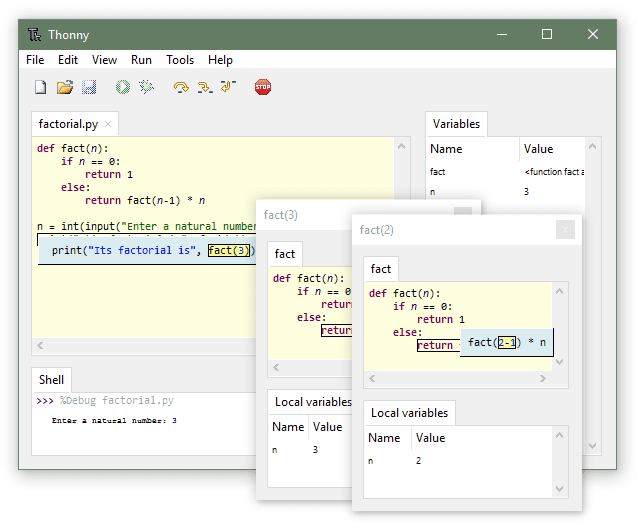
You can write MicroPython in two ways, either right into the Python shell – the REPL(Read, Eval, Print, Loop) or through an IDE like Thonny which supports version 3.3.0 and above. That’s the easiest way as well.
You can program Raspberry Pi Pico by connecting it to your computer via USB cable, and then using drag and drop functionality to upload the file into it.
For C users, the Raspberry Pi Pico has two choices. You can write code in an editor(Vi/Vim. nano and so on) and then later build your required code using terminal tools. Another way of doing things is to use Microsoft’s Visual Studio Code coupled with a few extensions creating a workflow to build and flash code to the Pico.
As you see, these are not exactly user friendly choices. Let’s hope things change with RP2040 chip in the near future. By now, most of you must have made a decision whether to get Raspberry Pi Pico or Arduino for the next project! But wait till you read the next point.
4. Raspberry Pi Pico’s Ease of Use vs Arduino
You may have guessed the workflow with Raspberry Pi Pico will be hugely different from other Raspberry Pi boards. Normally, Pi boards are computers that we operate by getting an OS on an SD card.
But with the Raspberry Pi Pico, you just need to flash it with an image of the language to run it – no matter what language you use. Naturally, you can write and save code directly to the board. Make sure the image format is UF2. Simply press the BOOTSEL button while plugging into the micro USB cable and put the UF2 file onto the RPI-R2 drive to start writing code on it.

Beginners may find it a bit tedious to run C/C++ workflow as it has a more straightjacketed approach if you want to create a final product. You can only write code in a text editor and then later download extra applications as needed. Finally, all of this must be made into a UF2 file which you can then copy to the Pico.
On the other hand, things are quite different for the much more refined Arduino IDE. So much has gone into building and perfecting the Arduino for years that their approach is worth noting as well. Beginners will find lesser flexibility in the IDE as much of it happens within the app. Advanced users can use different boards, libraries and ports thanks to recent IDE releases.
When it comes to physically handle the product, it’s a great relief that Raspberry Pi Pico comes unsoldered, provided you know how to solder pins correctly. Arduinos on the other hand usually comes pre-soldered except for DIP-based boards. This advantage of pre-soldered boards helps you start writing code right away without much tinkering to the board.
5. Power consumption

Before comparing them straight up, it’s worth noting the advancement the Raspberry Pi Pico has made over the standard Raspberry Pi. Pico is made for embedded projects and was never intended to take the latter’s role. Thus it takes less power for Pico to run as a microcontroller as it lacks other functions a computer requires.
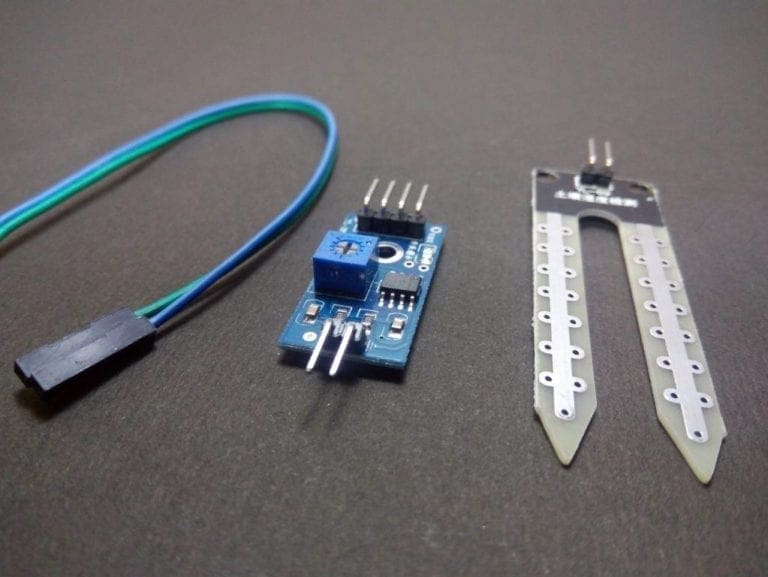
Raspberry Pi Pico when connected to a 5.21V power supply drew 600mA current while running 12 Neopixel LEDs. This meant just 3.1W was required for the Neopixels and to the power board. Now considering a standard Raspberry Pi, the average power requirement is 4-5W to run at idle without anything connected to it. So it’s safe to say that the new Raspberry Pi Pico takes much less power than a standard Raspberry Pi. But things are quite different when a Pico is compared to an Arduino.
An Arduino Uno connected to Neopixels could work at just 1.5W when connected to a 5.21V supply, drawing in just 290mA at 5.18V. So there is no competition when it comes to who draws lesser power to run – Arduino wins by a huge margin.
But this is comes at an expense of processor speed though. Your run in the mill Arduino had the slowest processor, so connecting it to say a Portenta H7 could see a rise in power since the Arm CPU used there is more powerful than even an RP2040.
Final verdict: which is better – Arduino or Raspberry Pi Pico?
Now, you can choose whether to buy Raspberry Pi Pico or Arduino. As I mentioned at the beginning, a real winner is a matter of your personal preference and ease of use. But with a $4 price, plenty of controllers, and great documentation, the Raspberry Pi Pico could easily help to get your project done in much lesser time than and effort.
Arduino is sure to come up with an updated IDE to support the Pico, so workflows based on C/C++ could also find it easier to use as well. So Raspberry Pi Pico wins for now while you may go for Arduino in the very near future.


![[Solved] sudo raspi-config command not found – Why and How to Solve this error in Raspberry Pi? How to install raspi-config?](https://b1870411.smushcdn.com/1870411/wp-content/uploads/2023/12/raspi-config-command-not-found-1-768x439.jpg?lossy=2&strip=1&webp=1)