

WiFi Controlled Robot using Raspberry Pi – Android Controlled Robot
How to make an Android Controlled Robot?
Let us build a WiFi Controlled Robot using Raspberry Pi that can be controlled using your mobile phone wirelessly over WiFi, Yes; an Android Controlled Robot. Here, I will be using an App RootSaid – WiFi Command Center to send UDP commands to the listener (Android Controlled Robot). The listener accepts the UDP packets and then uses them to execute a set of instructions to drive the motor. So, How do you build a WiFi Controlled Robot using Raspberry Pi controlled by an android smartphone? Now let’s get started.
Making an Android Controlled Robot – Components Required
Click on them to purchase from amazon
- Raspberry Pi
- A 12V Battery
- DC motors
- Chasis
- L293D Motor Driver IC
- An Android Phone with RootSaid – WiFi Command Center installed
- A WiFi network
Instructions
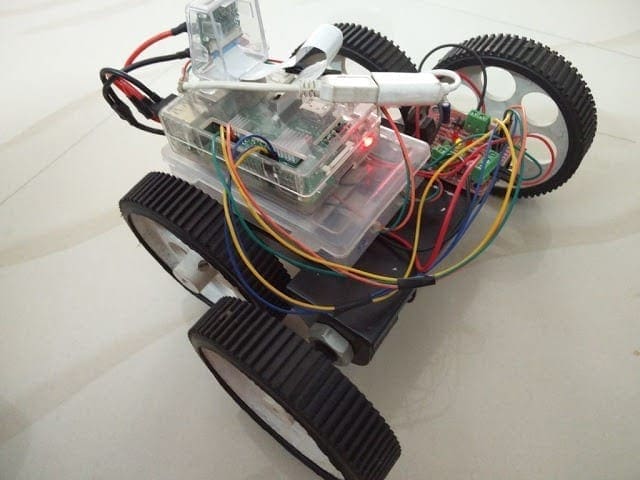
Step 1 – The Chasis of the Robot
The first thing to do is set up the chassis for WiFi Robot using Raspberry Pi. You can build it the way you like. It should have enough space to fix our Raspberry Pi, L293D Motor Driver and a good battery.

In this project, I will be using a LiPo Battery. You can use a foam board or light metal sheet for building the base. If you want you can purchase one from here. Here you will find a list of robot chassis you can buy to build a wifi-controlled robot using raspberry pi.
Step 2 – Power Source for your Android Controlled Robot
For our WiFi Controlled Robot using Raspberry Pi, I will be using a 12V Lithium Polymer battery to power up the whole robot, that is the Raspberry Pi and L293D Motor Driver to drive the motors. We can provide 12 V directly to the motor driver Board as it has an inbuilt regulator to power the motor and Circuit separately. But powering raspberry pi with this 12 V battery will fry the Chips. So you will have to use a regulator to step down the 12V to 5V and supply it to Pi. You can Purchase your Lithium Polymer Battery From Here.
Step 3 – Raspberry Pi DC Motor Driving
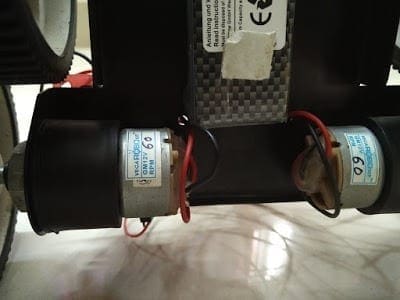
You can control DC motor using Raspberry Pi using a suitable Driver Board. In this project we will be using 2 DC motors. These DC motors are driven using a Dual H Bridge Motor Driver IC – L293D. More details on driving DC motors using L293D IC can be obtained here. If you are new to this, it is better to go through this proceeding to next step to get a better understanding of the project.
Learn More About L293D Motor Driver IC
Step 4 – Where is the Pi Mommy!
To build a wifi controlled robot using a raspberry pi of course you will need a Raspberry Pi. Raspberry Pi is a low-cost single board computer which can be used for robotics, home automation etc.
Get your Raspberry Pi from Here
Download and burn an OS to a micro SD card and insert it into the raspberry Pi. In this project, I used Raspbian OS. You can download the OS by clicking the below link[AdSense-C]Download
Now power it up. Now fire up your terminal and create a password for the user ‘pi’ by executing the command
sudo passwd pi
Now perform and update and upgrade by running
sudo apt update -y && apt upgrade -y
Step 5 – Setting up the Network of your Android Controlled Robot
Connect your Raspberry Pi to the network and make sure your Raspberry Pi Robot is getting an IP address. Connect your android smart phone to the same address and make sure there is proper connectivity between the android smart phone and the raspberry pi. You can confirm it by pinging your android smart phone from your Raspberry Pi by executing the command
ping <ip address of mobile phone>
Take a note of the IP address of the raspberry Pi robot as we will be using it in the future.
ifconfig
Step 6 – Connections
Raspberry Pi of your Raspberry Pi Robot should be provided with 5V and L293D Motor Driver with 12 V.
For this project, we will be using 6 GPIO pins to control the robot. 33 and 11 for Motor 1, 13 and 15 for Motor 2 and 29 and 31 for Enable Pins. 29 and 31 should be always kept at Logic 1.
Step 7 – Setting Up the Listener
Now all you have to do is set up a listener on the Raspberry Pi WiFi Robot. Download the sketch from the link below and save it as a file named “controller.py”
The Code

Now run the WiFi Robot controller script by executing the command
python controller.py
This will make the Raspberry Pi Wifi Robot listen to port 5050 for incoming UDP packets.
Step 8 – Install RootSaid WiFi Command Center from Google PlayStore to your Android SmartPhone

RootSaid WiFi Command Center is an android app that can be used to control robots and home appliances over WiFi. All you have to do is connect your mobile phone to the network, enter the IP address and Port of the server (the robot) and control it using the arrow button. Click here to know more about this App.
Click Here to Download this app from Playstore.
Step 9 – Let’s Ride the Bot!
WiFi Robot using Raspberry Pi is all set and ready to go.
Now all you have to do is start the App, enter the IP address of the Pi and port it is listening to (5050).

Load the IP and Port using the link button and navigate to the Robot Controller Tab.

Now you can control the robot by simply pressing the forward, backward, left and right buttons.


bu robota ortam sesi dinlemek için neler yapılabilir yada raspberry ile ortam sesi dinlemek mümkünmü
What will be the port no.
You are mentioning two different port no. In screen shot and content
We are facing problem in connecting raspberry pi and mobile app
There are no specific ports. Just use the same port number on both robot, and the app.
This android app works well with Mega256 + SEEED WiFi Shield + Cisco Access Point + Samsung S9 tablet. OS: Ubuntu 16.04. IDE: Sloeber Eclipse Plugin 4.3.
Tricks:
1> Close reading of the UDP port: 5050 section of this article. This had to be embedded in the Arduino code for the Mega256+WifiShield
2> Using SEEED wifi_upd.ino and their Example 1 from their WiFi shield support page.
3> Swapping the “uart(2,3) of Uno for the Mega256 Serial3 and the cross matching of the Mega-TX with Wifi-RX and Mega-RX with Wifi-TX.
Recommendation:
1> Replace the “string” with appropriate numeric characters to support Switch-Case usage and avoid string compares.
2> Annotate the images of the WiFi Command Center. There is too much guessing involved to be user friendly.
I updated my comments from 200602. Please delete those earlier comments.
Nice job on the knowledge transfer.
This Raspberry robot article was more helpful than the complementary Arduino article.
The android app, WiFi Command Center, works well with Arduino Mega256 + SEEED WiFi Shield + Cisco Access Point + Samsung S9 tablet. OS: Ubuntu 16.04. IDE: Sloeber Eclipse Plugin 4.3.
Tricks:
1> Close reading of the UDP port: 5050 section of this article. This had to be embedded in the Arduino code for the Mega256+WifiShield
2> Using SEEED wifi_upd.ino and their Example 1 from their WiFi shield support page.
3> Swapping the “uart(2,3) of Uno for the Mega256 Serial3 and the cross matching of the Mega-TX with Wifi-RX and Mega-RX with Wifi-TX.
Recommendation:
1> Replace the “string” with appropriate numeric characters to support Switch-Case usage and avoid string compares.
2> Annotate the images of the WiFi Command Center. There is too much guessing involved to be user friendly.
3> The Action1 and Action2 seem ot have different naming conventions in the WiFi Command Center. The UDP packet yields “action 1” for Action1 amd “action2” for Action2. My application was modified to accomodate the “” diference between the two.
4> Clearing packets for the next UDP packet required some experimenting with delay() values.