Let’s Use Arduino To Take Charge Of The Bittle| Petoi Bittle The Arduino Programmable Robot
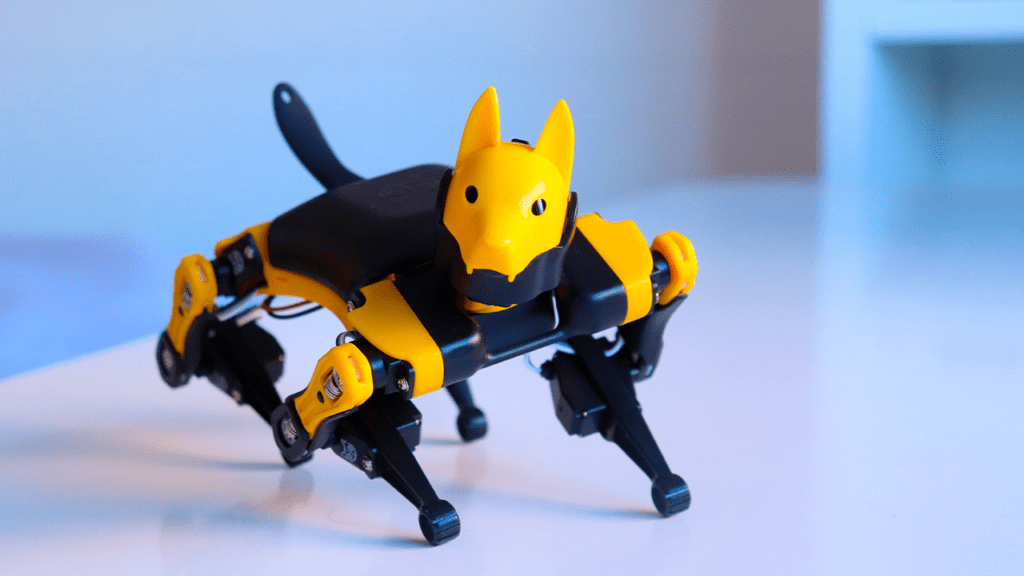
Hey, guys welcome back. How about making a DIY Arduino robot dog? What if the next electronics project you work on is a robot dog? Do you remember Bittle, a little dog robot that served as Boston Dynamics Spot’s inspiration? In the previous post, I give you a glimpse of what we can do with this robot dog project. One of the key characteristics of Bittle, the little dog robot, is that it makes a wonderful companion for everyone. In this post, we will be going through how we can program and control the robot using Arduino IDE. Therefore, this is a fantastic companion dog robot in addition to being a DIY Arduino dog robot!

Arduino
As I mentioned earlier we will be using Arduino IDE to calibrate, program, and control the robot so the first thing we need is Arduino IDE. you can easily download this software from their official website. Bold that simply go to their website, go to the download page, choose the type of download you want, make sure you are downloading the latest version, and download to Software.


For this tutorial, I will be downloading the compressed version of the software so that I don’t have to install it on my computer, and we can directly run it from the folder. Once you have downloaded it, simply run this executable file and make sure it is working properly.
Download Opencat Files
The next thing you need to do for this dog robot project is all of these opencat files in this Petoi GitHub repository. This contains all the samples sketch, supporting files, and configurations you can use to calibrate configure, and program our Bittle robot using Arduino IDE.
Once you download the file, copy and paste the whole folder somewhere, and extract the file. It would be clean if you rename the folder like this. Just remove the main. Inside the opencat folder, you should be able to see this Opencat. In the file right? Simply open the file using Arduino.
Prepare the Hardware
Let´s look at parts of this Arduino dog robot. On the hardware side, you have to make sure that all the servo motors are connected to the right port of the motherboard. For that, you can check the documentation and connection diagrams that are available in Petoidocumentation.
Also, you have to make sure that the battery has adequate charge in order to perform the calibration. And, it is not necessary to screw all the legs to the body of the robot at this point, all that matters is that the body and the motherboard should be lying flat on a perfectly flat table.
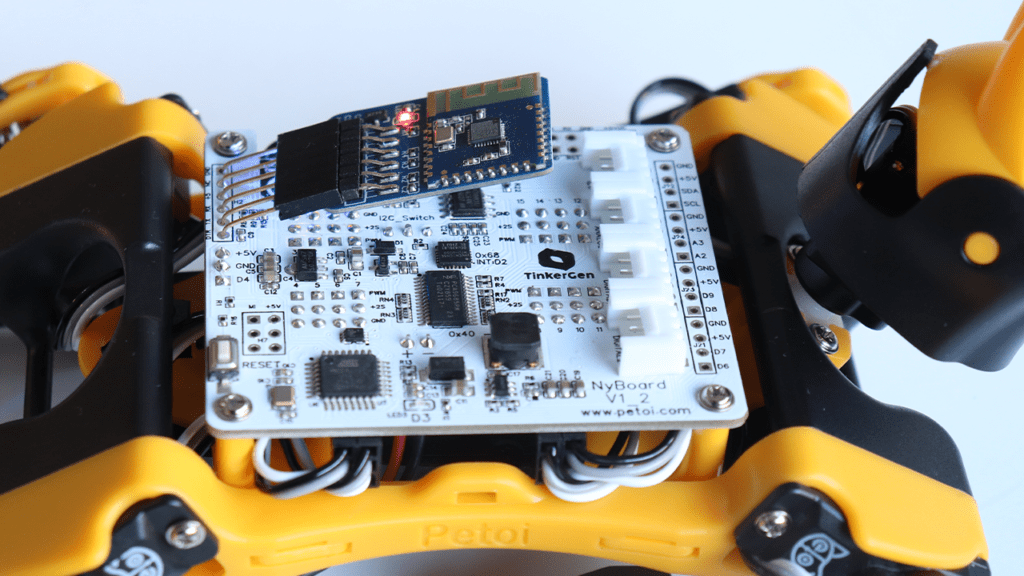
At this point, you can connect the program downloader to the board and the other end of the USB port to your computer. Now if you check the device manager of your computer you should be able to see an additional device with a com port. This is our programmer. Now all you have to do is open up opencat.ino file using Arduino IDE.
Initial Calibration
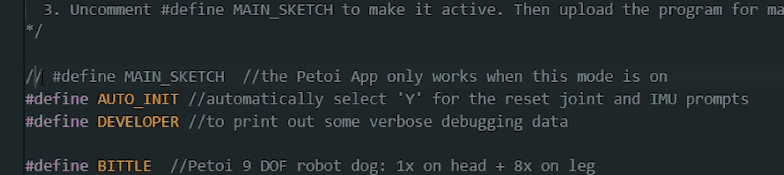
The first and most important thing to do is to calibrate the IMU and do some initial calibrations. In order to do that, the first thing you need to do is select which robot you are having right here in this section. We are having this Bittle robot, so we will be uncommenting this part and we will be commenting on the nibble Robot as shown in the screenshot below.


In order to do the initial calibration to the IMU, first we will uncomment this line right here. Now simply select the right port and select the board as audio you know and upload the code.

Once the code is uploaded, simply open the serial monitor you should be able to see some things like this. But don’t worry guys this is the boat doing all the initial calibrations. If you are seeing some unusual characters or something that’s not making sense you don’t have to worry because it could be because of the incorrect baud rate which we can easily change right here, Now it will ask you whether this robot is in a flat surface and if it is not in a flat surface make sure to keep the boat and everything in the flat surface and proceed with the setup. Once that is done the board will do a set of operations and do the initial calibration and save all the values inside the motherboard.
Once this part is done we can upload our main code. In order to do that simply open the same sketch and comment on this line right here, and simply upload the code as we did earlier.


Once the code is uploaded simply open the serial monitor and from now on you should be able to control our robot dog using serial commands. I will also show you how you can calibrate and set servo motor offset values in order to do calibrations and set all the robot legs to 90°.
Setting Offset to Servo Motors
It’s time to refine your companion robot dog. Let’s now set the servo motor offset for this robot dog project. In order to do that simply open up the serial monitor and send the command C. This will set the robot in calibration mode. In the calibration mode, all the servo motors will be set in a particular position. And at this point, you have to connect all the leg parts together in this 90° configuration. And you don’t have to worry if the legs are not in a 90° configuration as we will be able to adjust it using the serial monitor. Once you have connected all the screws your robot should be looking like this.
Then, you can use this l shape tuner in order to make fine adjustments to the servo motors position using the serial monitor. Let me show you how we can do that.

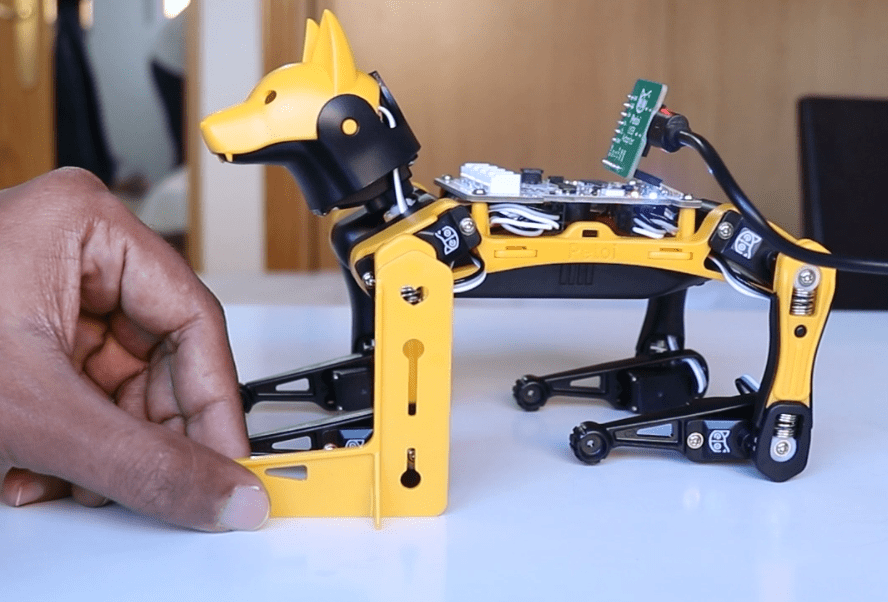
Let’s say we have a small mismatch in this like right here. Here you can see the legs are not positioned in the 90° position right. Now put the tuner here like this and we can confirm that there is a mismatch so we need to change the offset angle of this servo motor right here. This robot has a number for each servo motor and you will get this number from the documentation right here.

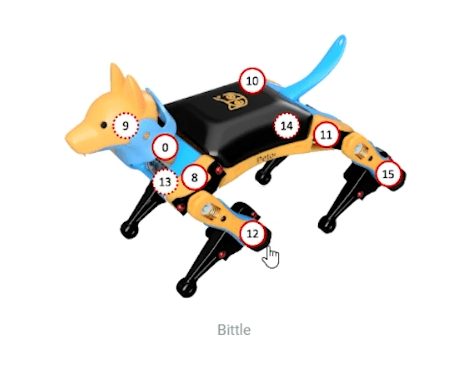
And from the documentation, the number associated with this servo motor is 12. And we need to make fine adjustments to servo motor 12 in order to do that simply send c12 5 through the serial monitor, and that will turn the servo motor 5°. And if you need to reverse the direction of the offset simply send the command c12 -5 and that will rotate the servo motor shaft to minus 5 degrees.

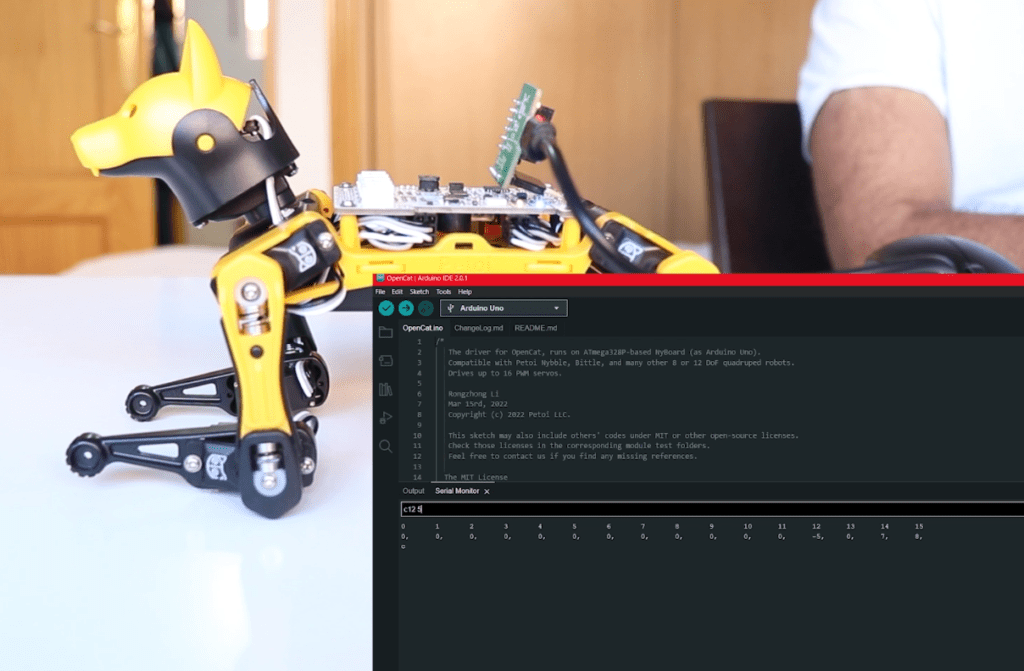
And this way we should be able to configure all the servo motors in this robot. Once the calibration is done you can send s in order to save all the offset values and you are done.
Control Bittle using Serial Commands
Let´s control the Arduino dog robot using serial commands. Now we will calibrate the servo motors for this robot dog project. This is how we calibrate all the motors in the orbital robot. Now we can start controlling the robot using serial commands. For that, there are so many different options. First, we will use the audio I d e to control our robot. For that simply open the serial monitor and send commands to walk or crawl or do other actions.

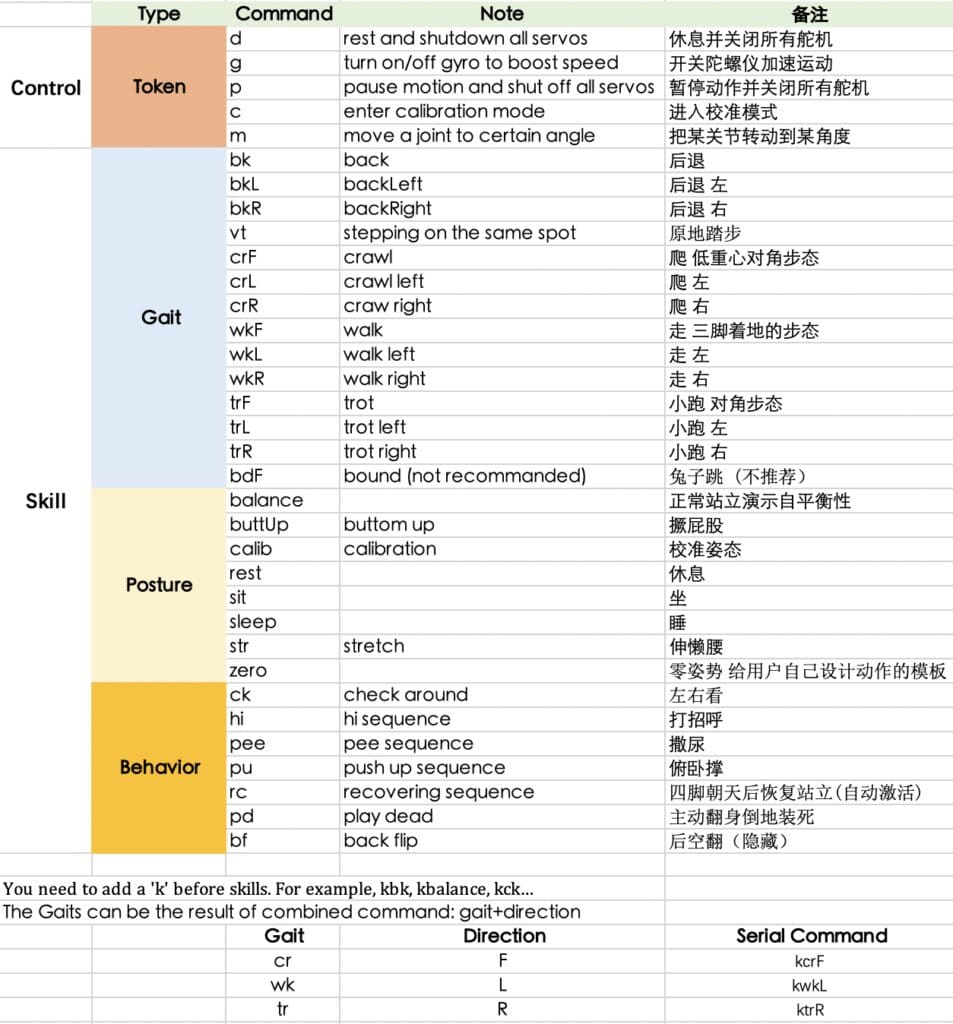
This robot already has a set of skills predefined so we can first start with those skills. In order to enable a skill you can send a comment with the character k. For example, if you want the boat to say hi you can send the command khi. If you want to make the robot push up, simply send the command kpu.
Sample Commands
- khi
- kpu
- ksit
- krest
There are mainly three types of skills that are predefined, one is for movement or gate, one is for poster, and one is for behavior. You will see a list of all the serial commands that you can send to your robot on this documentation page right here. When you are sending it a movement or a gate command make sure you are sending it a direction as well.
That was easy, right? Now if you are familiar with Python, you can have a lot of fun with Bittle as well. You can calibrate, control, and play with Petoi with Python as well! There are plenty of Python scripts with which you can send serial commands to Petoi. Check out the documentation here and learn how to control Petoi using Python. Also, make sure you follow Petois official, social media pages, as you will be able to get a lot of updates and news on new products and features. So guys, bye for now, see you in the next video!
Adopt your Petoi Bittle
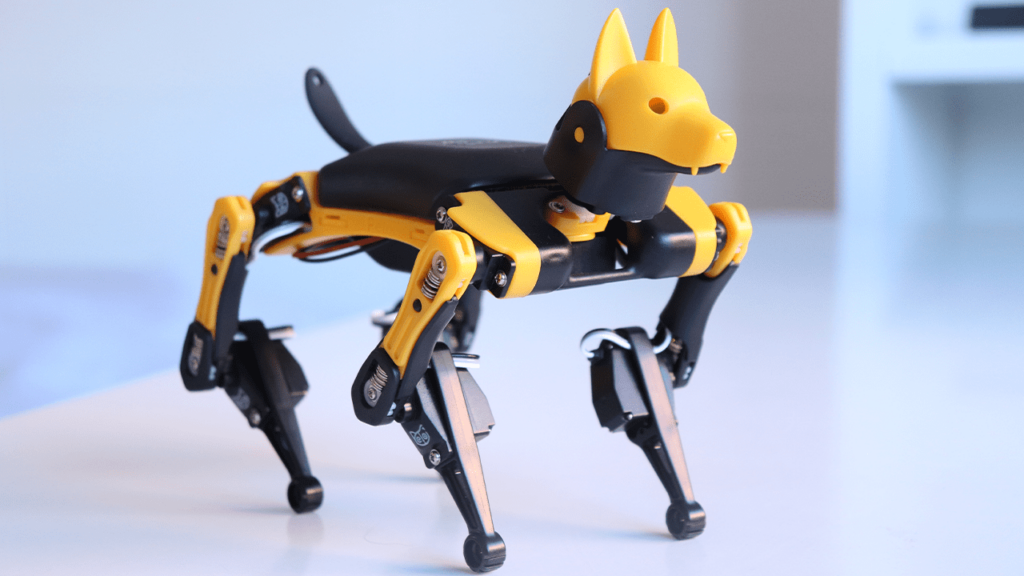
This bot is now available in different configurations, and colors along with different sensor modules which can be attached to Bittle, the DIY dog robot. You can purchase from different platforms, so if you want one, I will share the link in the description and you can check it out! Also, our viewers will get an additional discount if purchased from the link below.
Adopt a Petoi Bittle
Want more Updates on the Petoi Camp?
Check out the documentation here and learn how to control Petoi using Python. Also, make sure you follow Petois official, social media pages, as you will be able to get a lot of updates and news on new products and features. So guys, bye for now, see you in the next video.