DigiSpark as HID Keyboard – Complete DigiKeyboard Commands Explained
Introduction to DigiKeyboard Commands
Hey there! Ready to have some fun with microcontrollers? You’re in the right place! Today, we’re going to play around with DigiSpark/DigiStump – these tiny, awesome boards that can pretend to be HID keyboards. Think of it like teaching a mini robot to type for you! Whether you’re a DIY enthusiast, a budding developer, or just someone who loves tinkering with cool gadgets, you’ll love learning how to use DigiKeyboard commands. Here, we’ll explore how to turn these little wonders into your very own custom keyboards. So, grab your DigiSpark, and let’s get started on this exciting adventure!


What is DigiSpark?
Before going to DigiKeyboard Commands, let’s talk about DigiSpark. DigiSpark is a tiny yet powerful microcontroller development board, resembling a USB thumb drive in size and shape. It’s part of the larger family of Arduino-compatible boards, but what sets DigiSpark apart is its incredibly small footprint and ease of use.

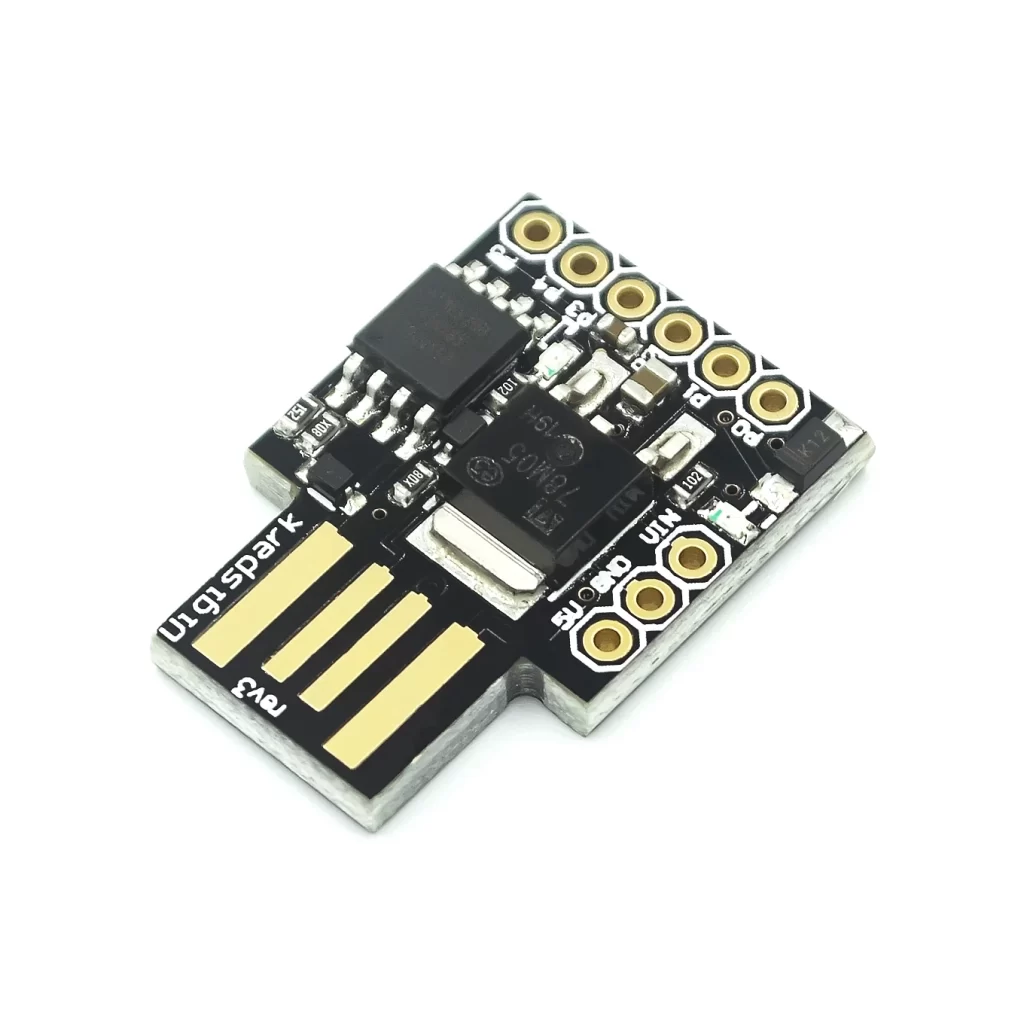
This microcontroller is based on the ATtiny85 microchip, and it’s designed for small-scale projects where space is a premium and simplicity is key. Despite its diminutive size, DigiSpark is surprisingly versatile. It comes with a built-in USB interface, allowing it to be plugged directly into a computer for programming and power, eliminating the need for a separate programmer or power supply.
DigiSpark as a HID Keyboard
The beauty of DigiSpark lies in its flexibility and the vibrant community support that surrounds it. It’s compatible with a simplified version of the Arduino IDE, making it accessible even to beginners in the world of programming and electronics. The board features six I/O pins, which can be used for a variety of inputs and outputs like sensors, LEDs, and event functions as a HID Keyboard. Wait! What!?
What is an HID Device or HID Keyboard?
So, have you ever heard of HID devices and wondered what they’re all about? HID stands for Human Interface Device, which is just a fancy way of saying ‘a gadget that helps humans interact with computers’. Think of it like a bridge between you and your computer. The most common HID devices are things you use every day – like your keyboard and mouse. But that’s just the tip of the iceberg! HID devices can be anything that sends data to your computer and sometimes gets data back, all in the name of making your interaction with the computer easier and more intuitive.
They’re designed to be plug-and-play, which means you can usually just plug them into your computer and they’ll work without needing special drivers or a complicated setup. This is because they follow a standard communication protocol that most operating systems understand right out of the box. Now we are one step closer to DigiKeyboard Commands.
How to make DIY HID Device using Arduino?
With platforms like Arduino and Raspberry Pi, tech enthusiasts and DIYers can build their own custom HID devices. Imagine creating a custom game controller that fits your hand perfectly, or a special keyboard with shortcuts for your favorite software. The possibilities are endless! This aspect of HID devices opens up a whole playground for innovation and personalization, making the interaction between humans and computers not just efficient, but also uniquely tailored to individual needs and preferences.

How to use DigiSpark as an HID Keyboard?
Step 1: Things Needed
DigiSpark Board: This is the tiny microcontroller you’ll be programming.
Computer: You’ll need this to write and upload your code.
Micro USB Cable: For connecting the DigiSpark to your computer (if your model requires it).
Step 2: Set Up the Arduino IDE
Download and Install: If you haven’t already, download and install the Arduino IDE from the official Arduino website. Then add DigiSpark to the Arduino IDE. To do that,
Open the Arduino IDE. Go to File -> Preferences.
In the “Additional Boards Manager URLs,” add the DigiSpark URL – http://digistump.com/package_digistump_index.json
Open Tools -> Board -> Boards Manager, search for DigiSpark, and install the package.
Step 3: Writing the DigiKeyboard Code
Create a New Sketch: Open a new sketch in the Arduino IDE. Include the DigiKeyboard Library: At the top of your sketch, include the DigiKeyboard library by adding #include .
Write Your Code: Write the code for what you want your DigiSpark HID keyboard to do. For example, you can make it type a specific message or perform certain keystrokes.
Example:
#include <DigiKeyboard.h>
void setup() {
// Your setup code here
}
void loop() {
DigiKeyboard.sendKeyStroke(0);
DigiKeyboard.println("Hello World");
DigiKeyboard.sendKeyStroke(KEY_ENTER);
DigiKeyboard.delay(5000);
}
Step 4: Uploading DigiKeyboard Code
Prepare DigiSpark: Plug your DigiSpark into the USB port.
Upload the Sketch: In the Arduino IDE, go to Sketch -> Upload. The IDE will compile the sketch and prompt you to plug in the DigiSpark if it’s not already plugged in. Once detected, it will upload the code.
Step 5: Testing the Digispark HID Keyboard
Test Your HID Keyboard: After the code is uploaded, open a text editor or any input field on your computer. The DigiSpark should start typing the message or performing the actions you programmed.
How to Install Digispark HID Keyboard Library (DigiKeyboard Library)
The DigiSpark library, designed for use with the DigiSpark series of microcontrollers, includes a collection of classes, functions, and utilities that simplify programming the DigiSpark boards. The DigiKeyboard library is a part of the DigiStump package, so once you install the DigiStump boards, you should automatically have access to the DigiKeyboard library.
Go to Sketch > Include Library. You should see DigiKeyboard listed under Contributed Libraries.
If you don’t see it, make sure you have correctly installed the DigiStump AVR Boards.
DigiKeyboard Command List and Functions
These commands are essentially functions that you can call in your Arduino code to control what the emulated keyboard does. The commands can be broadly categorized into the following groups:

Typing and Key Presses
- sendKeyStroke(key, modifier): Sends a keystroke with an optional modifier (like CTRL, ALT, etc.). key represents the keycode of the key, and modifier is the keycode of the modifier key.
- print(text): Types the specified text as if it was typed on a keyboard.
- println(text): Types the specified text and then sends a return (enter key), effectively like pressing ‘Enter’ after typing the text.
Special Characters and Keycodes - write(byte): Sends a single byte of data as a keystroke, which can represent special characters or function keys.
- setModifier(modifier): Sets a modifier key (like CTRL, SHIFT, ALT) which will be held down.
- setKey(key): Sets a regular key to be pressed.
- sendKeyPress(): Sends the current modifier and key values set by setModifier and setKey.
- releaseKey(): Releases any pressed keys. It’s good practice to use this after sending a keypress to avoid the key being held down indefinitely.
Digikeyboard Command List and Keystrokes
The DigiKeyboard library, a part of the DigiSpark Arduino package, provides various keystrokes that can be used to emulate a USB keyboard. These keystrokes correspond to different keys on a standard keyboard and are used in conjunction with the sendKeyStroke function in the DigiKeyboard library.
Here’s a list of common keystrokes that are typically available in the DigiKeyboard library:
Standard Keys
- KEY_A, KEY_B, KEY_C, …, KEY_Z: Representing the alphabet keys.
- KEY_1, KEY_2, …, KEY_9, KEY_0: Representing the number keys.
- KEY_ENTER
- KEY_ESC
- KEY_BACKSPACE
- KEY_TAB
- KEY_SPACE
- KEY_MINUS: The ‘-‘ key.
- KEY_EQUAL: The ‘=’ key.
- KEY_LEFT_BRACE: The ‘[‘ key.
- KEY_RIGHT_BRACE: The ‘]’ key.
- KEY_BACKSLASH: The ” key.
- KEY_SEMICOLON: The ‘;’ key.
- KEY_QUOTE: The ”’ key.
- KEY_TILDE: The ‘`’ key.
- KEY_COMMA: The ‘,’ key.
- KEY_PERIOD: The ‘.’ key.
- KEY_SLASH: The ‘/’ key.
- KEY_CAPS_LOCK
Function Keys
- KEY_F1, KEY_F2, …, KEY_F12: Representing the function keys.
Control Keys
- KEY_LEFT_CTRL
- KEY_LEFT_SHIFT
- KEY_LEFT_ALT
- KEY_LEFT_GUI: Often represents the Windows key or Command key on Mac.
- KEY_RIGHT_CTRL
- KEY_RIGHT_SHIFT
- KEY_RIGHT_ALT
- KEY_RIGHT_GUI
Navigation Keys
- KEY_UP_ARROW
- KEY_DOWN_ARROW
- KEY_LEFT_ARROW
- KEY_RIGHT_ARROW
- KEY_HOME
- KEY_END
- KEY_PAGE_UP
- KEY_PAGE_DOWN
- KEY_INSERT
- KEY_DELETE
Numeric Keypad Keys
- KEYPAD_0, KEYPAD_1, …, KEYPAD_9
- KEYPAD_PERIOD
- KEYPAD_DIVIDE
- KEYPAD_MULTIPLY
- KEYPAD_MINUS
- KEYPAD_PLUS
- KEYPAD_ENTER
Special Keys
- KEY_PRINTSCREEN
- KEY_SCROLLLOCK
- KEY_PAUSE
- KEY_NUM_LOCK
Media Playback Controls
- MEDIA_PLAY_PAUSE: Toggles play/pause of the media player.
- MEDIA_STOP_CD: Stops playback.
- MEDIA_PREVIOUS_TRACK: Goes to the previous track.
- MEDIA_NEXT_TRACK: Goes to the next track.
- MEDIA_REWIND: Rewinds the current track.
- MEDIA_FAST_FORWARD: Fast forwards the current track.
Volume Controls
- MEDIA_VOLUME_UP: Increases the system volume.
- MEDIA_VOLUME_DOWN: Decreases the system volume.
- MEDIA_VOLUME_MUTE: Mutes/unmutes the system volume.
Additional Media Functions
- MEDIA_EJECT_CD: Ejects the CD or DVD (if applicable).
- MEDIA_PLAY: Starts playback (may be different from play/pause toggle).
- MEDIA_PAUSE: Pauses playback (may be different from play/pause toggle).
Web and Application Controls
- MEDIA_WWW: Opens the default web browser.
- MEDIA_CALCULATOR: Opens the calculator application.
- MEDIA_EMAIL: Opens the default email application.
- MEDIA_BROWSER_SEARCH: Activates the browser’s search function.
- MEDIA_BROWSER_HOME: Goes to the browser’s home page.
- MEDIA_BROWSER_BACK: Goes back in the browser.
- MEDIA_BROWSER_FORWARD: Goes forward in the browser.
This list covers the most common keys. Remember, the actual availability of these keystrokes can vary depending on the version of the DigiKeyboard library and the firmware of the DigiSpark board. If these media keys are not supported in your version of the DigiKeyboard library, you might need to look into other libraries or update the firmware. Always check the most recent documentation for your specific hardware and software setup.
Cyber Warning – Rubber Ducky in the Wild
Hackers can use a DigiSpark device, programmed to act as an HID (Human Interface Device) keyboard, to execute malicious operations on a target computer. Once plugged in, the DigiSpark can automatically input pre-programmed keystroke sequences, such as opening a terminal or running a script, without the user’s knowledge. These sequences can include downloading and executing malware, creating backdoors, or extracting sensitive information. This form of attack, known as a “Rubber Ducky” attack, exploits the inherent trust computers have in human interface devices, often bypassing standard security measures like passwords or firewalls.

Applications and Project Ideas for DigiSpark USB HID with DigiKeyboard Commands?
Using DigiSpark as a Human Interface Device (HID) and DigiKeyboard Commands opens up a wide array of creative and practical applications. The DigiSpark’s ability to mimic keyboard and mouse inputs makes it particularly useful for tasks where small, programmable automation or control is beneficial. Here are some common and innovative applications:
- Typing Repetitive Information: Automate the process of typing repetitive data, like filling out forms or entering login credentials.
- Batch File Operations: Automate tasks in batch files or scripts that require keyboard input.
- DIY Keyboards: Create custom keyboards with specialized layouts or functions for specific tasks or accessibility needs.
- Specialized Controllers: Develop controllers for specific applications, like video editing, music production, or gaming.
- Assistive Technology: Develop custom input devices for individuals with disabilities, tailored to their specific needs for interacting with computers.
- Teaching Tool: Use as a teaching aid for programming and electronics, demonstrating real-world applications of microcontroller programming.
- Game Controllers: Build custom game controllers or automate certain actions in games.
- Macro Keys: Create devices that execute complex in-game actions with a single button press.
- Control Interfaces: Interface with home automation systems, sending commands via a computer to control lights, temperature, or other IoT devices.
- Automated Password Entry: Test security systems by attempting automated password entries or other input-based testing procedures.
- Keyboard Injection Attacks: Ethical hacking and security training often use devices like DigiSpark to simulate keystroke injection attacks.
- Testing User Interfaces: Simulate user input for software testing and UI/UX development.
- Prototype Development: Quickly develop prototypes for devices that require simple keyboard/mouse input functionality.
- Equipment Control: Integrate into industrial processes for controlling machinery or inputting commands into computer systems controlling industrial equipment.
The small size, low cost, and ease of programming make the DigiSpark an ideal choice for these and many other applications. Its versatility allows hobbyists, educators, professionals, and enthusiasts to explore a vast range of possibilities in the world of electronic automation and custom input devices.
Conclusion DigiKeyboard Commands
As we wrap up this journey through the intriguing world of DigiKeyboard commands with DigiSpark/DigiStump acting as an HID Keyboard, it’s clear that the possibilities are as vast as your imagination. This tiny yet mighty microcontroller not only demystifies the world of hardware programming but also opens up a universe of creative and practical applications, from custom input devices to automated tasks.
Whether you’re a seasoned programmer, a hobbyist, or a curious learner, the DigiSpark provides an accessible and flexible platform for bringing your innovative ideas to life. As you continue to explore and experiment with the DigiKeyboard library, remember that each line of code is not just a command, but a stepping stone towards realizing the untapped potential of microcontrollers in our digital world. Happy tinkering, and may your journey through electronics and programming continue to be as exciting and enriching as the world of DigiSpark itself!