Pick and Place Robot with Robotic Arm | Arduino Robotics
After the grand success of the Spinel Crux in the Arduino Robotics workshop, we started working on an add on, which can be placed on top the Spinel Crux – A Robotic Arm, controlled using Hand Gestures/Joystick. A pick and place robot using Arduino and a cool robotic arm, with 4 DOF(Degrees of Freedom).
Spinel Crux was one of our most successful project that was well received within our RootSaid community as well as outside groups. It was a discussion topic that has been going around for more than a month.

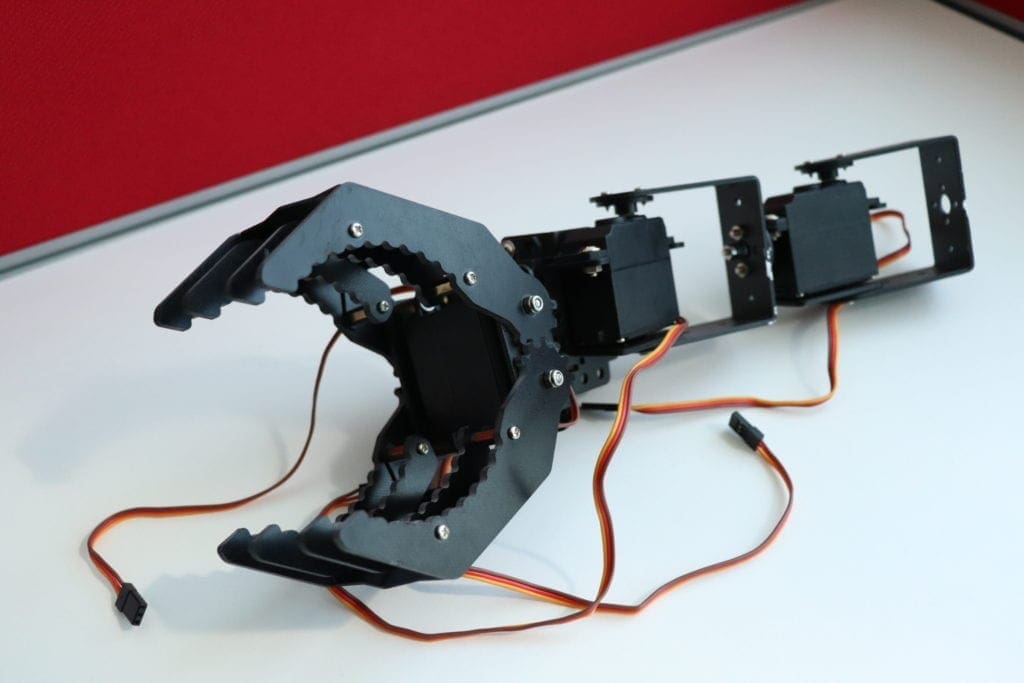
The Robotic Arm
I got the robotic arm kit from banggood.com. This robotic arm is made of good quality aluminum and is really light weight. This one have so many mounting points which will allow us to connect to any robot bodies/chassis without drilling mounting holes.
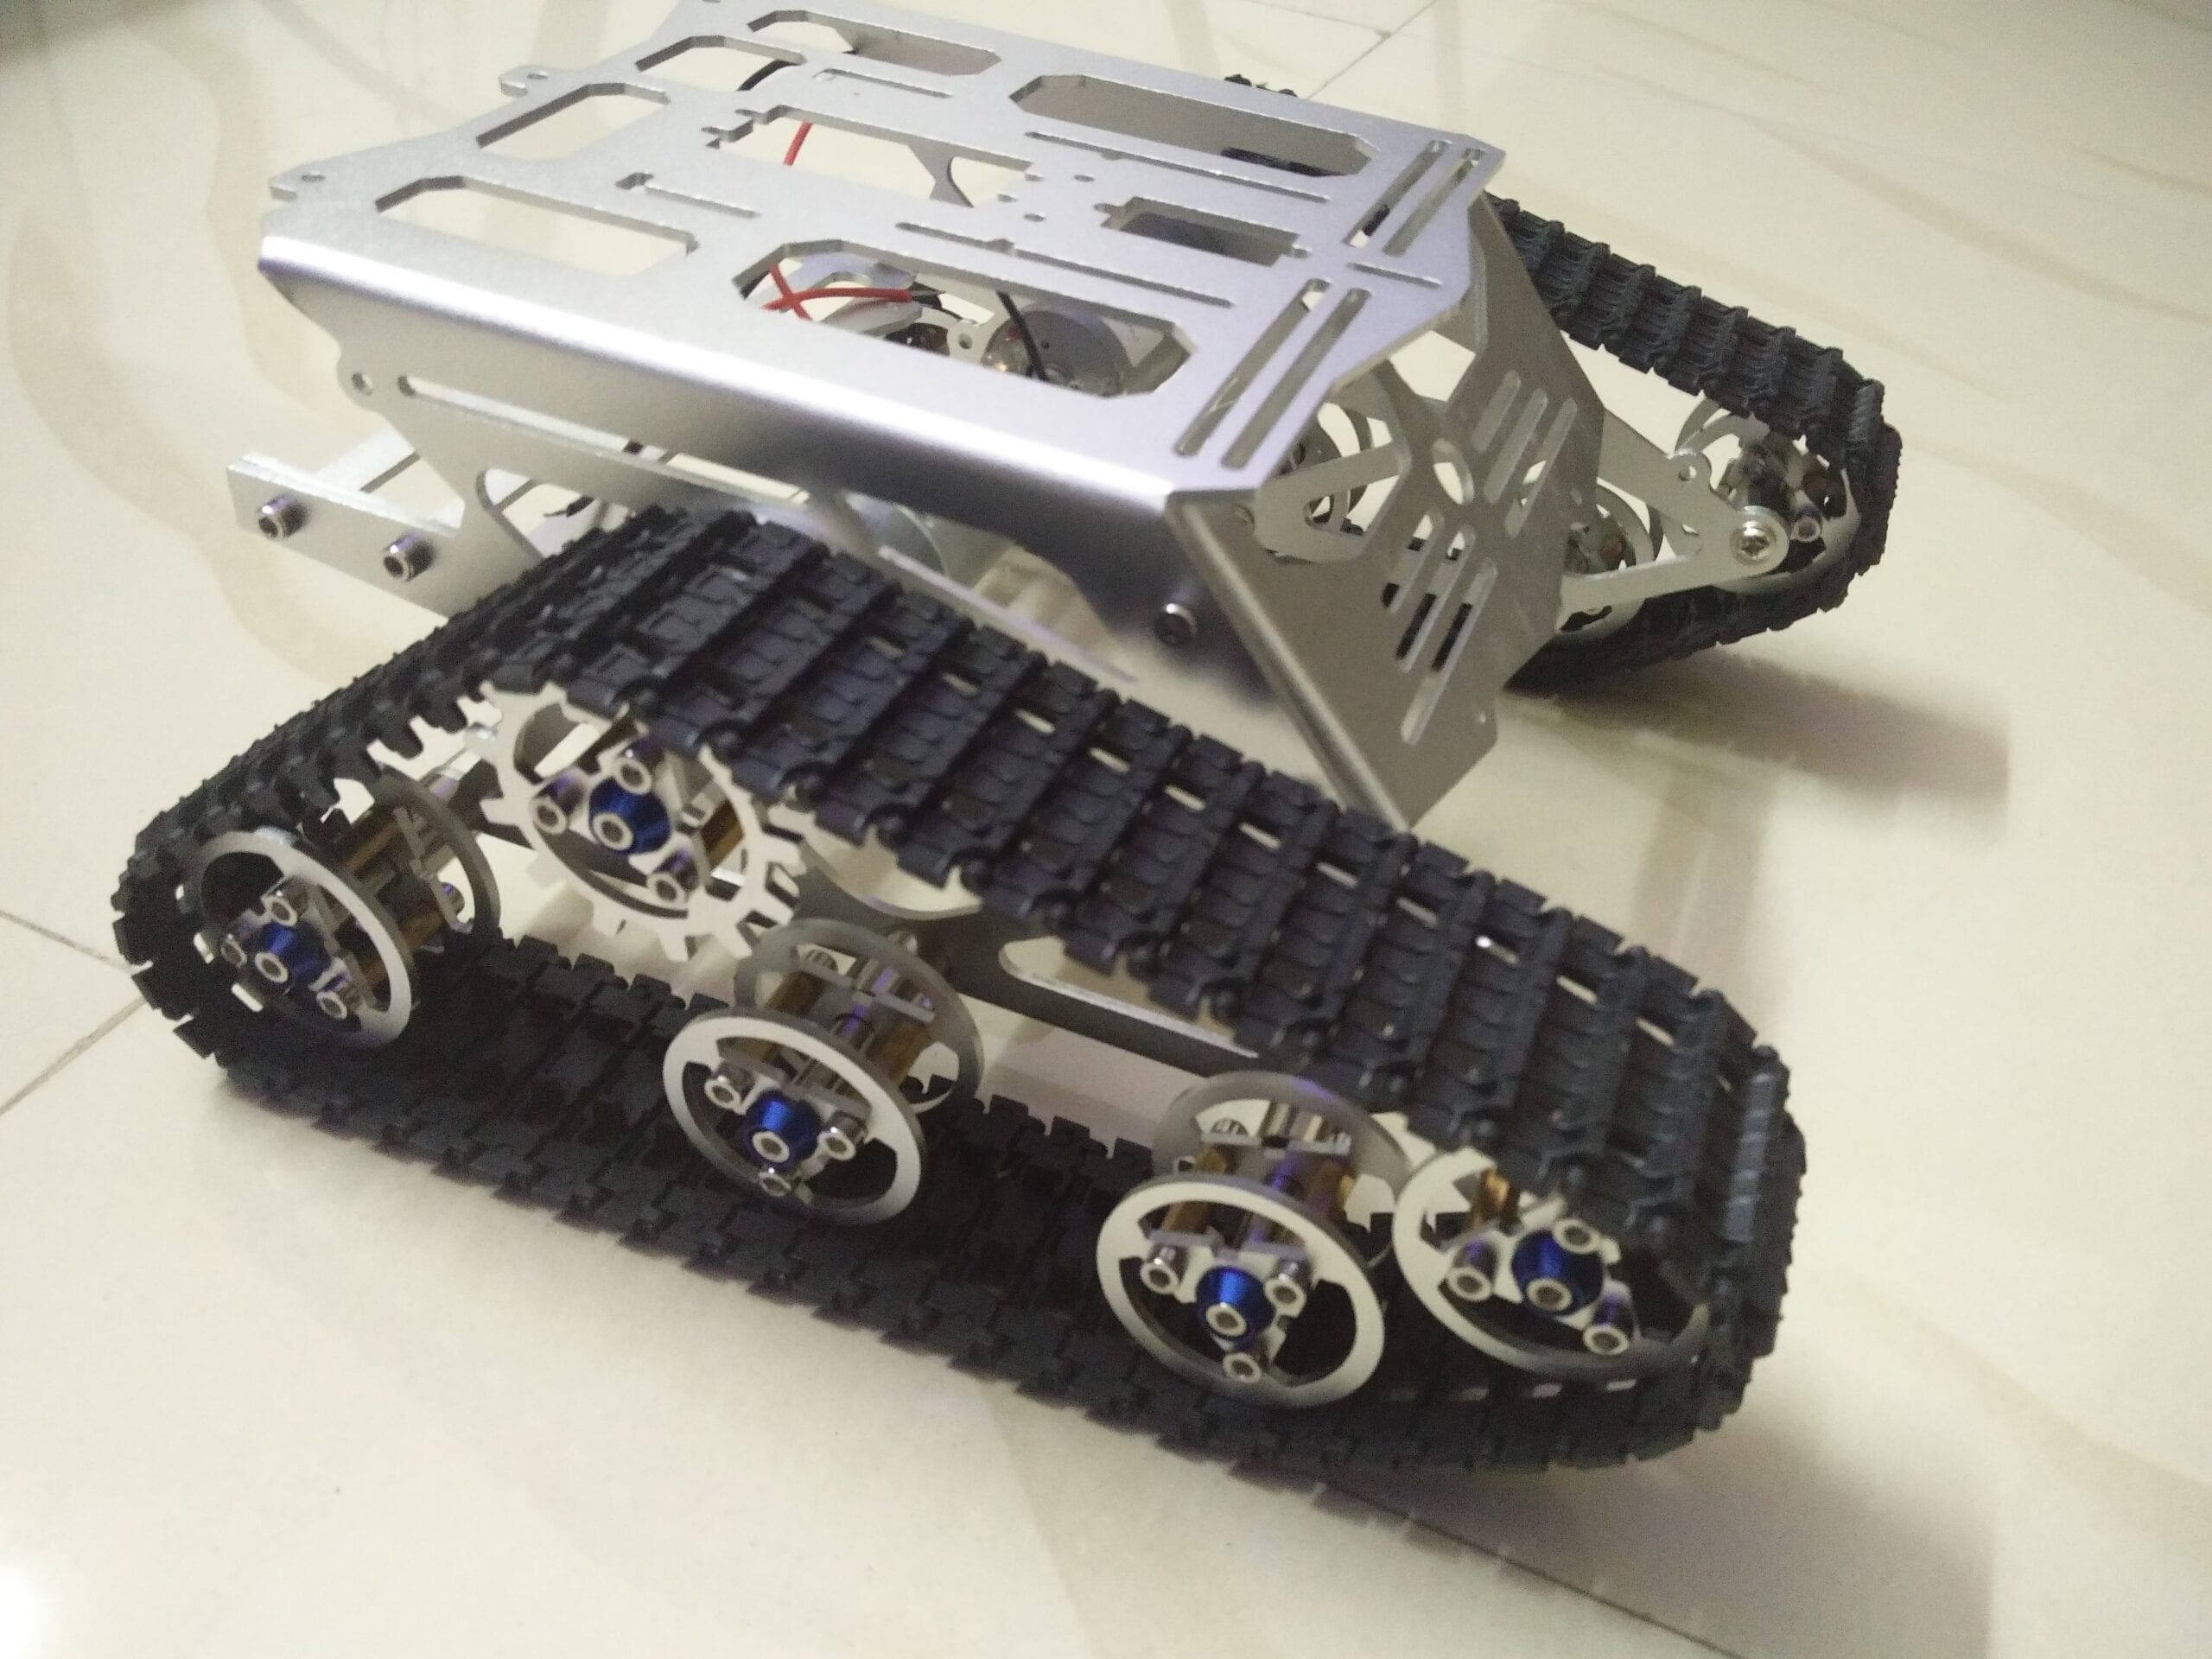
Robot Chassi – DIY Smart Robot Kit
The chassis I used for making this pick and place robot is something I would like to talk about. I got this kit banggood.com. Not only this one, they have so many types of robot frames, motors and almost all the sensors for doing Arduino, raspberry pi and other electronics and hobby projects. You will get all these things for a cheap price with really fast and quality shipping.
And the great thing about this kit is they provide all the tools you need to assemble the frame together.
Get Your Components
About the Spinel Crux V1
For those who dont know what the Spinel Crux is, Spinel Crux is a remote control gesture controlled robot which can be used for Wireless surveillance in rough terrain and hostile situations.Hand Gesture Controlled WiFi Robot
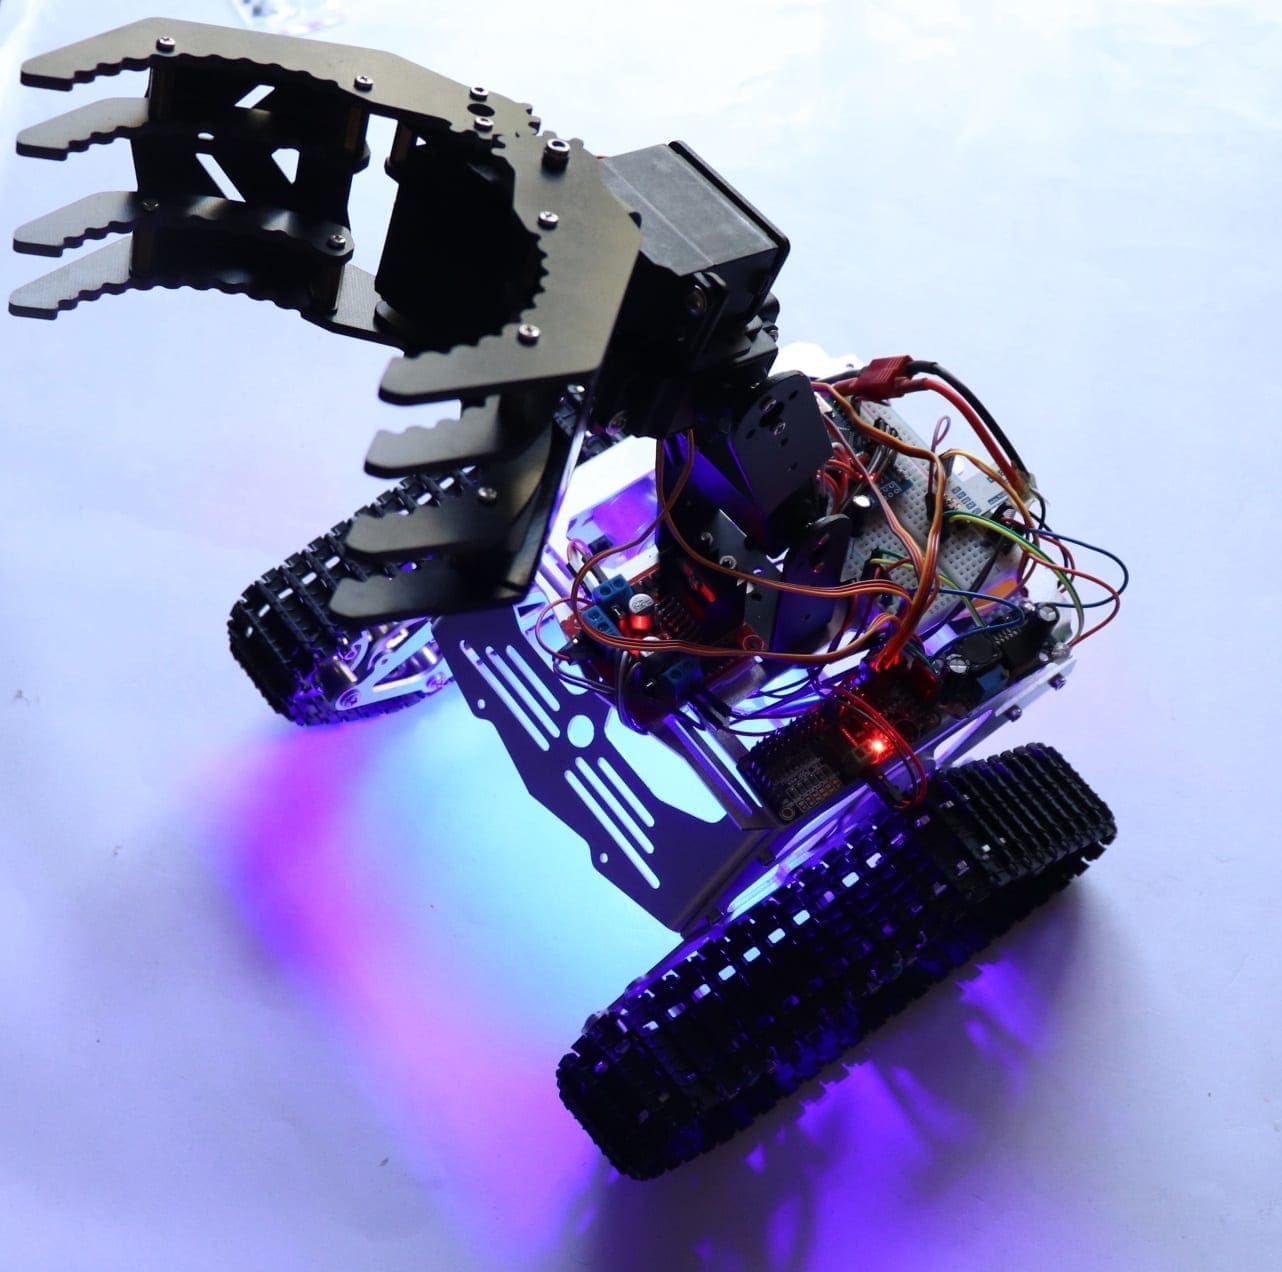
Meet the Spinel Crux L2 – The Pick and Place Robot
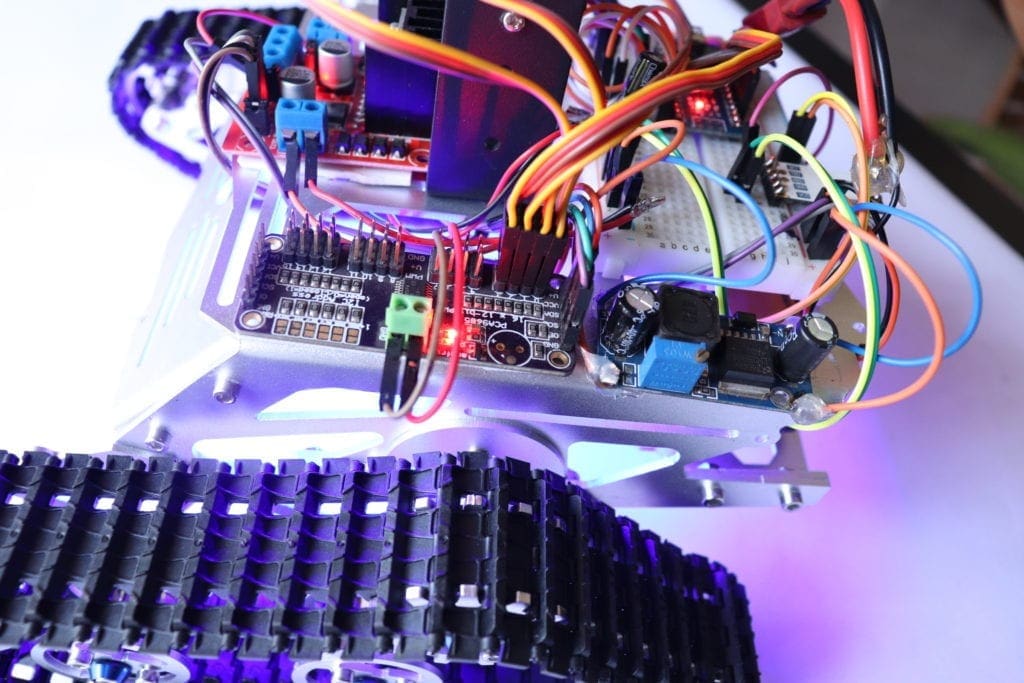
Spinel Crux L2 is an advanced version of Spinel Crux V1. We have added a robotic arm on top of the previously built remote control gesture controlled robot which will enable the bot to pick and place objects around it. https://youtu.be/qrCHwLQsPjU This one is also remotely controlled and can be controlled without nasty wires hanging around.
The Robotic Arm
I got the robotic arm kit from banggood.com. This robotic arm is made of good quality aluminum and is really light weight. This one have so many mounting points which will allow us to connect to any robot bodies/chassis without drilling mounting holes.


Robot Chassi – DIY Smart Robot Kit
The chassis I used for making this pick and place robot is something I would like to talk about. I got this kit banggood.com. Not only this one, they have so many types of robot frames, motors and almost all the sensors for doing Arduino, raspberry pi and other electronics and hobby projects. You will get all these things for a cheap price with really fast and quality shipping.
And the great thing about this kit is they provide all the tools you need to assemble the frame together.
Get your DIY Robot Kit From BangGood

How to make pick and place DIY Robot?
Really like this awesome looking robot?
We will now head over to the robotics tutorial section and will start building it. For your convenience, I will be dividing this post into two parts. In the first part, I will show you how to make the controlling glove and in the second part, I will show you how to build this DIY robot. [AdSense-A]
Click the Subscribe YouTube button below for Demo and Complete Tutorial
In this video series, we will explain everything about this pick and place remote control robot, controlling it with the hand gesture using the gesture sensor control glove and will show you how to make a robot yourself.
We will provide you with the design, code of the pick and place robot and links to all the products used in this project including this cool robot kit.
Links to the robot building kit are also available in our project tutorial pages so that you can buy any robot building kit you want and build your own DIY robot as per your needs.
Getting Started with Robotics?
Want to learn Robotics from Scratch? Here is an awesome guide for you to get started with robotics (Free Video Tutorials Included).Robotics for Beginners | How to Make a Robot for Kids?
Get Your Components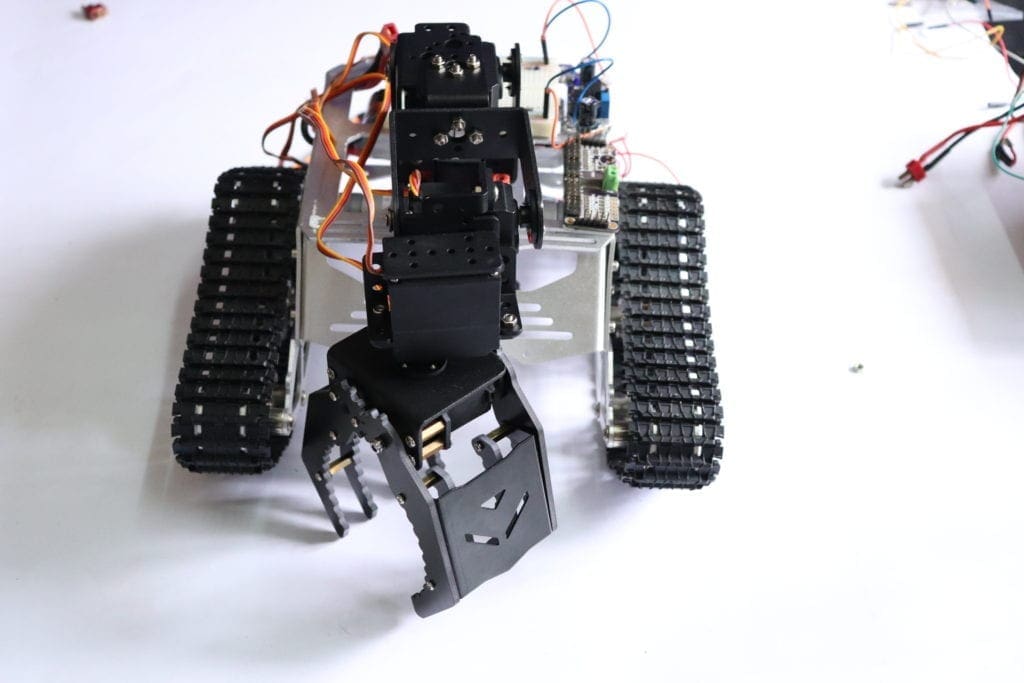

To build one yourself, you will have to get a robotic arm, robot chassis and some sensors. Click on this link and get everything you need for this project project.
Check out the Pick and Place Robot Tutorial down below
Subscribe RootSaid Website by simply entering your Email ID below. You will receive notification whenever the tutorial is available for you to tinker with.
[mc4wp_form id=”1842″]
Rate the Project
Did you find this useful? Help us to improve by rating this page.
[RICH_REVIEWS_FORM]
[RICH_REVIEWS_SNIPPET stars_only=”true”]