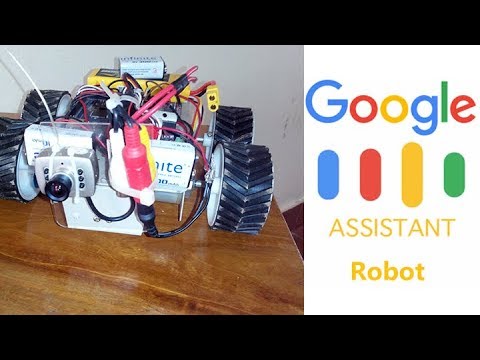
Google Assistant Robot using Arduino
In the last post, I showed you how to build Google assistant in Raspberry Pi and integrate Google Assistant to IFTTT. In this tutorial, I will show you how to build a robot that can be controlled using Google Assistant. You don’t have to worry if you don’t have Google Assistant installed in your Raspberry Pi. Here I will also show you how you can control it using Google Assistant on your mobile phone. So let us get started.

Sponsor Link
This Project is Sponsored by UTSource. UTSource is a professional electronic components supplier.
Mission
Our Mission is to build a robot that can be controlled using Google Assistant. We tell Google Assistant to move our robot to a particular direction, Google assistant convert it into text and pass it on to IFFFT. Depending on the command, IFTTT will make different HTTP requests to our robot which is controlled using Arduino connected to our home WiFi network. These requests are received by our Arduino and the Arduino drive the motors of our robot using an L293D driver.
Video Demo
Components Needed
- Google Assistant (Raspberry Pi or Android)
- Arduino with WiFi Connectivity (I am using Arduino MKR 1000)
- L293D Motor Driver
- DC Motors
- 12 V LIPO Battery
Google Assistant
Google has made artificial intelligence a huge part of  what they’re trying to accomplish in the world of mainstream technology. Earlier, we had google pixel, which is pretty much the only device that had access to their new Google assistant unless you had a modified device. Google home was also recently released which looks to make the virtual assistant even bigger part of your daily life and to keep you constantly connected with the search giants. But with google assistant, it’s pretty much the main selling point of the pixel. It also looks as if moving forward the google assistant will take over for google now and now on the tab.
Now google assistant is available in almost all new Android devices. So what exactly it can do differently than current google voice search commands and google now already do and is it even useful in everyday life?
So we already know that Google Assistant can show you pictures of cats, can tell you tall someone is, what two times two is, what is the weather it’s like over in Arizona and where the nearest ATM is located. I am pretty much normal everyday smartphone users so something like google assistant should be just what I need right? What I use the system for is pretty simple. FUN!!
IFTTT
IFTTT – IF This Then That, is a conditional statement which is used commonly a lot in programming is one of the core fundamentals of coding. To keep the things very simple, it simply means, If this happens, then do that. Let me give you a non-tech savvy explanation. before going to technical.
- If it rains, then you should open the umbrella.
- If you receive a call from unknown number, you shouldn’t answer the call
- If lights go off, you should light a candle.
If you do a certain action, it performs a certain outcome. So how do you use it in programming side? As you all are familiar with Arduino, you might have seen it at least once right?
if(currentLine.endsWith("GET /device1on"))
 {
 digitalWrite(0, HIGH);
 }
In the above piece of code, we have used if condition; If request ends with “GET /device1on” (this). then “turn the output of digital pin 0 to HIGH”(that), simple as that.

Is that it? Absolutely not!!
The IFTTT we are using here is a user-friendly platform, which can be used to connect a whole bunch of services and apps in one place, which enables you to perform various tasks and automate works in a smart way.
Check out the below examples.
- If it is sunny outside, then send a message to your mobile phone.
- If you receive a message from your home, then send that message to me as mail.
There are just two of thousands of possibilities you can do with IFTTT. So what are we going to do with this? We are setting up our IFTTT account to receive voice commands from Google Assistant, pass it through IF This Then That condition and send a web request to our Arduino to drive your robot.
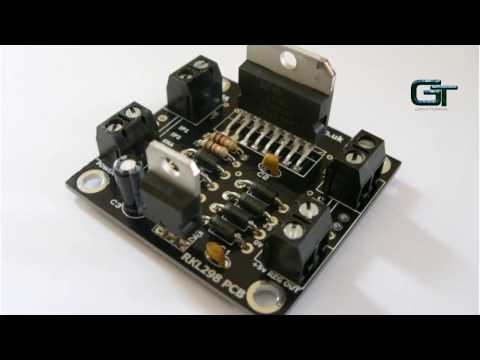
H Bridge and L293D Motor Driver
An H-bridge can be any switching circuit (BJT, MOSFET or MESFET) which enables a potential difference to be applied across a load with our making physical or hardware changes. H Bridge circuits are widely used in the field of robotics to swtich the direction of DC motor rotation.
Click Here to Learn the working of an H Bridge Motor Driver

L293D is a small and compact H Bridge circuit available in the form of an IC. One advantage of using this IC is, you can control two DC motors simultaneously using a single chip. In this project, we will be using this IC to drive the motors in our robot.
Now let us start building your Google Assistant Robot
For your convenience, ease of understanding and troubleshooting, I will be dividing this whole projects into three parts.
Part 1 – Setting up of Google Assistant
- Method 1 – Using Raspberry Pi (or)
- Method 2 – Using Mobile Phone
Part 2 – The Robot (Using Arduino)
Part 3 – IFTTT
Get Started
Part 1 – Setting up of Google Assistant
First thing for us to do is setting up Google Assistant. So let’s get started with Part 1
Method 1 – Using Raspberry Pi
In my previous post, I explained how you can install and set up Google Assistant in your Raspberry Pi using MATRIX Voice. Click on the link below set one up yourself.
Set Up Google Assistant in Your Raspberry Pi using MATRIX Voice/Creator
Finished? By now you will be having a functional Google Assistant in your Raspberry Pi.
Try asking the simple questions –
- Hey Google, Whats the time now?
- Hey Google, How is the weather outside?
If you have successfully completed this, you can now go to Step 2.
Method 2 – Google Assistant Using Mobile Phone
For Google Assistant to work on your phone, your phone should have at least
- Android OS ver 5 or above
- Google App ver 6.13 or above
- Google Play services
Follow the below steps to start Google Assistant.
Take your phone, and open Google App. Install it if you don’t have it already installed.
On the bottom of the screen, you will Settings button – the one with 3 lines. Hit it.
Click on “Settings” from the list.
And turn on Google Assistant
Now ask Google simple questions like –
- Hey Google, Whats the time now?
- Hey Google, How is the weather outside?
Now go to Step 2.
Step 2 – The Robot
Here we are going to build a 4 wheeled robot, with DC Motors connected on each side. We will be using Arduino MKR 1000 board (as it have inbuilt WiFi connectivity) to connect to our home WiFi network and an L293D motor driver IC to drive the DC motor.
The Connections
As you can see in the below pinout diagram, L293D IC has two pins for inputting voltage. One of them is for powering the internal circuit of the IC and the other for driving the motor.
 Pin 8 – Driving the Motors – 6 V to 31 V
Pin 16 – Working of the IC– 5V
If you happen to reverse this connection accidentally, you may burn off the chip.
One side of this IC Controls the one motor and the other controls the second motor. For the motor to work, the Enable pin of that side should be High.
This pin can be used to control the speed of the motor using PWM (Pulse Width Modulation).
I have attached the pinout of MKR 1000 board to connect L293D of your Google Assistant Robot. You can use any 4 GPIO pins and connect it to L293D. In the code, I am using Pin 33 and 11 for enable pins, 13 and 15 for Motor 1 and 29 and 31 for motor 2.
Motor 1
In 1 – GPIO 10
In 2 – GPIO 11
Motor 2
In 3 – GPIO 12
In 4 – GPIO 13
The Code
Upload the below code to your Google Assistant Robot.
Download the Code
Code Explained
Here I will various parts of the code
char ssid[] = "www.rootsaid.com";//Your WiFi Name
char pass[] = "RootSaid";//Your WiFi Password
Here you enter your WiFi ESSID as well as your Password. Once the code is uploaded, the board will try to connect to the WiFi network with this ESSID and Passphrase if it is available.
pinMode(10, OUTPUT);
pinMode(11, OUTPUT);
pinMode(12, OUTPUT);
pinMode(13, OUTPUT);
The 4 pins we will connecting to the L293D input.
while ( status != WL_CONNECTED) {
 digitalWrite(ledpin, LOW);
 Serial.print("Attempting to connect to Network named: ");
 Serial.println(ssid);
 digitalWrite(ledpin, HIGH);
 status = WiFi.begin(ssid, pass);
 delay(10000);
 }
This will try to connect to the WiFi network using the credentials provided earlier.
 server.begin();
 printWifiStatus();
 digitalWrite(ledpin, HIGH);
This will start a server in port 80 and serves the webpage
Once the code is uploaded, an HTTP server will be started and listens through port 80 for incoming connections.
Testing
To check that, you can start Serial Monitor and it will show you the current IP. Start a browser and enter the IP address in the URL. Arduino will serve a webpage with control buttons. You will be able to control the robot using those control buttons.
Step 3 – IFTTT
Now it is time to set up IFTTT
Follow the below tutorial to set up an IFTTT account
Once you create an account, you can start building your first applet.
Click on new Applet
In the search box, enter Google Assistant, select say a simple phrase. And enter the details as shown below.

Click on Create Trigger. Now we can create an action. In this case, the action is to send a web request to our webpage which is being served by the Arduino. We will be sending the request to our Public IP (request reaches our router) and we redirect that request to our Arduino using Port Forwarding mechanism in the WiFi router.
For sending the request, click on that, search for webhooks, select Make a Web Request and enter the details as shown in the below screenshot.
Remember, you should use your public IP Address. and Click on create action.
In the end, you will end up with something like this

Now click on Finish.
Now you will have to repeat these steps for all the actions like Forward, Left, Right, Stop and Backward.

Now all you have to do is Port Forwarding.
You have to add a rule in your router to forward port 80 to your Arduino’s internal IP. This might be different for different routers.
That it guys.. you are all set up and good to go… Power up your Arduino and start controlling your robot using your own Google Assistant..
Rate the Project
Did you find this page useful? Help us to improve by rating this page.
Google Assistant Robot using Arduino Overall rating: 4.4 out of 5 based on 42 reviews.


how to send the web requests while creating the applet.send me the photos or the screenshots
In #THE CONNECTION section i didn’t get the connections. If you can provide a circuit diagram it would be very helpful.
The Ifttt part make a web request can you send me the full solution. I m trouble with it
can i get a screen shot of web hook setup and circuit for the connections ? thank you
Hi,
This project is really good but i want know if i want to sense the temperature value using robot through google assistance and IFTTT what i have to do.
Example :- If i ask google assistance about temperature, google assistance should tell the temperature.
Kindly help me out as soon as possible