Build a 100% Offline AI Voice Assistant on Raspberry Pi with Ollama + Gemma (2026)
Complete guide to building a fully offline voice assistant on Raspberry Pi 4/5. Uses Ollama + Gemma for AI, Whisper for speech-to-text, Piper TTS for voice output. Full Python code included. No cloud, no API keys — 100% private.
Fully Functioning Local AI Assistant on Raspberry Pi with Ollama + Gemma
This article is part of the RootSaid Raspberry Pi AI series. For the previous article on setting up Ollama and running Gemma on Raspberry Pi, start there first.
In this guide, we will build a fully local, offline AI voice assistant running entirely on a Raspberry Pi 4 or 5 — using Ollama to run a local LLM (Google Gemma), Whisper for speech-to-text, and Piper TTS for voice output. No cloud. No API keys. No subscription. Once the initial setup is done, this works completely without an internet connection.
The local LLM runs entirely on the Pi’s CPU using Ollama. Ollama is the same tool you may have seen used on desktop machines to run models like Gemma, Llama, and Phi locally — and yes, it runs on Raspberry Pi too. Everything stays on your device. Your voice, your questions, your data — none of it ever leaves your network. This is the offline AI assistant that actually respects your privacy.
Here is the complete pipeline:
Your Voice → USB Mic → Whisper (speech-to-text) → Gemma via Ollama (local LLM / AI brain) → Piper TTS (text-to-speech) → SpeakerAll three components run locally on the Pi. Nothing leaves your network.
Video Tutorial
Prefer to follow along with a video? We have a full step-by-step video tutorial covering everything in this article — from setting up Ollama and downloading Gemma, to wiring up the microphone and speaker, to running the complete voice assistant live on a Raspberry Pi 4.
Part 1 — How to Run Google Gemma Locally on Raspberry Pi 4

Covers installing Ollama, downloading Gemma, testing it in the terminal, and setting up the web chat console.
Part 2 — How to Build a 100% Local Voice Assistant on Raspberry Pi 4
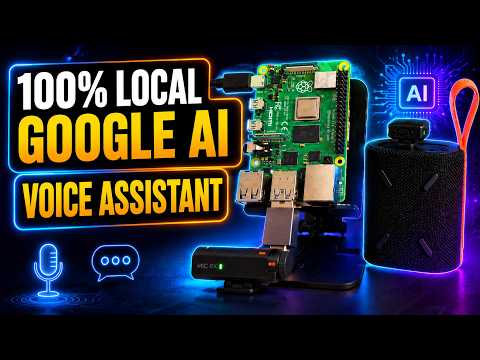
Covers setting up the microphone and speaker, installing Whisper and Piper TTS, writing the voice assistant script, and a full live demo.
What You Need to Build an AI Assistant?
Hardware:
- Raspberry Pi 4 or 5 (2GB RAM minimum, 4GB or 8GB recommended)
- MicroSD card (32GB or larger, Class 10)
- USB microphone (any basic USB mic works)
- Speaker with 3.5mm jack or USB speaker
- Power supply for Pi
Software:
- Raspberry Pi OS Bookworm (64-bit) — latest version
- Internet connection for initial setup only
How It All Connects
┌─────────────┐     WAV file      ┌──────────────────┐
│ USB Mic     │ ──────────────→   │ Whisper (tiny)   │  Speech → Text
└─────────────┘                   └────────┬─────────┘
                                           │ text
                                           ▼
                                  ┌──────────────────┐
                                  │ Gemma via Ollama │  AI Thinking
                                  └────────┬─────────┘
                                           │ text response
                                           ▼
┌─────────────┐     WAV file      ┌──────────────────┐
│ Speaker     │ ←──────────────   │ Piper TTS        │  Text → Speech
└─────────────┘                   └──────────────────┘
Everything runs locally on your Raspberry Pi. No data ever leaves your device.
Step 1: Prepare Your Raspberry Pi
Make sure your Pi is running Raspberry Pi OS Bookworm 64-bit. Check your OS version:
cat /etc/os-release
Update the system before starting:
sudo apt update && sudo apt upgrade -y
Step 2: Install Ollama
Ollama is the tool that lets us run large language models locally on the Pi. Install it with a single command:
curl -fsSL https://ollama.com/install.sh | sh
Verify the installation:
ollama -v
Fix for Slow or Unstable Downloads
If you are on a slow connection, Ollama’s default parallel downloader can stall. Fix this by limiting it to a single stream:
sudo mkdir -p /etc/systemd/system/ollama.service.d/
sudo nano /etc/systemd/system/ollama.service.d/override.conf
Add the following:
[Service]
Environment="OLLAMA_HOST=0.0.0.0:11434"
Environment="OLLAMA_ORIGINS=*"
Environment="OLLAMA_DOWNLOAD_PARTS=1"
Environment="OLLAMA_EXPERIMENT=client2"
Environment="OLLAMA_REGISTRY_MAXSTREAMS=1"
Apply the changes:
sudo systemctl daemon-reload
sudo systemctl restart ollama
Note:
OLLAMA_HOST=0.0.0.0:11434makes Ollama accessible from your local network, which is needed if you want to use the web console later.OLLAMA_ORIGINS=*enables browser access.
Step 3: Download Google Gemma
For a Pi 4 with 2GB RAM, use the 1 billion parameter model:
ollama pull gemma3:1b
If you have 4GB or 8GB RAM, you can use the more capable model:
ollama pull gemma3:4b # For 4GB+ RAM
Verify the model downloaded correctly:
ollama list
Test that it works:
ollama run gemma3:1b "Say hello in one sentence"
Comparing AI Models for Raspberry Pi: Gemma vs Llama vs Phi
Once you have Ollama running, you are not locked into Gemma. Ollama supports a whole range of models and some of them are actually better suited to the Pi depending on what you need. Here is a practical comparison of the models worth trying on a Raspberry Pi 4 or 5.
| Model | RAM Required | Inference Speed (Pi 4) | Response Quality | Best For |
|---|---|---|---|---|
| gemma3:1b | ~1.4 GB | 3–5 tokens/sec | Good for basic Q&A | 2GB Pi 4, speed priority |
| gemma3:4b | ~3.2 GB | 1.5–2.5 tokens/sec | Strong general purpose | 4GB/8GB Pi |
| llama3.2:1b | ~1.3 GB | 4–5 tokens/sec | Similar to Gemma 1B | 2GB Pi 4, fastest option |
| llama3.2:3b | ~2.8 GB | 2–3 tokens/sec | Good reasoning | 4GB Pi 4 |
| phi3.5:mini | ~2.4 GB | 2–3 tokens/sec | Excellent for its size | 4GB Pi, quality focus |
| mistral:7b | ~5.5 GB | 0.5–1 token/sec | Best quality | 8GB Pi 5 only |
My recommendation by use case:
- Fastest responses, 2GB Pi 4: Use llama3.2:1b — it is marginally faster than gemma3:1b and similarly capable.
- Best balance of quality and speed, 4GB Pi: Use gemma3:4b or phi3.5:mini. Phi is surprisingly good for its size.
- Best possible quality, Pi 5 with 8GB: Try mistral:7b — but be prepared for 30+ second response times. Not great for voice, but fine for text-only use.
- Voice assistant specifically: Stick with gemma3:1b or llama3.2:1b. The faster response time matters more than raw quality when you are waiting for spoken output.
To switch models in the voice assistant script, just change the OLLAMA_MODEL variable:
OLLAMA_MODEL = “llama3.2:1b” # or phi3.5:mini, gemma3:4b, etc.
Download any model with:
ollama pull llama3.2:1b
ollama pull phi3.5:mini
The rest of the code stays exactly the same — Ollama handles everything else.
Step 4: Set Up the USB Microphone
Plug in your USB microphone and verify the Pi detects it:
arecord -l
You should see your USB mic listed. Note the card number — for example:
card 2: USBMic [USB Microphone], device 0: USB Audio [USB Audio]
In this example the card number is 2 and the device is 0, so the hardware address is hw:2,0.
Test a 3-second recording:
arecord -D hw:2,0 -f S16_LE -r 48000 -c 2 -d 3 /tmp/mic_test.wav
aplay /tmp/mic_test.wav
You should hear your voice played back. If you get a “Sample format non available” error, try:
arecord -D hw:2,0 -f S24_3LE -r 48000 -c 2 -d 3 /tmp/mic_test.wav
Some USB microphones use S24_3LE format instead of S16_LE. Note which format works for your mic — you will need it later.
Step 5: Set Up the Speaker
Plug your speaker into the Pi’s 3.5mm audio jack or USB port.
Test audio output:
aplay /usr/share/sounds/alsa/Front_Left.wav
You should hear “Front Left” from your speaker. If you do not hear anything, check that your speaker is powered on and the volume is up.
List available playback devices:
aplay -l
Note the card number for your speaker output. The 3.5mm jack on Pi 4 is typically card 2: Headphones.
Step 6: Install Python Dependencies
Install all required packages:
pip install faster-whisper ollama piper-tts numpy --break-system-packages
sudo apt install python3-pyaudio espeak-ng -y
What each package does:
- faster-whisper — OpenAI’s Whisper speech recognition model optimised for CPU, converts your speech to text
- ollama — Python client for talking to the Ollama API running locally
- piper-tts — Fast, natural-sounding text-to-speech engine designed for edge devices like Raspberry Pi
- numpy — Required for audio data processing
Step 7: Download a Piper Voice Model
Piper TTS needs a voice model file. Download the high-quality Lessac voice:
mkdir -p ~/piper-voices
cd ~/piper-voices

wget https://huggingface.co/rhasspy/piper-voices/resolve/main/en/en_US/lessac/high/en_US-lessac-high.onnx
wget https://huggingface.co/rhasspy/piper-voices/resolve/main/en/en_US/lessac/high/en_US-lessac-high.onnx.json
Test the voice:
python3 -c "
import wave, numpy as np, os
from piper import PiperVoice
os.environ['ORT_LOGGING_LEVEL'] = '3'
voice = PiperVoice.load('/home/pi/piper-voices/en_US-lessac-high.onnx')
with wave.open('/tmp/voice_test.wav', 'wb') as wf:
    wf.setnchannels(1)
    wf.setsampwidth(2)
    wf.setframerate(22050)
    for chunk in voice.synthesize('Hello, I am your Raspberry Pi voice assistant.'):
        audio_int16 = (chunk.audio_float_array * 32767).astype(np.int16)
        wf.writeframes(audio_int16.tobytes())
"
aplay /tmp/voice_test.wav
You should hear a clear, natural-sounding voice.
Other available voices:
en_US-amy-medium— Female, medium quality, smaller fileen_US-ryan-high— Male, high qualityen_US-lessac-high— Female, high quality (recommended)Browse all voices at: https://huggingface.co/rhasspy/piper-voices
Step 8: How the System Works
Before writing the code, let us understand what happens at each step:
8.1 Speech to Text (Whisper)
When you press Enter and speak, arecord captures audio from your USB microphone and saves it as a WAV file. Faster-Whisper then loads this WAV file and runs it through OpenAI’s Whisper model locally on the Pi’s CPU. The model converts the audio into text — this is called automatic speech recognition (ASR).
We use the tiny Whisper model because it is small enough (around 75MB) to run on Pi without using too much RAM, while still being accurate enough for clear speech.
8.2 AI Processing (Gemma via Ollama)
The transcribed text is sent to Gemma running locally via Ollama’s REST API on port 11434. Gemma processes the question and generates a text response. We send a system prompt alongside every question telling Gemma to keep answers short and avoid markdown formatting — because the response will be spoken aloud, not displayed on screen.
8.3 Text to Speech (Piper)
The text response from Gemma is passed to Piper TTS. Piper uses a neural network model (the .onnx file we downloaded) to convert text into audio samples. We write those audio samples into a WAV file and play it back through aplay to your speaker.
Step 9: The Complete Voice Assistant Script
Create the script:
nano ~/voice_assistant.py
Paste the following complete code:
import os
import wave
import subprocess
import logging
import ctypes
import numpy as np
import ollama
from faster_whisper import WhisperModel
from piper import PiperVoice

# ─── Suppress noisy warnings ────────────────────────────────────────────────
os.environ['ORT_LOGGING_LEVEL'] = '3'
os.environ['TF_CPP_MIN_LOG_LEVEL'] = '3'
logging.getLogger('faster_whisper').setLevel(logging.ERROR)

# Suppress ALSA error messages
ERROR_HANDLER_FUNC = ctypes.CFUNCTYPE(
    None, ctypes.c_char_p, ctypes.c_int,
    ctypes.c_char_p, ctypes.c_int, ctypes.c_char_p
)
c_error_handler = ERROR_HANDLER_FUNC(lambda *args: None)
asound = ctypes.CDLL('libasound.so.2')
asound.snd_lib_error_set_handler(c_error_handler)

# ─── Configuration ───────────────────────────────────────────────────────────
MIC_CARD      = "hw:2,0"          # Change to match your mic (arecord -l)
MIC_FORMAT    = "S16_LE"          # Use S24_3LE if S16_LE gives an error
MIC_RATE      = "48000"
MIC_CHANNELS  = "2"
RECORD_SECS   = 5                 # Seconds to record per question
WAVE_INPUT    = "/tmp/input.wav"
WAVE_OUTPUT   = "/tmp/output.wav"
OLLAMA_MODEL  = "gemma3:1b"       # Change to gemma3:4b if you have 4GB+ RAM
PIPER_MODEL   = "/home/pi/piper-voices/en_US-lessac-high.onnx"

# ─── Load models at startup (once) ──────────────────────────────────────────
print("⏳ Loading speech recognition model...")
whisper_model = WhisperModel("tiny", device="cpu", compute_type="int8")
print("✅ Speech recognition ready!")

print("⏳ Loading text-to-speech model...")
piper_voice = PiperVoice.load(PIPER_MODEL)
print("✅ Text-to-speech ready!")

# ─── Step 1: Record audio from microphone ───────────────────────────────────
def record_audio():
    print("🎤 Listening... speak now")
    if os.path.exists(WAVE_INPUT):
        os.remove(WAVE_INPUT)
    subprocess.run([
        "arecord",
        "-D", MIC_CARD,
        "-f", MIC_FORMAT,
        "-r", MIC_RATE,
        "-c", MIC_CHANNELS,
        "-d", str(RECORD_SECS),
        WAVE_INPUT
    ], stderr=subprocess.DEVNULL, stdout=subprocess.DEVNULL)
    print("✅ Recording done")

# ─── Step 2: Convert speech to text ─────────────────────────────────────────
def transcribe():
    print("🧠 Transcribing...")
    segments, _ = whisper_model.transcribe(WAVE_INPUT, language="en")
    text = " ".join([s.text for s in segments]).strip()
    print(f"📝 You said: {text}")
    return text

# ─── Step 3: Get response from Gemma ────────────────────────────────────────
def ask_gemma(prompt):
    print("🤖 Thinking...")
    response = ollama.chat(
        model=OLLAMA_MODEL,
        messages=[
            {
                "role": "system",
                "content": (
                    "You are a helpful voice assistant running on a Raspberry Pi. "
                    "Give short, clear answers suitable for speaking aloud. "
                    "No markdown, no bullet points, no special characters or emojis."
                )
            },
            {
                "role": "user",
                "content": prompt
            }
        ]
    )
    answer = response["message"]["content"]
    # Clean any remaining markdown symbols
    for char in ['*', '#', '`', '_', '-']:
        answer = answer.replace(char, '')
    answer = answer.strip()
    print(f"💬 Gemma: {answer}")
    return answer

# ─── Step 4: Convert text to speech and play ────────────────────────────────
def speak(text):
    print("🔊 Speaking...")
    with wave.open(WAVE_OUTPUT, 'wb') as wf:
        wf.setnchannels(1)
        wf.setsampwidth(2)
        wf.setframerate(22050)
        for chunk in piper_voice.synthesize(text):
            audio_int16 = (chunk.audio_float_array * 32767).astype(np.int16)
            wf.writeframes(audio_int16.tobytes())
    subprocess.run(
        ['aplay', WAVE_OUTPUT],
        stdout=subprocess.DEVNULL,
        stderr=subprocess.DEVNULL
    )

# ─── Main loop ───────────────────────────────────────────────────────────────
if __name__ == "__main__":
    print("\n=== RootSaid Local AI Voice Assistant ===")
    print(f"Model : {OLLAMA_MODEL}")
    print(f"Voice : Piper Lessac High")
    print(f"Mic   : {MIC_CARD}")
    print("==========================================\n")

    while True:
        input("Press Enter to speak (Ctrl+C to quit)...")
        record_audio()
        question = transcribe()
        if question:
            answer = ask_gemma(question)
            speak(answer)
        else:
            print("⚠ Nothing detected, try again")
        print()
Important: Update the
MIC_CARDvalue to match your microphone’s hardware address fromarecord -l. Also update thePIPER_MODELpath if your username is notpi.
Step 10: Run the Voice Assistant
python3 ~/voice_assistant.py 2>/dev/null
The 2>/dev/null silences any remaining ALSA or system warnings so your terminal output stays clean.
You should see:
⏳ Loading speech recognition model...
✅ Speech recognition ready!
⏳ Loading text-to-speech model...
✅ Text-to-speech ready!

=== RootSaid Local AI Voice Assistant ===
Model : gemma3:1b
Voice : Piper Lessac High
Mic   : hw:2,0
==========================================

Press Enter to speak (Ctrl+C to quit)...
Press Enter, speak your question clearly, wait a few seconds and the Pi will respond!
Step 11: Performance Expectations
Real numbers matter here, so let me share what to actually expect when running Gemma on a Raspberry Pi. These are measured from a Pi 4 running Raspberry Pi OS Bookworm 64-bit with no desktop environment active, just the terminal.
| Metric | Pi 4 — 2GB RAM (gemma3:1b) | Pi 4 — 4GB RAM (gemma3:4b) | Pi 5 — 8GB RAM (gemma3:4b) |
|---|---|---|---|
| Whisper tiny — transcription time | 3–5 seconds | 3–5 seconds | 2–3 seconds |
| Gemma inference speed | 3–5 tokens/sec | 1.5–2.5 tokens/sec | 3–4 tokens/sec |
| Typical short answer (20 tokens) | ~6 seconds | ~10–15 seconds | ~6–8 seconds |
| RAM used by Ollama + Gemma | ~1.4 GB | ~3.2 GB | ~3.2 GB |
| RAM used by Whisper tiny | ~400 MB | ~400 MB | ~400 MB |
| Total RAM during active query | ~1.8 GB | ~3.6 GB | ~3.6 GB |
| Piper TTS synthesis time | ~1 second | ~1 second | under 1 second |
| Total response latency (end to end) | 12–18 seconds | 18–25 seconds | 10–15 seconds |
What these numbers mean in practice:
On a 2GB Pi 4 with gemma3:1b, you ask a question and get a spoken answer in roughly 15 seconds. It is not instant, but it works reliably and the answers are surprisingly decent for a 1 billion parameter model. This setup is the sweet spot if you want it to actually run without running out of memory.
On a 4GB Pi 4 with gemma3:4b, the answers are noticeably better quality — more coherent, more accurate — but you are waiting 20+ seconds per response. If your use case tolerates that (like a voice-controlled home automation assistant that runs in the background), it is worth the upgrade.
On a Pi 5 with 8GB RAM, using gemma3:4b becomes much more comfortable. The extra CPU performance of the Pi 5 pushes inference speed up significantly, and the full 8GB means you are not hitting swap at all.
A note on swap: If you are on a 2GB Pi running gemma3:1b and the system feels sluggish or crashes, add swap space. It will not make inference faster, but it prevents out-of-memory crashes when all three components (Whisper + Gemma + Piper) are loaded simultaneously.
Step 12: Autostart on Boot (Optional)
To start the voice assistant automatically when the Pi boots:
sudo nano /etc/systemd/system/voice-assistant.service
Add:
[Unit]
Description=RootSaid Voice Assistant
After=network.target ollama.service

[Service]
User=pi
WorkingDirectory=/home/pi
ExecStart=/usr/bin/python3 /home/pi/voice_assistant.py
Restart=on-failure
StandardOutput=journal
StandardError=null

[Install]
WantedBy=multi-user.target
Enable and start:
sudo systemctl daemon-reload
sudo systemctl enable voice-assistant
sudo systemctl start voice-assistant
Troubleshooting
“Sample format non available” when recording: Change MIC_FORMAT = "S16_LE" to MIC_FORMAT = "S24_3LE" in the script.
“No such file or directory” for input WAV: Your mic card number may be different. Run arecord -l and update MIC_CARD in the script.
No sound from speaker: Run aplay -l to list playback devices. Test with aplay /usr/share/sounds/alsa/Front_Left.wav.
Whisper transcribes nothing or wrong text: Speak clearly and close to the microphone. Increase RECORD_SECS to give yourself more time.
Ollama not responding: Check it is running with sudo systemctl status ollama. Restart with sudo systemctl restart ollama.
Out of memory / very slow: Use gemma3:1b instead of larger models. Add swap space:
sudo fallocate -l 4G /swapfile
sudo chmod 600 /swapfile
sudo mkswap /swapfile
sudo swapon /swapfile
Common Ollama and Voice Assistant Errors
The Troubleshooting section above covers the quick fixes. This section goes deeper into the errors people actually hit when setting this up — including the causes, not just the solutions.
Q: Ollama gives “connection refused” on port 11434
Error you see: httpx.ConnectError: All connection attempts failed or ollama: connection refused
Cause: Ollama service is not running, or it started but crashed due to RAM pressure.
Fix:
1. Check if the service is running: sudo systemctl status ollama
2. If it shows “failed” or “inactive”, restart it: sudo systemctl restart ollama
3. If it keeps crashing, check the logs: sudo journalctl -u ollama -n 50
4. Most common cause of repeated crashes is RAM — make sure you are using gemma3:1b on a 2GB Pi, not a larger model.
5. Also confirm your override.conf file is correct (from Step 2) and that you ran sudo systemctl daemon-reload after creating it.
Q: Model fails to load — “model requires more system memory”
Error you see: Error: model requires more system memory than is available
Cause: You are trying to load a model that is too large for your Pi’s available RAM.
Fix:
- On a 2GB Pi, only use gemma3:1b or llama3.2:1b. Do not attempt 4b models.
- Add swap space to give the system breathing room (this will not fix a severely undersized setup, but helps with edge cases):
sudo fallocate -l 4G /swapfile && sudo chmod 600 /swapfile && sudo mkswap /swapfile && sudo swapon /swapfile - Run ollama list to see what models are downloaded. Delete unused ones with ollama rm modelname to free disk space.
Q: Whisper gives “audio format error” or transcribes silence
Error you see: Error loading audio or transcription returns empty string
Cause 1: Wrong audio format. Some USB microphones record in S24_3LE, not S16_LE.
Fix for Cause 1: In your voice_assistant.py, change:
MIC_FORMAT = “S16_LE”
to:
MIC_FORMAT = “S24_3LE”
Cause 2: Wrong card number in MIC_CARD. If the WAV file is being recorded from the wrong device, Whisper gets silence or noise.
Fix for Cause 2: Run arecord -l, find your USB mic in the list, and update MIC_CARD = “hw:X,0” with the correct card number.
Cause 3: The WAV file was recorded but is too short or corrupted. Check it manually: aplay /tmp/input.wav — if you do not hear your voice, the problem is at the recording stage, not Whisper.
Q: Piper voice model fails to download from Hugging Face
Error you see: HTTP Error 403 or connection timeout when running wget for the .onnx file
Cause: Hugging Face occasionally rate-limits or requires login for some model files. Also happens if your Pi’s internet is slow and the download times out.
Fix:
1. Try the download again — transient 403s on Hugging Face often resolve on retry.
2. If you are consistently blocked, download the model files on your laptop and copy them to the Pi via SCP: scp en_US-lessac-high.onnx pi@raspberrypi.local:/home/pi/piper-voices/
3. Make sure you download both files — the .onnx model AND the .onnx.json config file. Piper will fail silently if the JSON is missing.
Q: ALSA errors flood the terminal even with 2>/dev/null
Error you see: ALSA lib pcm.c:8526:(snd_pcm_recover) underrun occurred — appearing repeatedly
Cause: The ALSA error suppression in the script uses ctypes to silence the library-level errors, but some errors come from subprocess calls (arecord/aplay) and are printed to stderr before the Python handler kicks in.
Fix: The script already redirects stderr to /dev/null for subprocess calls. If you are still seeing ALSA errors, run the entire script with stderr redirected:
python3 ~/voice_assistant.py 2>/dev/null
This is already shown in Step 10 of the guide. If errors appear in the model loading phase before that, they are cosmetic and do not affect functionality.
Q: The assistant responds but the speaker produces no sound
Error you see: Script runs to completion (“Speaking…” prints) but nothing comes out of the speaker
Cause: aplay is outputting to the wrong audio device, or the speaker volume is at zero in ALSA mixer.
Fix:
1. Run alsamixer in the terminal and make sure Master and PCM volumes are not at zero and not muted (press M to unmute).
2. Run aplay -l to list all playback devices and identify your speaker’s card number.
3. If your speaker is on a different card than the default, add -D hw:X,0 to the aplay command in the speak() function in your script.
4. Test directly: aplay /usr/share/sounds/alsa/Front_Left.wav — if this works, the issue is in the script. If this also fails, the issue is system-level ALSA configuration.
What’s Next?
Now that you have a working local AI assistant, here are ideas to extend it:
- Add a wake word using Porcupine or OpenWakeWord so you do not need to press Enter
- GPIO integration — control LEDs, relays, or motors with voice commands
- Add a camera with moondream vision model for object recognition
- Multilingual support — Whisper supports 99 languages, just change
language="en" - Build a custom enclosure with a 3D printer for a standalone desk assistant
Adding Wake Word Detection — Hands-Free “Hey Pi” Activation
Right now the voice assistant waits for you to press Enter before it listens. That works fine on a desk, but if you want a truly hands-free experience — like saying “Hey Pi” to activate it — you need wake word detection. Here is how to add it using OpenWakeWord, which is free and runs entirely offline on the Pi.
This replaces the press-Enter trigger with an always-on microphone listener that only activates the full pipeline when it hears your wake word.
Install OpenWakeWord
pip install openwakeword pyaudio --break-system-packagesOpenWakeWord includes a set of pre-trained wake word models. The one we will use is “hey jarvis” — you can swap it for “alexa”, “hey mycroft”, or train a custom one.
Updated Voice Assistant Script with Wake Word
Create a new script or update your existing one. Replace the main loop section (from if _name_ == “_main_”: onwards) with this:
import pyaudio
import numpy as np
from openwakeword.model import Model

# Load wake word model
oww_model = Model(wakeword_models=["hey_jarvis"], inference_framework="onnx")

CHUNK = 1280
FORMAT = pyaudio.paInt16
CHANNELS = 1
RATE = 16000

audio = pyaudio.PyAudio()

if __name__ == "__main__":
    print("\n=== RootSaid Local AI Voice Assistant (Wake Word Mode) ===")
    print(f"Model : {OLLAMA_MODEL}")
    print(f"Wake  : Say 'Hey Jarvis' to activate")
    print("==========================================================\n")

    stream = audio.open(
        format=FORMAT,
        channels=CHANNELS,
        rate=RATE,
        input=True,
        frames_per_buffer=CHUNK
    )

    while True:
        print("Listening for wake word...")

        audio_chunk = stream.read(CHUNK, exception_on_overflow=False)
        audio_data = np.frombuffer(audio_chunk, dtype=np.int16)

        prediction = oww_model.predict(audio_data)

        for mdl, score in oww_model.prediction_buffer.items():
            if score[-1] > 0.5:
                print("Wake word detected!")
                oww_model.reset()
                record_audio()
                question = transcribe()
                if question:
                    answer = ask_gemma(question)
                    speak(answer)
                else:
                    print("Nothing detected, listening again...")
The rest of the functions (record_audio, transcribe, ask_gemma, speak) stay exactly the same as in the original script.
Available Wake Words in OpenWakeWord
| Wake Word | Model Name | Notes |
|---|---|---|
| Hey Jarvis | hey_jarvis | Best performer, recommended |
| Alexa | alexa | Familiar trigger, works well |
| Hey Mycroft | hey_mycroft | Open source assistant style |
| Hey Rhasspy | hey_rhasspy | Home assistant community |
To use a different wake word, just change the wakeword_models parameter:
oww_model = Model(wakeword_models=["alexa"], inference_framework="onnx")If you prefer Porcupine: Picovoice Porcupine is more accurate but requires a free API key from picovoice.ai. OpenWakeWord requires no account and runs 100% offline, which fits the spirit of this project better.
Performance note: OpenWakeWord running in the background uses approximately 150–200MB of additional RAM on the Pi. On a 2GB Pi with gemma3:1b, this will push you close to the memory limit. If you hit OOM errors, increase your swap space as described in the Troubleshooting section, or switch to a Pi 4 with 4GB RAM for wake word mode.
This article is part of the RootSaid Raspberry Pi AI series. For the previous article on setting up Ollama and running Gemma on Raspberry Pi, visit: rootsaid.com/embedded-systems/gemini-ai-in-raspberry-pi