Program Arduino via USB to Serial RS232 Converter with and without DTR Pin
What make this Arduino popular among Electronics hobbyists and enthusiast? Of course they are compact with so many input and output pins, digital and analog input and output support, support for various serial communication protocol etc. but all this things are supported by various other microcontroller boards.
But, the real reason why Arduino is on top of all other microcontroller boards is its ease of use. They are tiny compact and it can be easily programmed using a normal PC via its USB port.
Almost all the Arduino boards like UNO, nano, MKR series can be programmed by connecting it to the USB port of a PC.
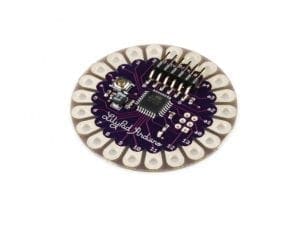
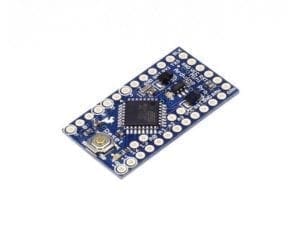
But there are some boards which cannot be program directly using USB due to the lack of USB port on the Arduino board. For example Arduino pro mini and lilypad. For boards like that, you will need a USB to Serial to upload code.

In this post I will explain everything you need to know about arduino programming, uploading and different logic levels that are involved in the program uploading.
Here I will show you how you can upload any code to any Arduino board using Arduino IDE and USB to Serial converter.
Let us start with the basics.
Arduino Behind the Scenes
“Arduino is a micro controller” this statement is technically incorrect. Arduino is a platform/board, which has a micro controller in it. Arduino boards uses a series of micro controllers that are made by a company called ATMEL. All the pins of micro controller IC are connected to the board which makes it easier for us to access the GPIO pins and program the IC.
How do you upload code to the arduino?
Of course you might be knowing how it works.
– Write the Code
– Choose the right Board and port
– Click on upload
Now let us dig deeper and see what is happening behind the scenes.
The code is written in type of C/C++ and when you click on the upload button, the code is compiled and converted to hex format. It is this hex file that is uploaded to the microcontroller IC.
USB to Serial Converter
In most of the boards, there is another chip, that acts as an intermediate between the PC and the main microcontroller IC. This chip is what lets you connect your USB cable to the Arduino board and helps the ATMEGA IC to communicate with the PC via USB.
This is the chip that helps you upload your program to the microcontroller. Once the code is uploaded, this chip will help the Arduino board to send messages back and forth between the Arduino and the PC.
Arduino Boards without built in USB circuitry
There are boards like Arduino Pro Mini and Lilypad that are really small and less costly that don’t have the IC that facilitates the communication between the Arduino Board and the USB. So in order to program we will have to use another external circuit that will stand in between the PC and the microcontroller and help us to communicate back and forth between them.
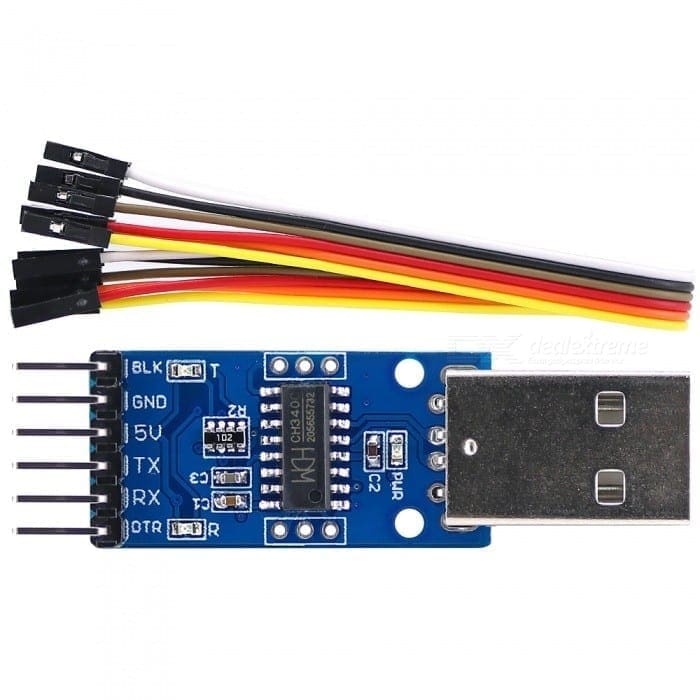
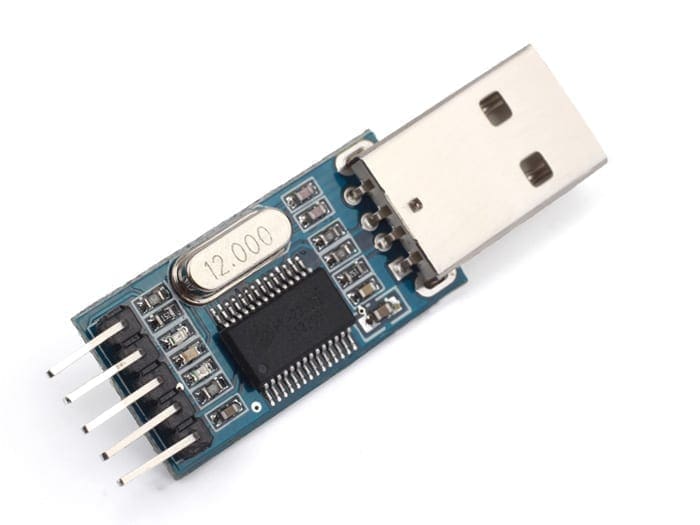
USB To RS232 PL2303 TTL Converter Adapter
This is a compact circuit that will help us to translate the communication between PC and the microcontroller IC. The USB to RS232 chipset based TTL provides you an easy and convenient way to connect your RS232 TTL Devices such as Arduino boards to your PC via the USB port.


Here, we will be using this adapter that will stand in between the PC and the microcontroller IC.
There are two variants of this available; the one with the DTR pin and one without DTR.


What is DTR Pin in Arduino?
Data Terminal Ready (DTR) is simply a control signal in RS232 serial communication, transmitted from data terminal equipment (DTE), like a PC, to data communications equipment (DCE), for example a modem, which will be used to indicate that the terminal is ready for communications and the modem can now initiate a communication channel.
AutoReset is a feature, which enables us to upload the compiled sketch to the Microcontroller without pressing the reset switch. The way it works is by sending a reset signal (GND) to the reset pin using the DTR signal on the RS-232 interface.
So if the USB To RS232 PL2303 TTL Converter Adapter does not have a DTR pin, we will have to manually reset the Arduino Board in order to upload the code. This will freeze the execution of the currently uploaded code and waits for the USB To RS232 PL2303 TTL Converter Adapter to send the new code.
Now we know what all things to keep in mind to program Arduino pro mini. Lets get started.
Tutorial
Step 1 – The Connections
As mentioned, there are two types of USB To RS232 PL2303 TTL Converter Adapter. The one with DTR and one without DTR pin.
Follow the connections as mentioned below
For the One With DTR
Arduino —- USB To RS232 PL2303 TTL
5V—-VCC
Gnd—-Gnd
Tx—-Rx
Rx—-Tx
DTR-DTR
Without DTR
5V—-VCC
Gnd—-Gnd
Tx—-Rx
Rx—-Tx
Thats it. Now its time to upload the code
Step 2 – Connect it to PC
Now you can connect the adapter to your PC.
Once the its is connected, you should be able to see the adapter in the Device Manager. Take a note of the COM port.
Fire up the Arduino and go to Tools -> Port
There you should see the COM port which is linked to the Adapter. Select that port.
Now Go to Tools -> Board and Select “Arduino Pro or Pro Mini”
Step 3 – The Code
Copy the below code to the Arduino IDE.
void setup()
{
pinMode(13, OUTPUT);
}
void loop() {
digitalWrite(13, HIGH);
delay(1000);
digitalWrite(13, LOW);
delay(1000);
}
This is a simple sketch which is used to blink the inbuilt LED once a second.
Step 4 – Code Upload
For the USB to Serial Adapter with DTR
Simply click on Upload button and the code will be compiled and uploaded to the Arduino Pro Mini without any interaction. The DTR will automatically reset the board for the upload.
For the USB to Serial Adapter without DTR
For the adapters without DTR the process is a bit different.
Once you click on the upload button, the code will be compiled and at that time the status bar on the bottom will be changed to “Compiling”. At that time, press and hold the reset button the Arduino Pro Mini. Once the code is compiled, the status will be changed to uploading. Now release the reset button and the code will be uploaded in no time. Easy as that!!
Once the upload is completed, the code will start to run. That is how we upload a code to an Arduino board especially Arduino Pro Mini with no USB port using a USB to Serial RS232 PL2303 TTL Adapter with or without a DTR pin.
Want to build more projects? Checkout Our Project Vault.