

Robotics for Beginners 2026: Step-by-Step Learning Roadmap & Your First Robot Project
Complete robotics guide for beginners. Learn Python & Arduino programming, electronics basics, and build your first robot with our step-by-step project tutorial. Includes component lists & costs.
Introduction to Robotics for Beginners
So you want to build robots. Honestly? That’s one of the best decisions you can make if you’re into tech. Robotics sits right at the intersection of programming, electronics, and mechanical design — and the cool part is, you don’t need an engineering degree to get started. You just need a plan.

This guide is your complete 2026 learning roadmap. If you follow the steps here, you can go from zero experience to having a fully working robot in 8 to 12 weeks. Not theoretical knowledge — an actual robot you built and programmed yourself.
Here’s exactly what you’ll learn in this guide:
- Programming fundamentals using Python and C++ — the two most important languages in robotics
- Electronics basics — how to read circuits, work with sensors, and understand components
- Arduino platform mastery — setting up your board, writing code, and uploading it to hardware
- Your first complete robot project — an obstacle-avoiding car with a full component list and working code
- A structured week-by-week roadmap so you always know what to learn next
Whether you’re a complete beginner or someone who dabbled a bit and got stuck, this guide covers everything in a logical order. Let’s get into it.
Robotics Learning Roadmap: From Zero to First Robot
One of the biggest reasons beginners give up on robotics is that they don’t know what to learn next. They watch a few YouTube videos, buy an Arduino, get confused, and quit. This roadmap fixes that. Follow it in order and you’ll have a working robot by week 8.
Week 1–2: Programming Basics (Python Fundamentals)
Start with Python. It’s beginner-friendly, widely used in robotics and AI, and you can start writing useful code in a matter of days. Focus on variables, loops, functions, and basic logic. You don’t need to become a Python expert — you just need enough to understand how to give instructions to a machine.
Week 3–4: Electronics Fundamentals
Learn how resistors, capacitors, and transistors work. Get comfortable reading a basic circuit diagram. Buy a cheap breadboard and starter components kit and start building simple LED circuits by hand. This hands-on practice is what makes the theory stick.
Week 5–6: Arduino Platform
Download the Arduino IDE, get an Arduino Uno board, and start uploading code to real hardware. Start with the classic LED blink sketch, then move on to reading sensor data. This is where programming and electronics come together for the first time.
Week 7–8: Your First Robot Project
Build an obstacle-avoiding car using an Arduino Uno, ultrasonic sensor, and motor driver. Full component list and code are included later in this guide. Budget around $60–75 total. This is your proof of concept — a real robot you made yourself.
Week 9 and Beyond: Advanced Projects
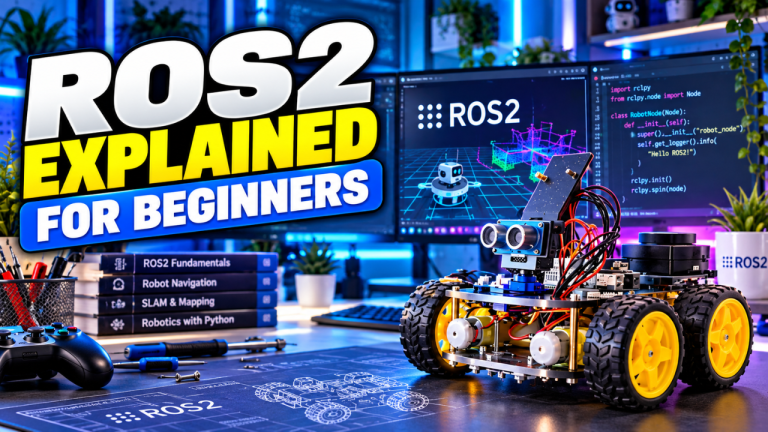
Once you’ve completed your first robot, the path opens up. Line-following robots, robotic arms, Bluetooth-controlled vehicles, and eventually ROS (Robot Operating System) for more complex builds. The skills stack on top of each other from here.
| Week | Focus Area | Goal |
|---|---|---|
| Week 1–2 | Python Programming | Write basic scripts, understand loops and functions |
| Week 3–4 | Electronics Basics | Build LED and resistor circuits on a breadboard |
| Week 5–6 | Arduino Platform | Upload code to hardware, read sensor data |
| Week 7–8 | First Robot Project | Complete obstacle-avoiding car build |
| Week 9+ | Advanced Projects | Line follower, robotic arm, Bluetooth control |
How to Get Started with Robotics?
Step 1 – Understand the Basics of Coding
Getting started with robotics might feel overwhelming at first, but here’s the truth — coding is the one skill that makes everything else click. Your robot is just hardware until you program it. The two languages you need to focus on as a beginner are Python and C++.
Is Programming Important for Robotics?
Absolutely yes. Programming is what gives your robot its brain. Without code, an Arduino is just a piece of plastic. With code, it can detect obstacles, follow a line, control motors, and respond to its environment in real time.
Python vs C++ for Robotics Beginners
Python is where most beginners should start. It reads almost like plain English, the syntax is forgiving, and you can build something useful within your first week. C++ is more powerful and runs faster — it’s the language you’ll use directly on Arduino and in performance-critical robotics applications. Most serious robotics engineers know both.
| Language | Ease of Learning | Main Use in Robotics | Recommended For |
|---|---|---|---|
| Python | Easy — beginner friendly | AI, ROS, data processing, scripting | Complete beginners, first 2–4 weeks |
| C++ | Moderate — more syntax rules | Arduino programming, real-time control | After Python basics, or Arduino projects |
Recommended Learning Path
1. Start with Python on Codecademy (free tier available) — their Python 2 and Python 3 courses are structured and beginner-friendly
2. Aim for 20–30 hours to reach basic Python proficiency — that’s roughly 2 weeks at 2 hours per day
3. Once comfortable with Python, move to C++ basics via learncpp.com — it’s free and well-structured
4. Allow another 15–20 hours to get comfortable with C++ syntax before jumping into Arduino code
Here’s a simple Python example that shows the concept of controlling something in a loop — the same logic you’ll use when programming robot behavior:
motor_speed = 150
obstacle_detected = False
while not obstacle_detected:
    print("Moving forward at speed:", motor_speed)
    if motor_speed == 0:
       obstacle_detected = True
       print("Obstacle detected — stopping motor")
This is just pseudocode-style logic for now, but once you get into Arduino, you’ll write nearly identical logic in C++ to actually drive motors.
Arduino Coding for Robotics
The Arduino board is hands-down the best starting point for robotics beginners. It’s affordable, has massive community support, and you can go from unboxing to blinking an LED in under an hour. But before you buy one, you need to know which board to get — because not all Arduinos are the same.
Which Arduino Board Should Beginners Buy?
| Board | Digital Pins | Flash Memory | Price (approx.) | Best For |
|---|---|---|---|---|
| Arduino Uno | 14 | 32KB | ~$25 (₹2,100) | First-time beginners, most tutorials use this |
| Arduino Nano | 14 | 32KB | ~$10 (₹840) | Space-constrained projects, smaller builds |
| Arduino Mega | 54 | 256KB | ~$40 (₹3,360) | Complex robots needing many pins and memory |
For your first robot, get the Arduino Uno. Every beginner tutorial — including the ones on this site — is written for the Uno. You can always upgrade later.
A complete Arduino starter kit (Uno board + breadboard + jumper wires + basic components) runs about $30–50 (₹2,500–4,200) on Amazon or AliExpress. That’s your starting investment.
Setting Up Arduino IDE
Download the Arduino IDE from arduino.cc — it’s free and available for Windows, macOS, and Linux. Once installed, connect your Arduino Uno via USB cable. Go to Tools > Board and select “Arduino Uno,” then go to Tools > Port and select the COM port your board is on. You’re ready to upload code.
For a full setup walkthrough, check out our Arduino IDE setup guide.
Your First Arduino Program — LED Blink
This is the “Hello World” of Arduino. Every beginner starts here.
void setup() {
pinMode(13, OUTPUT); // Set pin 13 as an output pin
}

void loop() {
digitalWrite(13, HIGH); // Turn LED on
delay(1000); // Wait 1 second
digitalWrite(13, LOW); // Turn LED off
delay(1000); // Wait 1 second
}
What this does: setup() runs once when the board powers on — it configures pin 13 as an output. loop() runs continuously — it turns the LED on, waits a second, turns it off, waits a second, and repeats forever. That’s the basic structure of every single Arduino program you’ll ever write.
First Motor Control Code (L298N Motor Driver)
Once you’re past the LED blink, motor control is your next milestone. Here’s a basic example using the L298N motor driver:
int motorPin1 = 8;   // IN1 on L298N
int motorPin2 = 9;   // IN2 on L298N
int enablePin = 10;  // ENA on L298N

void setup() {
  pinMode(motorPin1, OUTPUT);
  pinMode(motorPin2, OUTPUT);
  pinMode(enablePin, OUTPUT);

  analogWrite(enablePin, 200);  // Set motor speed (0–255)
}

void loop() {
  // Move forward
  digitalWrite(motorPin1, HIGH);
  digitalWrite(motorPin2, LOW);
  delay(2000);  // Run for 2 seconds

  // Stop
  digitalWrite(motorPin1, LOW);
  digitalWrite(motorPin2, LOW);
  delay(1000);
}
This tells one DC motor to spin forward for 2 seconds, stop for 1 second, and repeat. In your obstacle-avoiding robot (covered in Step 3), you’ll add sensor logic to make the stopping automatic instead of on a timer.
Step 2 – Understanding the Basics of Electronics
Electronics is the physical side of robotics — if coding is the brain, electronics is the nervous system. The good news is you don’t need to become an electrical engineer. You just need to understand enough to wire up sensors, motors, and microcontrollers without frying anything.
Start with the three most fundamental components: resistors (they limit current flow and protect components), capacitors (they store and release charge — useful for smoothing power supply), and transistors (they act as electronic switches or amplifiers — the basis of all digital logic). Once you understand what each one does and why, reading circuit diagrams becomes much less intimidating.
Beginner Electronics Shopping List
Here’s exactly what to buy to get started. You don’t need everything at once — the first four items are your immediate priority:
| Component | What It’s For | Approx. Cost |
|---|---|---|
| Resistor kit (assorted values) | Protecting LEDs, voltage dividers | ~$5 (₹420) |
| Breadboard (full size) | Prototyping circuits without soldering | ~$8 (₹670) |
| Jumper wire kit (M-M, M-F, F-F) | Connecting components | ~$6 (₹500) |
| HC-SR04 ultrasonic sensor | Distance measurement for obstacle avoidance | ~$4 (₹335) |
| IR sensor module | Line following, proximity detection | ~$3 (₹250) |
| Photoresistor (LDR) | Light detection circuits | ~$5 for a pack of 10 (₹420) |
| LED assorted kit | Testing circuits, visual output | ~$5 (₹420) |
| 9V battery + connector | Powering your Arduino independently | ~$4 (₹335) |
Total for a solid starter electronics kit: roughly $40–50 (₹3,360–4,200). You can get most of this as a single bundle on Amazon or AliExpress for even less.
Recommended Starter Sensors for Robotics
These three sensors come up in almost every beginner robot project. Get familiar with all three:
HC-SR04 Ultrasonic Sensor — measures distance by sending and receiving sound waves. Range is 2cm to 400cm. This is the sensor you’ll use in the obstacle-avoiding car project. Check out our ultrasonic sensor Arduino tutorial for wiring and code.
IR Sensor Module — detects infrared light reflected from surfaces. Used for line following and proximity detection. Essential for the line-follower project covered later in this guide.
Photoresistor (LDR) — resistance changes based on light levels. Simple but useful for light-activated circuits and basic environmental sensing.
Your First Circuit: LED + Resistor + Arduino
Before you touch a motor or sensor, build this circuit. It teaches you the most important habit in electronics — always use a resistor to protect your components.
Connect a 220-ohm resistor from Arduino pin 13 to the positive leg (longer leg) of an LED. Connect the negative leg (shorter leg) of the LED to the GND pin on the Arduino. Upload the LED blink code from Step 1. The resistor limits the current so the LED doesn’t burn out. That’s it — your first real circuit.
For motor driver wiring, see our L293D motor driver tutorial which covers the H-bridge concept you’ll need for robot builds. For temperature and humidity sensors, check our DHT11 temperature sensor guide.
Robotics Tools and Budget Guide for Beginners
One question I get a lot is: “How much does it actually cost to get started with robotics?” The honest answer is — not as much as you might think. Here’s a clear breakdown by budget tier so you can plan realistically.
Essential Tools You’ll Need
You don’t need a full electronics lab. But these tools will save you hours of frustration:
| Tool | Why You Need It | Budget Option Cost |
|---|---|---|
| Multimeter | Test voltage, current, continuity — essential for debugging | ~$15 (₹1,260) |
| Soldering iron + solder | Permanent connections for final builds | ~$20 (₹1,680) |
| Wire stripper | Preparing jumper wires and custom cables | ~$8 (₹670) |
| Screwdriver set (Phillips + flathead) | Assembling chassis and enclosures | ~$10 (₹840) |
| Helping hands / PCB holder | Holds components while soldering | ~$10 (₹840) |
A basic starter toolkit covering all five items runs $50–70 (₹4,200–5,880). Buy the multimeter first — it’s the single most useful debugging tool you’ll own.
Budget Tiers: What You Can Build at Each Level
Under $50 (₹4,200)
You can do a surprising amount at this level. An Arduino Uno clone ($10), a breadboard and jumper wire kit ($10), a few sensors ($15), and some LEDs and resistors ($5) gets you through all of Steps 1 and 2. You’ll be writing code, building circuits, and understanding electronics fundamentals.
$50–100 (₹4,200–8,400)
This is the sweet spot for beginners. Your first complete robot project — the obstacle-avoiding car covered in Step 3 — falls in this range at about $62–75 all in. Add in a basic tools kit and you’re fully equipped for months of learning.
$100–200 (₹8,400–16,800)
At this level you can buy a quality robotics starter kit (like the mBot Neo or SunFounder PiCar), get a decent soldering station, and have enough components to build 3–4 different projects. This is also the range where you start thinking about Raspberry Pi-based builds.
Where to Buy Components
- Amazon — best for fast delivery and reliable sellers. Slightly more expensive but great for urgent parts
- AliExpress — cheapest prices, but 2–4 week shipping. Perfect for planning ahead
- SparkFun (sparkfun.com) — great tutorials alongside every product, slightly premium pricing, excellent for learning
- Adafruit (adafruit.com) — similar to SparkFun, excellent documentation, beginner-friendly product selection
- Local electronics stores — useful for single components you need immediately
Step 3 – Building and Programming a Robot
This is where everything comes together. You’ve learned some code, you’ve worked with basic circuits — now you’re going to build an actual robot. We’re going to do this as a complete project, start to finish: the Obstacle-Avoiding Car.
This is genuinely one of the best first robot projects for beginners. It uses the exact skills you’ve been building — Arduino programming, the HC-SR04 ultrasonic sensor, and DC motors via a motor driver. The total cost is around $62 (₹5,200), and you can complete the build in 2–4 hours.
For a more in-depth walkthrough of the full build process, check our how to build a robot complete guide.
Your First Robot: Obstacle-Avoiding Car
Full Component List with Costs
| Component | Purpose | Approx. Cost |
|---|---|---|
| Arduino Uno | Brains of the robot — runs all your code | ~$25 (₹2,100) |
| L298N motor driver module | Controls two DC motors from Arduino | ~$8 (₹670) |
| HC-SR04 ultrasonic sensor | Detects obstacles ahead | ~$4 (₹335) |
| 2x DC gear motors | Drive the wheels | ~$10 (₹840) for a pair |
| Robot chassis kit (2WD) | Plastic frame, wheels, battery holder | ~$15 (₹1,260) |
| 9V battery or 18650 battery pack | Powers the motors | ~$5 (₹420) |
| Jumper wires + breadboard | Wiring connections | ~$8 (₹670) if not already owned |
Estimated total: ~$62–75 (₹5,200–6,300)
Wiring Guide
1. Mount the Arduino and L298N motor driver on the robot chassis
2. Connect the left motor wires to OUT1 and OUT2 on the L298N
3. Connect the right motor wires to OUT3 and OUT4 on the L298N
4. Connect L298N IN1 to Arduino pin 8, IN2 to pin 9, IN3 to pin 10, IN4 to pin 11
5. Connect L298N ENA to Arduino pin 5 (PWM), ENB to Arduino pin 6 (PWM)
6. Mount the HC-SR04 sensor at the front of the chassis pointing forward
7. Connect HC-SR04 VCC to Arduino 5V, GND to GND, TRIG to pin 2, ECHO to pin 3
8. Connect your battery pack to the L298N power input (and Arduino via its VIN pin)
Upload Your Code: Once your robot is assembled, upload your code from the Arduino IDE to the Arduino board. Make sure to troubleshoot any issues that arise, which is a normal part of the learning process.
// Obstacle Avoiding Robot - Complete Code
// Mount HC-SR04 at front, L298N for motor control

// Motor pins
int IN1 = 8;
int IN2 = 9;
int IN3 = 10;
int IN4 = 11;
int ENA = 5;
int ENB = 6;

// Ultrasonic sensor pins
int trigPin = 2;
int echoPin = 3;

// Distance threshold in cm
int stopDistance = 20;

void setup() {
  pinMode(IN1, OUTPUT);
  pinMode(IN2, OUTPUT);
  pinMode(IN3, OUTPUT);
  pinMode(IN4, OUTPUT);
  pinMode(ENA, OUTPUT);
  pinMode(ENB, OUTPUT);
  pinMode(trigPin, OUTPUT);
  pinMode(echoPin, INPUT);

  analogWrite(ENA, 180);  // Motor speed (0–255)
  analogWrite(ENB, 180);

  Serial.begin(9600);
}

long getDistance() {
  digitalWrite(trigPin, LOW);
  delayMicroseconds(2);
  digitalWrite(trigPin, HIGH);
  delayMicroseconds(10);
  digitalWrite(trigPin, LOW);

  long duration = pulseIn(echoPin, HIGH);
  return duration * 0.034 / 2;  // Convert to cm
}

void moveForward() {
  digitalWrite(IN1, HIGH);
  digitalWrite(IN2, LOW);
  digitalWrite(IN3, HIGH);
  digitalWrite(IN4, LOW);
}

void stopMotors() {
  digitalWrite(IN1, LOW);
  digitalWrite(IN2, LOW);
  digitalWrite(IN3, LOW);
  digitalWrite(IN4, LOW);
}

void turnRight() {
  digitalWrite(IN1, HIGH);
  digitalWrite(IN2, LOW);
  digitalWrite(IN3, LOW);
  digitalWrite(IN4, HIGH);
  delay(600);  // Adjust for turn angle
}

void loop() {
  long distance = getDistance();
  Serial.print("Distance: ");
  Serial.println(distance);

  if (distance > stopDistance) {
    moveForward();
  } else {
    stopMotors();
    delay(300);
    turnRight();
    stopMotors();
    delay(200);
  }
}
Upload this code via the Arduino IDE and your robot will drive forward automatically, detect any obstacle within 20cm, stop, turn right, and continue. Adjust the stopDistance value and the delay in turnRight() to tune the behavior for your specific chassis.
Common Problems and Solutions
| Problem | Likely Cause | Fix |
|---|---|---|
| Robot doesn’t move at all | Motor power not connected | Check L298N 12V input and battery connection |
| One motor spins, other doesn’t | Wiring error on IN3/IN4 or OUT3/OUT4 | Re-check motor connections to L298N |
| Robot ignores obstacles | HC-SR04 not wired correctly | Verify TRIG on pin 2, ECHO on pin 3, VCC to 5V |
| Motors spin but robot goes in circles | Motor speeds unequal | Adjust ENA/ENB PWM values until straight |
| Distance readings are 0 or 999 | Faulty sensor or loose connection | Re-seat sensor connections, test with Serial Monitor |
Estimated build time: 2–4 hours for someone following this guide for the first time. Don’t rush the wiring step — double-check every connection before powering on.
For sensor details, see our ultrasonic sensor Arduino tutorial.
Step 4 – Improving the Skills
You’ve built your first robot. Seriously, take a moment — that’s not a small thing. Most people who say they want to get into robotics never actually build anything. You did. Now let’s talk about where to go from here.
Skill Progression Roadmap
Beginner (You are here after completing Steps 1–3)
You can write basic Arduino code, wire simple circuits, use sensors and motor drivers, and troubleshoot common hardware issues. Next goal: build 2–3 more projects from scratch to reinforce these skills.
Intermediate
Add Bluetooth or WiFi control to your robots (HC-05 Bluetooth module, ~$5 / ₹420, or ESP8266 WiFi module, ~$4 / ₹335). Learn to use servo motors for robotic arms. Start learning about PID control — the algorithm that makes robots move smoothly and precisely instead of jerky and approximate.
Advanced
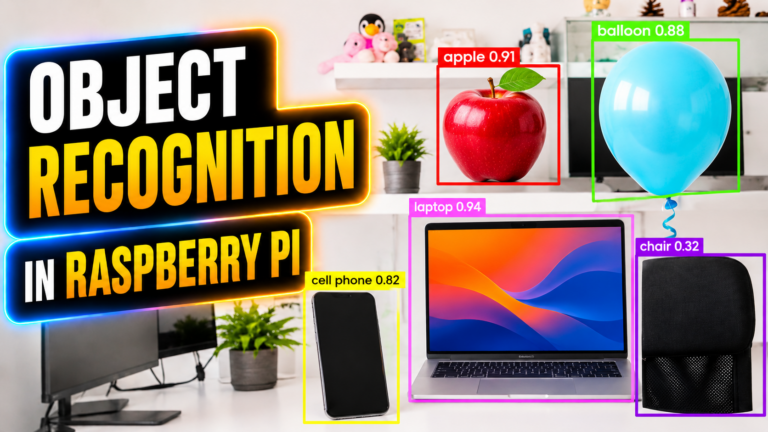
Move to Raspberry Pi for projects that need computer vision or machine learning. Start exploring ROS (Robot Operating System) — the standard framework for professional and research robotics. Build a robotic arm with inverse kinematics, or a self-balancing robot using an MPU-6050 gyroscope sensor.
Recommended Robotics Kits with Prices
These kits are excellent if you want a structured learning experience with pre-designed projects and included components:
| Kit Name | Skill Level | Price (approx.) | What You’ll Learn |
|---|---|---|---|
| Arduino Starter Kit (Official) | Beginner | ~$65 (₹5,460) | Arduino basics, 15 guided projects |
| SunFounder PiCar-X | Beginner–Intermediate | ~$90 (₹7,560) | Raspberry Pi, camera, AI basics |
| mBot Neo (Makeblock) | Beginner | ~$120 (₹10,080) | Block coding to Python, sensors |
| Pi Crawler (SunFounder) | Intermediate | ~$100 (₹8,400) | Servo control, walking robot mechanics |
| ELEGOO Smart Robot Car V4 | Beginner | ~$50 (₹4,200) | Arduino, ultrasonic, IR, Bluetooth |
For a full comparison with more options, see our best robotics kits for beginners guide.
Free Online Courses Worth Your Time
- Coursera — Robotics Specialization by University of Pennsylvania (audit for free) — covers aerial robotics, computational motion planning, and mobility
- edX — Robotics MicroMasters by Columbia University (audit for free) — more theoretical, excellent for understanding the math
- Codecademy — Learn Python 3 (free tier available) — best structured Python course for absolute beginners
- Arduino Project Hub (projecthub.arduino.cc) — free real-world project tutorials maintained by the Arduino community
- Instructables Robotics section (instructables.com/circuits/robots) — hundreds of beginner to advanced DIY robot builds with photos and code
Community Resources
Don’t learn in isolation. These communities will answer your questions, give you project feedback, and keep you motivated:
- Reddit r/robotics and r/arduino — active communities, great for troubleshooting and project inspiration
- Arduino Forum (forum.arduino.cc) — the official support forum, massive archive of solved problems
- RobotShop Community (robotshop.com/community) — forums focused specifically on robot hardware and builds
- Discord servers — search “Arduino Discord” or “Robotics Discord” for active real-time communities
Common Beginner Mistakes (And How to Avoid Them)
After going through this journey myself and watching a lot of beginners get stuck, these are the mistakes that waste the most time. Avoid these and you’ll progress noticeably faster.
1. Trying to build a complex robot before mastering the basics
Don’t jump straight to a robotic arm or autonomous drone as your first project. Start with the obstacle-avoiding car in this guide. Simple projects teach you the fundamentals better than complex ones — and you actually finish them, which matters.
2. Learning multiple programming languages at the same time
Pick Python or C++. Start there. Learn it to the point where you can write a working program without looking up basic syntax. Then add the second language. Splitting your attention between two languages early on just slows down progress in both.
3. Not documenting your projects
Write down your wiring diagrams. Comment your code. Take photos of your build at each stage. When something breaks — and it will — documentation is what lets you figure out what changed. A quick photo before you rewire anything has saved me hours of debugging.
4. Skipping the breadboard phase and going straight to soldering
Breadboards exist for a reason. Use them to prototype and test your circuit before making anything permanent. Solder only when you’re certain everything works. Desoldering is painful and time-consuming.
5. Buying components without a project in mind
It’s easy to spend $100 buying random sensors and modules that just sit in a drawer. Instead, pick your next project first, then buy exactly what you need for it. This forces focus and keeps costs down.
6. Giving up after the first failed upload or broken circuit
Hardware debugging is part of robotics — it’s not a sign that you’re doing something wrong. Every roboticist spends time troubleshooting. Use the Serial Monitor in the Arduino IDE to print sensor values and motor states. Read error messages carefully. Search the exact error message in the Arduino Forum. You will figure it out.
7. Not joining a community
Robotics is so much easier when you have people to ask questions. Even just lurking on r/arduino or the Arduino Forum and reading how others solved problems will shortcut your learning significantly.
Frequently Asked Questions
How long does it take to build your first robot as a complete beginner? If you follow this roadmap in order, you can go from zero experience to a fully working obstacle-avoiding robot in 8 to 12 weeks. The robot build itself (Step 3) takes about 2 to 4 hours once you have all the components and have covered the basics in the earlier steps.
How much does it cost to get started with robotics? You can get through the first two steps — programming basics and electronics fundamentals — for under $50. The complete obstacle-avoiding car project in Step 3 runs around $62 to $75 including all components. Add a basic tools kit (multimeter, soldering iron, wire stripper) and your total starting investment is roughly $100 to $120.
Do I need a math or engineering background to learn robotics? No. This guide is designed for complete beginners with no prior background. You’ll pick up the electronics and programming concepts as you go, in a practical context. Advanced topics like PID control and inverse kinematics come much later — by that point, you’ll have built enough hands-on experience for them to make sense.
Which Arduino board should I buy as a beginner? Get the Arduino Uno. It’s what virtually every beginner tutorial — including all the projects in this guide — is written for. The Nano is cheaper and smaller but harder to work with when starting out. Save the Mega for later when you need more pins and memory for complex builds.
Should I learn Python or C++ first? Start with Python. It’s more beginner-friendly, reads close to plain English, and you can write useful programs within your first week. Once you’re comfortable with Python basics (roughly 2 to 4 weeks), move to C++ for Arduino programming. Most working roboticists use both regularly.
My robot isn’t working after uploading the code — what do I do? Start with the Serial Monitor in the Arduino IDE. Print your sensor values and motor states to the serial output so you can see what the robot is actually reading. Then cross-check your wiring against the guide — the most common issues are a missed connection on the L298N, the HC-SR04 TRIG/ECHO pins swapped, or the battery not connected to the motor driver’s power input.
Can I use a Raspberry Pi instead of Arduino for my first robot? Arduino is the better starting point. It’s simpler, more forgiving for hardware beginners, and the community support for beginner projects is unmatched. Raspberry Pi becomes the right choice once you need camera input, computer vision, or machine learning — things that don’t come up until you’re well past your first robot.
What should I build after the obstacle-avoiding car? A line-following robot is the natural next step — it uses an IR sensor you already have on your shopping list and builds directly on the motor control skills from this project. After that, adding Bluetooth control via an HC-05 module is a popular upgrade that introduces wireless communication without much added complexity.





2 Comments