Ubidots Home Automation using Raspberry Pi
A few weeks back we published a tutorial “Home Automation using Raspberry Pi” in rootsaid.com which was well received among hobbyists and college students.This time, we are building a more secure and stable Ubidots Home Automation – The Global Cloud Network for IoT.
What is Ubidots?


Ubidots provides a simple and secure method for sending and receiving data to and from IoT devices using the global cloud network in real time. Ubidots provides a firm platform for hobbyists, enthusiasts as well as professionals, enabling them to easily retrieve and use the sensor data around the world and turn it into something useful. We can use the Ubidots platform to send various sensor values or other datas to the cloud, store it there safely and retrive them anytime we want using simple API calls.
Ubidots’ main value proposition is to save you the cost and time of developing an end-user interface for your IoT application. So what makes Ubidot unique? It was found that most platforms were merely data storage backends or device management dashboards, but lacked a clean interface where the end-customers (like a nurse in a hospital or a maintenance manager) could login and see the data in a friendly way. With Ubidots you can go to market in just one week while delighting your customers with an own-branded experience.
In this project, we will be creating a Ubidots Home Automation with an interactive dashboard from where we will be able to easily switch on and off various electrical appliances in our home. You can access the dashboard from Desktops, Laptops as well as Mobile Phones.
Home Automation using Ubidots and Raspberry Pi
Tutorial
Components Needed
- Raspberry Pi
- Relay
- Some Devices
- Mobile Phone or PC
Video Tutorial

Step 1 – Ubidots Sign Up
Ok now let’s get started.Go to this link and create a free account in Ubidots education. If you already have an account simply sign in with your credentials.
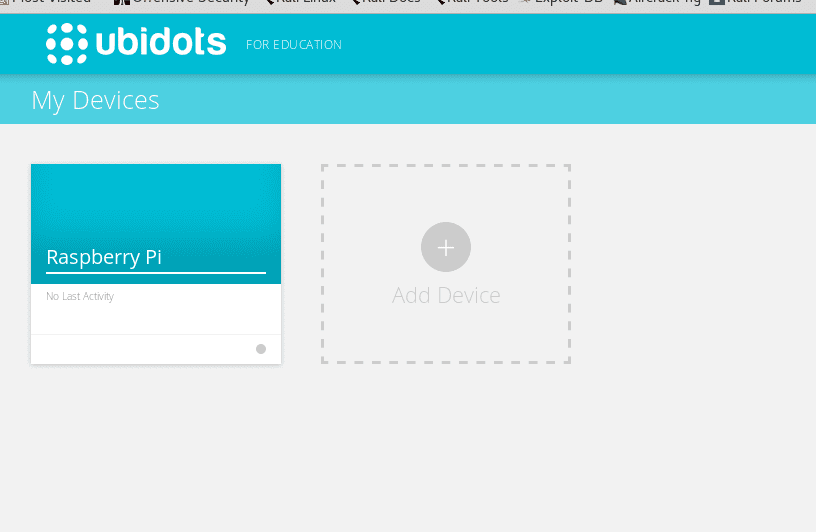
Step 2 – Setting Up Devices
Next we have to create a device. since we are using Raspberry Pi latest name the device Raspberry Pi.

Step 3 – Setting Up Variables
Now click on the device you just created. Now it will show you all the variable which are linked to that device. in this project we will be controlling for devices using this home automation system. so in this device we will have to create four variable which will store the status of each device.


Simply click on add variable And click on default. this will create a new variable. Similarly create three more variables and name them l1, l2, l3 and l4.
Step 4 – Adding Switches and connecting it to Variables
Next we want something to control the variable. For that we will be creating the control switches. control switches are able to toggle the value of the variable from 0 to 1 or 1 to 0.[AdSense-C]
Simply go to your dashboard, click on create widget, click on Control, select Switch Type, the device in which the variable is allocated and finally the Variable.
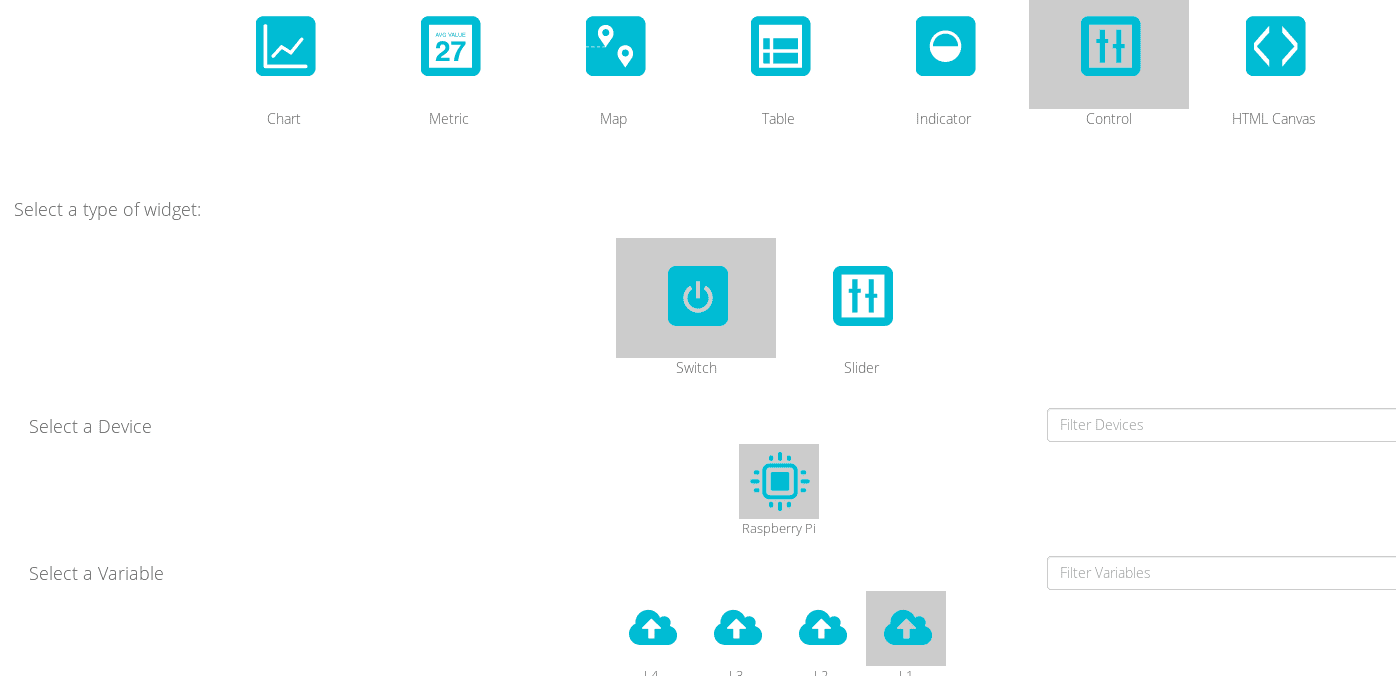

Once it is done, the control switch will appear on your dashboard. similarly create 3 more control switches and link them with rest of the variables
Step 5 – Authentication Token
The Ubidots API supports the below four HTTP methods:
- GET – Used to retrieve information from the cloud
- POST – To post or add a variable
- PUT – Used to edit existing element
- DELETE – Remove an element
Every request requires a TOKEN. The easiest way to get yours is clicking on “API Credentials” under your profile tab:

You’ll notice there are two types of keys in your Ubidots account:
- Tokens: Temporary and revocable keys that is to be embedded in all your API requests.
- API Key: This is your “Master Key”; a unique and inmutable key that is used only to generate your account’s tokens.
Take a note of the Default Token as we will be using that in the next steps.
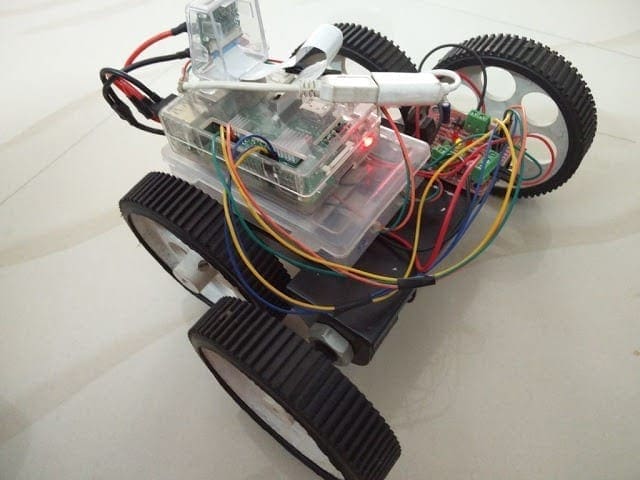
Step 6 – Setting up the Raspberry Pi
You all know might be knowing what a Raspberry Pi is. Raspberry Pi is a low cost single board computer which can be used for robotics, home automation and tonnes of embedded projects.
Get your Raspberry Pi from Here

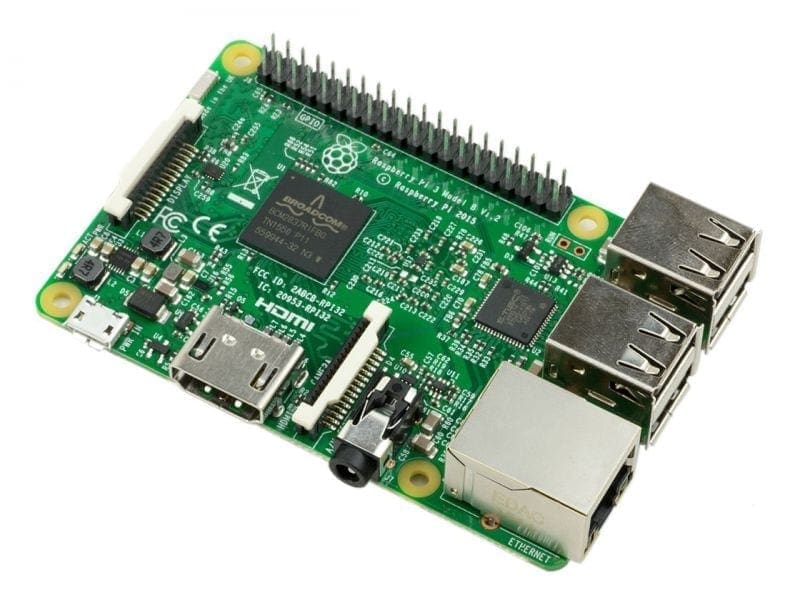
Download an OS and burn it onto a micro SD card. Now insert it into the raspberry Pis micro SD card slot. Here I will be using Raspbian OS and you can donwload it by clicking the Download Link.
Now power up the Pi and start a terminal .First thing to do is create a password for the user ‘pi’ by executing the command
sudo passwd pi
Now perform and update and upgrade by running
sudo apt update -y && apt upgrade -y
Step 7 – Reading Data
As mentioned earlier, to get the value of a variable from the cloud, we can use GET requests to specific URLs
To get the last value of a variable using its label, make a GET request to:
http://things.ubidots.com/api/v1.6/devices/<LABEL_DEVICE>/<VARIABLE_LABEL>/lv
Where <LABEL_DEVICE> is the unique label of the device (raspberry-pi) and <VARIABLE_LABEL> is the unique label of the variable. (l1, l2, l3 and l4)
Always keep in mind that you need the TOKEN for authentication. You can either
- Send the token inside the URL using the ?token= parameter or
- Send the token as a header using the X-Auth-Token header
So, the URL to fetch value of variable l1 from device Raspberry Pi will be like
http://things.ubidots.com/api/v1.6/devices/raspberry-pi/l3/lv?token=A1E-wN4jKlfbBzsexIx1B5C2O1zSAxHk8D
The Code
We have developed a short python code for our Ubidots Home Automation system that will automatically fetch and update the value of all the four variables each second and toggle the GPIO pins depending up on the values.
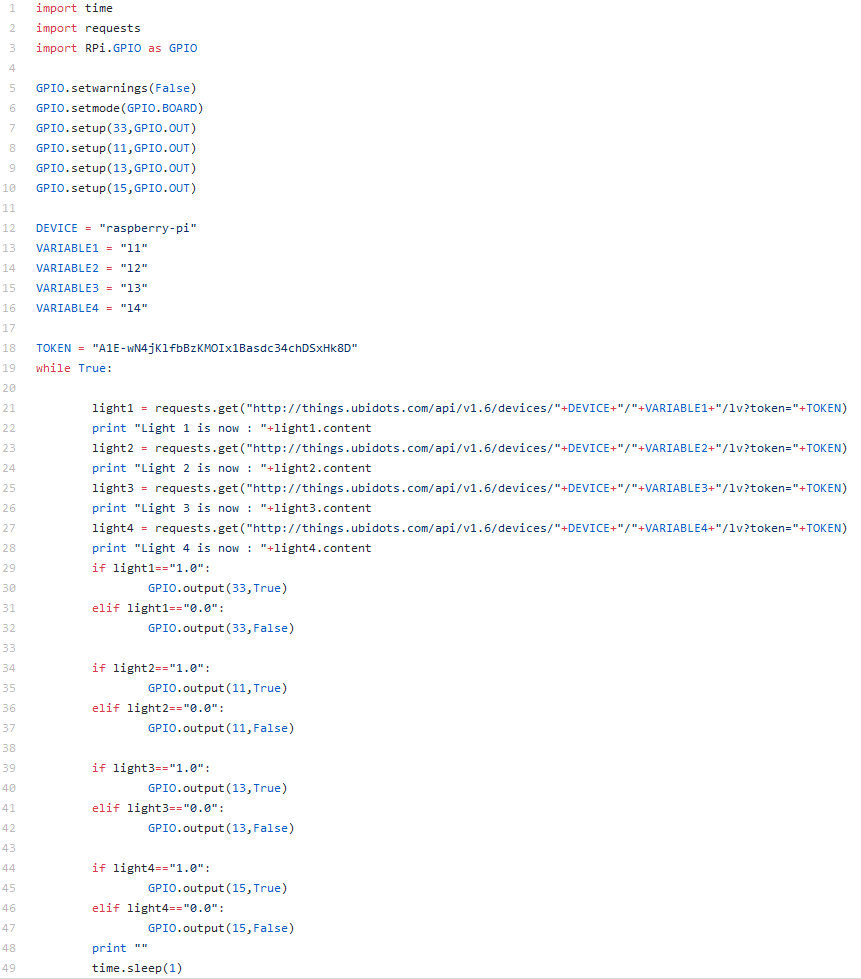

[AdSense-A][Download]
You can test the Ubidots Home Automation code by simply running it and clicking the control switches. It will look somewhat like this.


Step 8 – The Connections
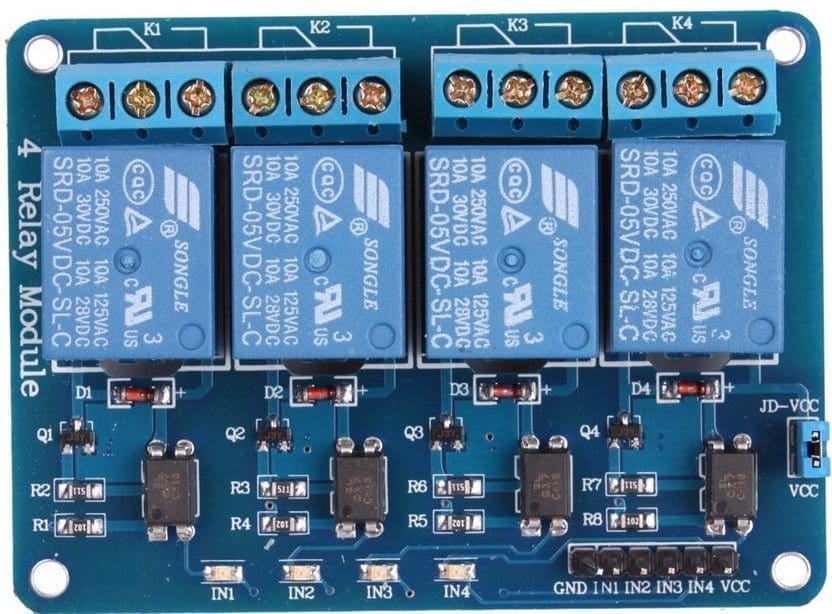
The Relay
Simply speaking, relays are circuits that are used for switching operations such as closing and breaking of electronic circuits. We can easily close and break the circuit by simply providing a voltage difference across the terminals.


Let me make the working clear for you. Check out the diagram on the right hand side of this page.
There are a total of 5 terminals. Two for energizing the coil (the bottom terminals), one on the right side is Common terminal and on the right side an NO and NC Terminals. Normally Closed terminal which will be connected to the Common terminal when the coil is active and a Normally Open pin which will be in contact with the Common pin when the coil is active.
That is how the switch relay works. In our case, we will be connecting
- GPIO pins of Raspberry Pi to One End of Coil
- Ground to other End of Coil of the Relay
- Phase of Main Power Supply to The Common terminal or Pole
- One Terminal of bulb (Or any other device) to Normally Open Terminal
- And the Other Terminal of Bulb to Neutral Point of Main Power Supply
Since the Output of Raspberry Pi GPIO pins are 3.3V, you will have to buy a 3.3V Relay. You can purchase the relay board of 4 relays that is compatible with Raspberry Pi from here or click on the image.

Connections
Now you can connect GPIO pins to Relay board
GPIO 33 of Pi to Relay 1 for Device 1
GPIO 11 of Pi to Relay 2 for Device 2
GPIO 13 of Pi to Relay 3 for Device 3
GPIO 15 of Pi to Relay 4 for Device 4
Testing
Ubidots Home Autmation System is now ready. Start the program by running
python ubidots-homeautomation.py
Now you can go to your Ubidots Dashboard and try toggling the switches. The value of the variables will be read by the Pi which will be used to toggle the GPIO pins thereby triggering the Relay and toggle the device ON or OFF.[AdSense-B]
Rate the Project
Did you find this useful? Help us to improve by rating this page.