Raspberry Pi Mini Computer- Light and Portable
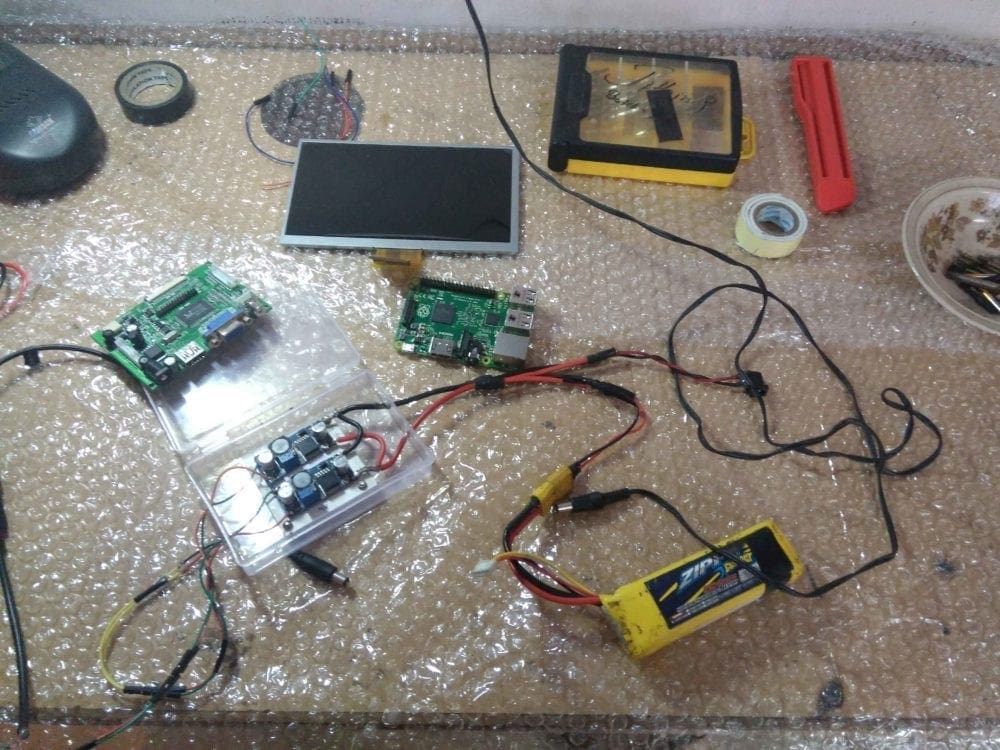
In the last post, I showed you how I made my long lasting heavy load power source for Raspberry Pi. Now let us take one more step forward. Let us build a mini computer with a 7 inch LCD Display, a small Keyboard and Mouse .
Things Needed
- Raspberry Pi
- Lithium Polymer Battery > 12 V
- LM2596S 20083 Adjustable Voltage Regulator Module x 2
- 7 inch LCD Display
- Mini USB Keyboard and Mouse
- Driver Board Monitor for Raspberry Pi
- Multimeter
- A Micro USB Cable
- Some Connecting Wires
- Soldering Iron
Powering Up the Pi
Just like in the last post, we will be using a 12 V Lithium Polymer Battery and a LM2596S 20083 Adjustable Voltage Regulator Module adjusted to 5 V output will be used to power up the Raspberry Pi. [AdSense-B]This will be more than enough to power up the Pi and devices connected to the USB port.
Connecting the Display
Depending up on the type of the display, you will have to make some small changes in the circuits. In this post, I will explain the circuits while using the two most common LCD display.
Raspberry Pi 7″ Touchscreen Display
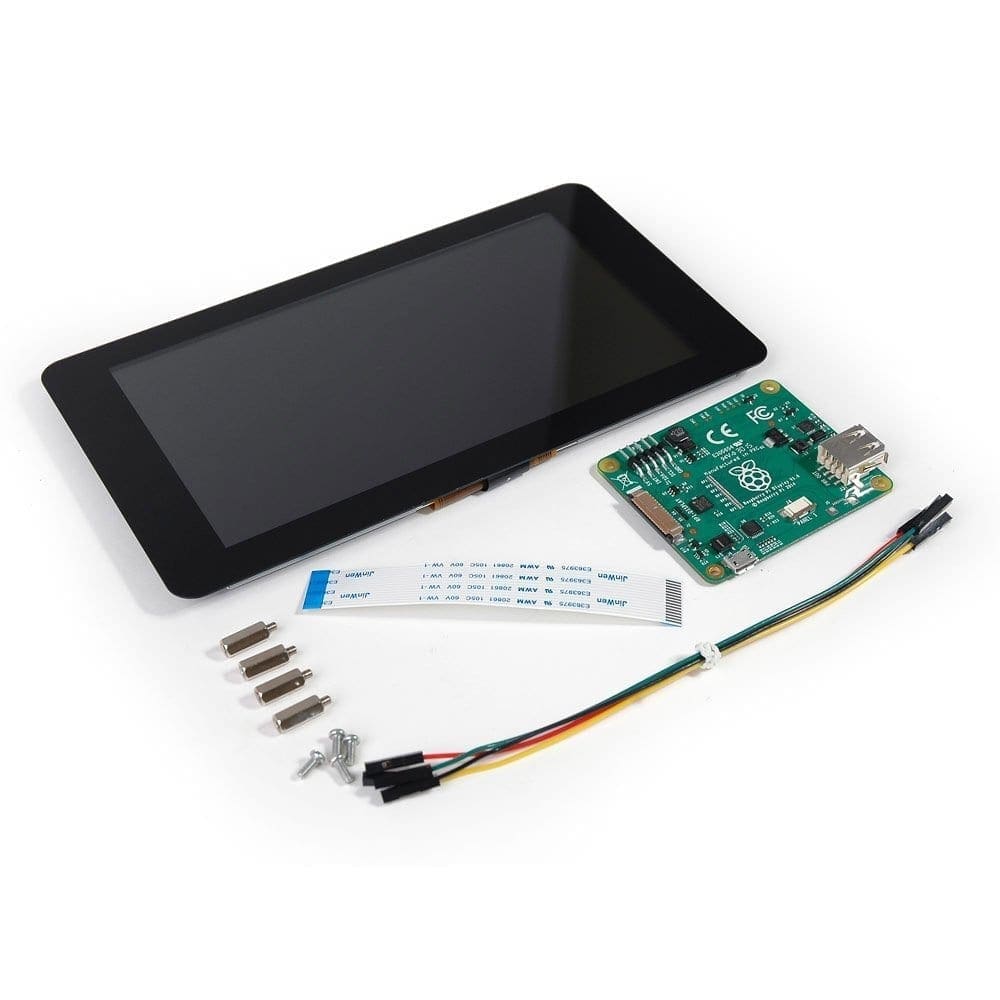
This is the standard easy to use touch screen display from raspberry pi itself. The display is powered using a Micro USB connector in the driver board which inturn powers the Raspberry Pi via GPIO pins. This is a plug and play device if you have the latest version of Raspbian OS.
Raspberry Pi is connected to the display using ribbon cable which is connected to the DSI port. Driver board has two functions – Powering up the screen and converting the parallel display signals to DSI serial signal.
Steps to Connect
- Connect the ribbon cable to the back of the driver board. Also connect the touch screen signal cables to J4.
- Attach the DSI Ribbon Cable to the driver board and connect the other end to the Raspberry Pi.
- Connect some jumper wires from the 5V of the driver board to the Power input pins on the Raspberry Pi.
- Now connect the driver board to the output of the voltage regulator we created earlier. The Driver Board will power up both the display as well as Raspberry Pi.
Raspberry Pi LCD Display Screen TFT Monitor with HDMI VGA Input Driver Board Controller
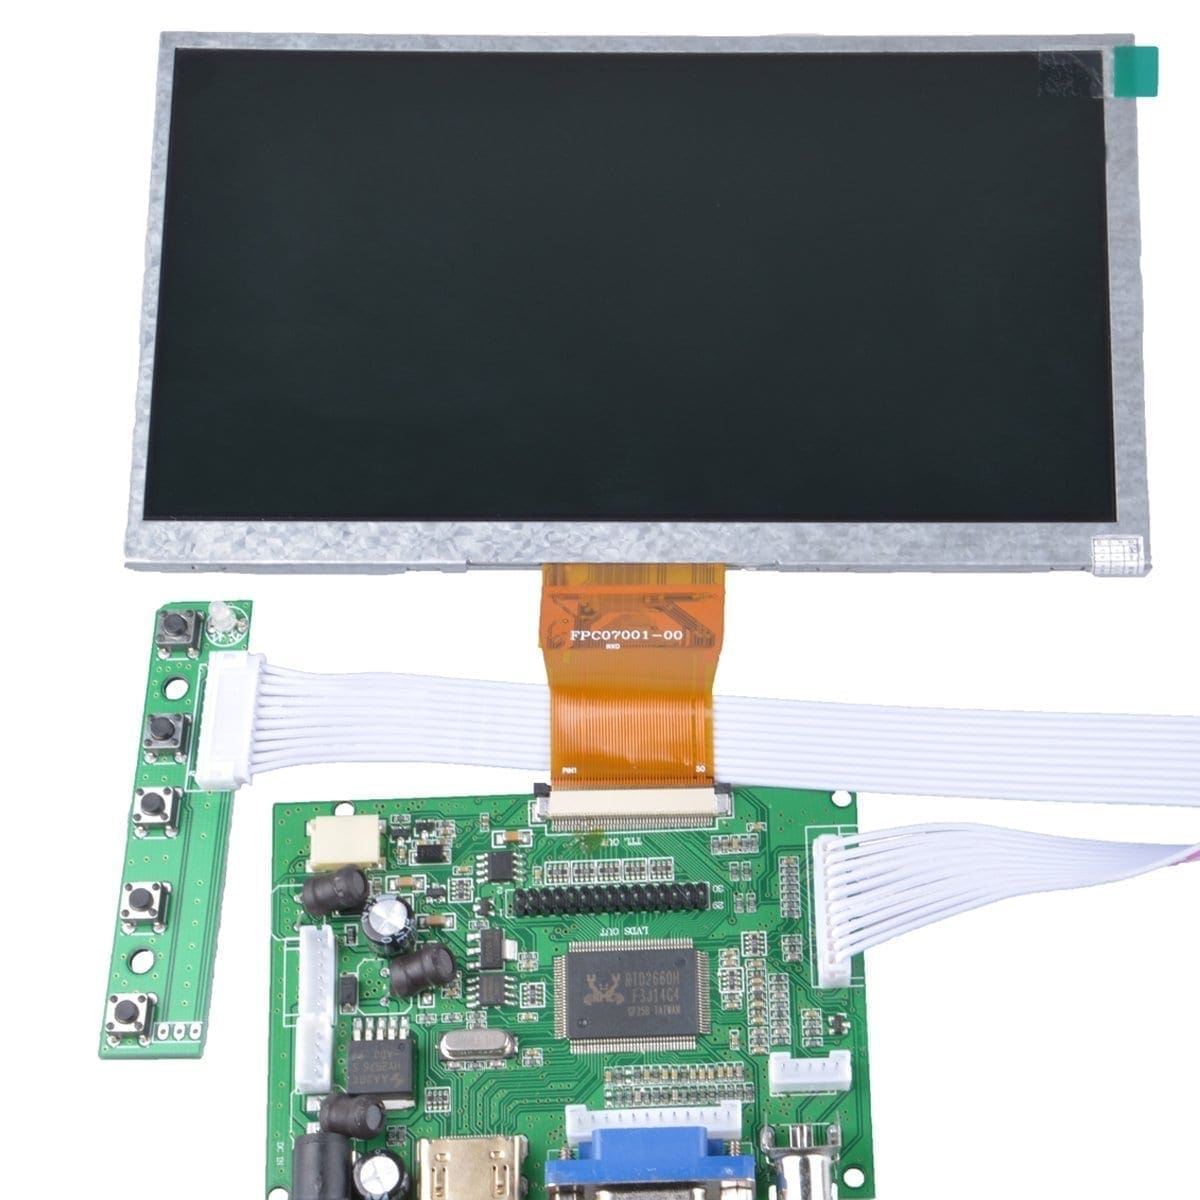
In our previous circuit, we used only one regulator. But here, we will add one more regulator adjusted to 12 V output in parallel to the previous regulator.

Steps to Connect
- Connect the ribbon cable to the back of the driver board.
- Plugin the HDMI Cable to the driver board and the other end to the Raspberry Pi.
- Connect +5V regulated Voltage to Power input pins on the Raspberry Pi.
- Attach +12 V to the driver board which will power the screen.
Keyboard and Mouse
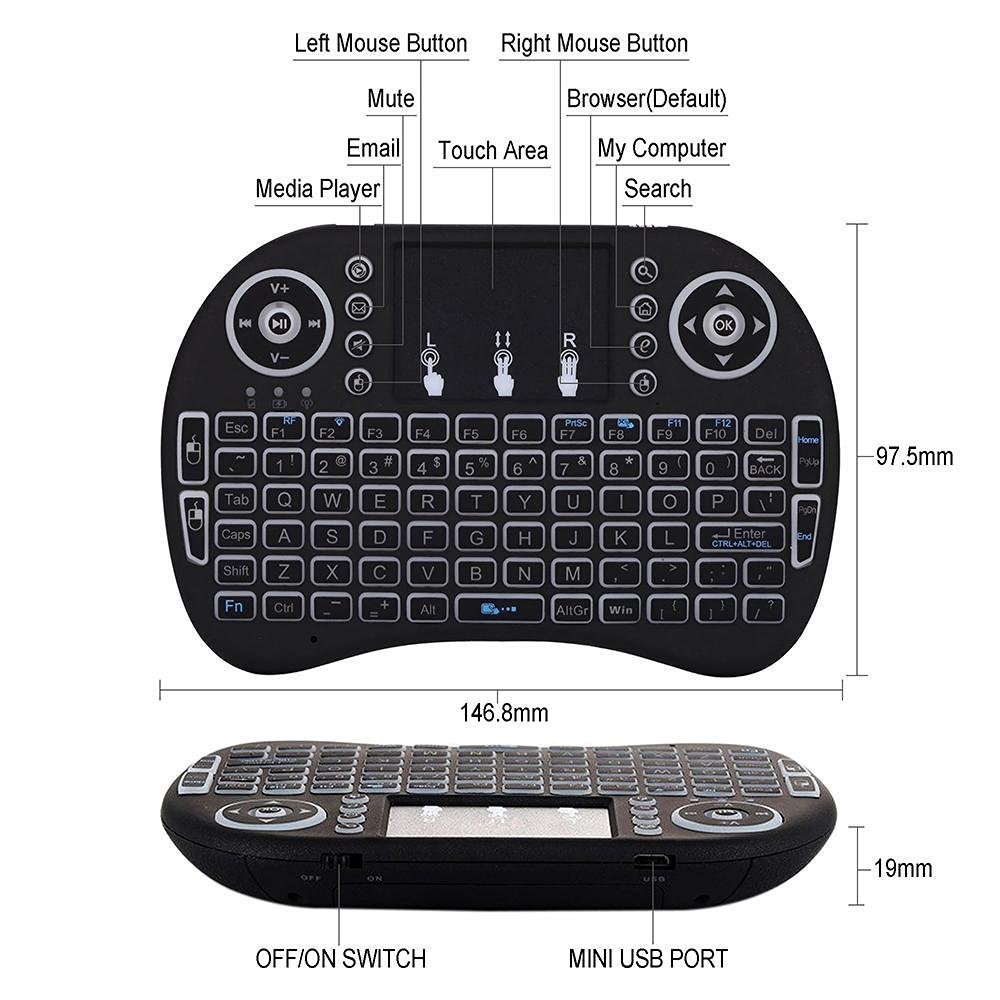
I used this small Wireless Keyboard+Mouse to control my mini PC. It have a USB receiver which can be connected to the Raspberry Pi, which will receive wireless signals from the transmitting unit.[AdSense-B]
Thats it. You have your very own fully functioning linux computer. You can carry this in your back pack wherever you go and use it whenever you want.
Rate the Project
Did you find this page useful? Help us to improve by rating this page.