[Solved] sudo raspi-config command not found – Why and How to Solve this error in Raspberry Pi? How to install raspi-config?
Introduction to raspi-config
Let’s dive into solving a common yet perplexing issue many Raspberry Pi enthusiasts encounter: the “sudo raspi-config command not found” error. This error can be a stumbling block for both beginners and experienced users alike, especially when trying to configure their Raspberry Pi to suit specific needs or projects. The Raspberry Pi, renowned for its versatility and user-friendly nature, sometimes throws these curveballs, often due to simple oversights or system-specific issues. In this post, we aim to demystify this error and provide a clear, step-by-step guide to get your Raspberry Pi configuration tool up and running smoothly.
What is raspi-config?
Understanding the root of this error is crucial in troubleshooting it effectively. The raspi-config tool is an integral part of the Raspberry Pi experience, particularly for those using the official Raspberry Pi OS. This command-line interface allows users to easily navigate through various system settings, making it a vital component for the initial setup and ongoing configuration of the Pi. Whether you’re setting up your Pi for the first time, or you’re a seasoned user tweaking a new project, encountering the “command not found” error can be frustrating. Stay with us as we explore the reasons behind this issue and guide you through the solutions to resolve it, ensuring your Raspberry Pi journey is smooth and enjoyable.
raspi-config is a command-line configuration tool for Raspberry Pi, specifically designed for the Raspberry Pi OS, the official operating system formerly known as Raspbian. This tool is crucial for Raspberry Pi users, providing an easy-to-use, text-based interface for configuring the system. It’s particularly handy for initial setup, allowing users to customize their Raspberry Pi for various applications and projects.
One of the primary functions of raspi-config is to manage system options. Users can easily change the hostname, modify the user password, and configure boot options, including whether the Raspberry Pi boots to a desktop or command line, and with or without auto-login. There’s also an option to adjust network settings at boot and toggle the splash screen. These features make raspi-config a vital tool for basic system setup and management.
What can we do with raspi-config?
raspi-config is mostly used in headless setups or during the initial configuration phase. For desktop users, many of these settings are also accessible via the graphical interface. You can access raspi-config by typing sudo raspi-config in the terminal. This brings up a text-based graphical interface where you can navigate using the arrow keys, Enter, and Tab.
System Options:
- Hostname: Change the name of your Raspberry Pi on the network.
- Password: Set or change the password for the ‘pi’ user.
- Boot / Auto Login: Configure options for booting to desktop or command line, with or without auto-login.
- Network at Boot: Enable or disable waiting for the network connection before completing the boot process.
- Splash Screen: Enable or disable the splash screen shown at boot.
Display Options:
Configure display settings such as resolution.
Interface Options:
Enable or disable interfaces like Camera, SSH, VNC, SPI, I2C, Serial, 1-Wire, and Remote GPIO. This is essential for users who are using these interfaces for projects.
Performance Options:
Overclocking (on supported models), GPU memory settings, etc.
Localisation Options:
Set up language and regional settings, such as timezone, keyboard layout, and Wi-Fi country.
Advanced Options:
A variety of advanced settings like expanding the filesystem to fill the SD card, memory split, audio settings, and others.
Update:
Update the raspi-config tool to the latest version.
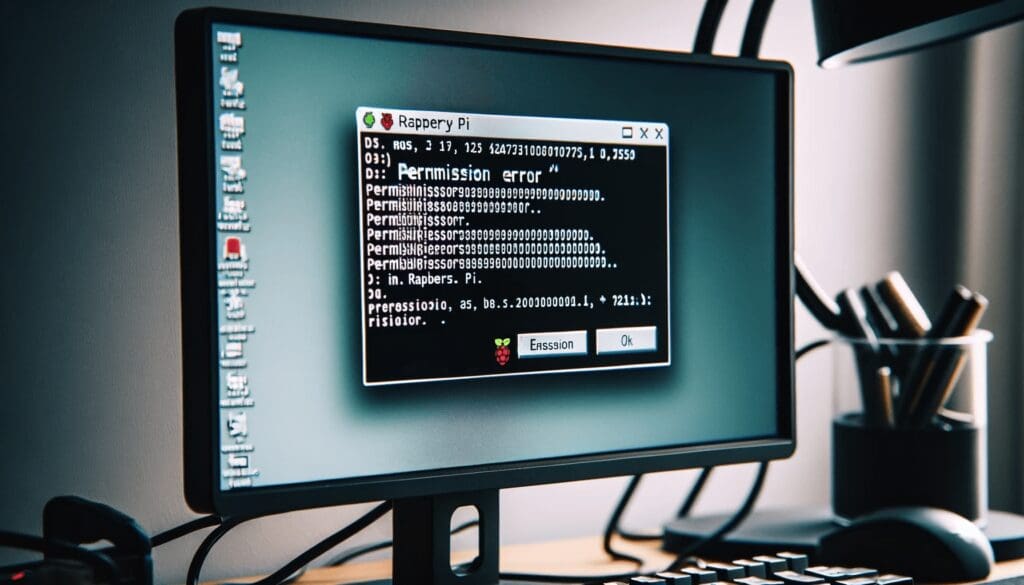
The Error – “sudo raspi-config command not found”
Understanding why this error occurs – sudo raspi-config command not found is key to resolving it effectively. The raspi-config utility is a cornerstone of the Raspberry Pi toolkit, particularly crucial for those utilizing the official Raspberry Pi OS. It offers a user-friendly, command-line interface that simplifies the process of adjusting various system configurations, an essential feature for both initial setups and ongoing customizations of the Pi. Encountering the “command not found” error can be a source of annoyance, whether you’re configuring your Pi for the first time or are an expert making adjustments for a new project.

This issue, while common, can prove to be a significant hurdle for both novices and seasoned Raspberry Pi users alike. It typically arises when attempting to tailor the configuration of the Raspberry Pi for particular tasks or projects.
Top reasons for “sudo raspi-config command not found”
Package not installed in the OS: The raspi-config tool is made for the Raspberry Pi’s own operating system, called Raspberry Pi OS. If your Raspberry Pi is using a different system, like Ubuntu, you won’t find raspi-config because it’s not included in other systems.
Incorrect PATH Settings: Your Raspberry Pi uses a list (called PATH) to know where to find commands and programs. If this list doesn’t include the place where raspi-config is stored, then your Raspberry Pi won’t be able to find it when you try to use it.
Package got Removed: Sometimes, the raspi-config tool might get removed by accident, especially if you were trying to clean up your system or update it. If it’s not there, your Raspberry Pi can’t run the command. This will give the error – sudo raspi-config command not found
Outdated System: If your Raspberry Pi OS is very old and hasn’t been updated for a long time, it might not work well with newer tools or commands. This includes raspi-config, which might not be up to date or compatible with older systems.
Corrupted or Incomplete OS Installation: If the installation of Raspberry Pi OS didn’t go well (maybe because of a power cut or a problem with the SD card), some parts might be missing. This includes the raspi-config tool, so it won’t work if it’s not properly installed.
Conflicts with Custom Configurations or Scripts: If you’ve changed your Raspberry Pi’s settings a lot, or if you’re running special scripts that change how the system works, this can sometimes cause problems. It might accidentally remove or hide important commands like raspi-config.
Damaged Filesystem or SD Card: The Raspberry Pi uses an SD card to store everything. If this card gets damaged or has errors, some files can be lost or broken. This can include important tools like raspi-config.
User Permissions Issues: Normally, this isn’t the reason for the “command not found” error, but sometimes if you don’t have the right permissions (like not using sudo), you can’t run certain commands. However, with raspi-config, this usually shows up as a different kind of error.
How to solve this error – “sudo raspi-config command not found”
To resolve the “sudo raspi-config command not found” error on a Raspberry Pi, the approach varies depending on the underlying cause. Here’s a detailed guide for each scenario:
Solution 1 – Package Not Installed? How to install raspi-config:
Reinstall the raspi-config package. Open the terminal and run sudo apt update to update your package lists, then sudo apt install raspi-config to install the tool.
Step 1 – Update Package Lists:
Before installing new software, it’s always a good idea to update the package lists. This ensures you have the latest information about available software versions. In the terminal, type
sudo apt update and press Enter. Wait for the process to complete; it might take a few minutes depending on your internet speed.
Step 2 – Install raspi-config:
Once the update is complete, install the raspi-config tool by typing
sudo apt install raspi-configand press Enter. The system will download and install the necessary files. This should be a quick process.
Step 3 – Verify the Installation:
After installation, you can verify that raspi-config is installed correctly by typing
sudo raspi-configin the terminal. This command should open the raspi-config interface, a blue screen with a menu to configure various settings of your Raspberry Pi.
Solution 2 – Incorrect raspi-config PATH Settings:
Check your PATH variable by typing echo $PATH in the terminal. If /usr/bin is missing, you need to add it. You can temporarily add it to your PATH by running export PATH=$PATH:/usr/bin, but for a permanent fix, add this line to your .bashrc file in your home directory.
If you’re encountering the “sudo raspi-config command not found” error even after installing raspi-config, it’s possible that the command’s directory isn’t included in your system’s PATH environment variable. The PATH variable tells the shell where to look for executable files. Here’s how to check and set the proper PATH settings for raspi-config:
Step 1 – Locate raspi-config:
First, find out where raspi-config is installed. It’s usually in /usr/bin/. You can use the which command to locate it:
which raspi-configIf it returns a path like /usr/bin/raspi-config, note it down.
Step 2 – Check Current PATH:
To see your current PATH settings, type:
echo $PATHThis command will display a list of directories separated by colons.
Check if the directory where raspi-config is located (e.g., /usr/bin) is in the list. If it’s not, you’ll need to add it to your PATH.
Step 3 – (Temporary Method) Add Directory to PATH:
To temporarily add the directory to your PATH for the current session, use:
export PATH=$PATH:/usr/bin
Replace /usr/bin with the directory you found raspi-config in if it’s different.
Step 3 – (Permanent Method) Add Directory to PATH:
For a permanent solution, you need to add the directory to your PATH in your bash profile. Edit your .bashrc file in your home directory (~/.bashrc) using a text editor, like nano:
nano ~/.bashrcAdd the following line at the end of the file –
export PATH=$PATH:/usr/binAgain, replace /usr/bin with the correct directory if it’s different. Save and close the file (in nano, press Ctrl+X, then Y, and Enter).
Step 4 – Reload .bashrc or Reboot:
For changes to take effect, either reload your .bashrc file:
source ~/.bashrcOr reboot your Raspberry Pi:
sudo rebootStep 5 – Test the Configuration:
After setting the PATH, test to see if raspi-config can be accessed:
sudo raspi-configThe raspi-config interface should open without the “command not found” error.
Solution 3 – User Permissions Issues:
This issue is less likely to cause the specific error in question, but ensuring you have the correct permissions is always a good practice. Running raspi-config with sudo (as in sudo raspi-config) is necessary because it requires root permissions.

Method 1 – Using Sudo
To execute raspi-config, you need superuser (root) access. This is typically achieved using the sudo command in Linux, which stands for “superuser do”. By prefixing a command with sudo, you are instructing the system to run that command with superuser privileges.
To run raspi-config, you should use the following command in the terminal:
sudo raspi-configInstead of just raspi-config.
User Account with sudo Privileges: To use sudo, your user account must be part of the sudo group. On Raspberry Pi OS, the default user ‘pi’ is already configured with these privileges. If you’re using a different user account, you might need to add that user to the sudo group.
Method 2 – By Switching to Root User
Open Terminal: Start by opening a terminal window.
Switch to Root User using either of the below commands:
For a Root Shell (similar to logging in as root): Type sudo -i and press Enter. This will provide an environment similar to what you would get if you logged in as the root user directly.
For a Root Shell Keeping Your Environment: Type sudo -s and press Enter. This opens a shell with root privileges but retains your user’s environment variables.
When prompted, enter your current user’s password (the user must have sudo privileges).
Now try to run raspi-config in the terminal directly.
Proceed with Caution: Now you’re operating as the root user. Be very careful with the commands you run in this mode.
Solution 4 – Corrupted or Incomplete OS Installation:
Reinstall the Raspberry Pi OS. Use a reliable SD card and ensure a stable power supply during the installation to prevent corruption. After the installation, update and upgrade the system (sudo apt update and sudo apt full-upgrade) to ensure all packages are up to date.
Solution 5 – Outdated System:
Update your Raspberry Pi OS to the latest version. Run sudo apt update to update your package lists, followed by sudo apt full-upgrade to upgrade all installed packages. This process should also update raspi-config.
Solution 6 – Damaged Filesystem or SD Card:
If your SD card is damaged or the filesystem is corrupted, the most reliable solution is to get a new SD card and reinstall the Raspberry Pi OS on it. Always safely shut down your Raspberry Pi to avoid such damage.
Solution 7 – Conflicts with Custom Configurations or Scripts:
If you suspect that custom scripts or configurations are causing the problem, try to revert those changes. If you’re unable to pinpoint the exact issue, a fresh installation of Raspberry Pi OS might be the most straightforward solution. In the future, be cautious with scripts and configurations that might affect system settings.
In each of these scenarios, the key is to methodically assess and address the specific cause of the error. Regular system maintenance, careful configuration management, and ensuring a stable environment for your Raspberry Pi can help prevent such issues.
Solution 8 – Move to Raspberry Pi OS
If you’re not using Raspberry Pi OS, consider switching to it, especially if you need raspi-config. This process involves downloading the official Raspberry Pi OS image from the Raspberry Pi website and writing it to your SD card. Tools like Raspberry Pi Imager can simplify this process, providing a user-friendly interface for selecting the desired OS version and writing it to the SD card. Ensure that your SD card is properly formatted and free of errors before proceeding with the installation. Once Raspberry Pi OS is installed, you can access raspi-config by simply typing sudo raspi-config in the terminal. This change not only resolves the raspi-config issue but also ensures better hardware-software compatibility, as the OS is optimized for Raspberry Pi devices.
Installing Raspberry Pi OS on an SD card can be simplified into five main steps:
Step 1 – Download and Install Raspberry Pi Imager: Go to the Raspberry Pi website (raspberrypi.org) and download the Raspberry Pi Imager for your computer’s operating system (Windows, macOS, or Ubuntu).
Install the Raspberry Pi Imager by running the downloaded file and following the on-screen instructions.
Step 2 – Prepare the SD Card: Insert your microSD card into the card reader of your computer. Ensure any important data on the card is backed up, as the installation process will erase everything on it.
Step 3 – Select OS and SD Card in Raspberry Pi Imager: Open the Raspberry Pi Imager software.
Click “CHOOSE OS” and select “Raspberry Pi OS (32-bit)” or another variant based on your preference.
Then click “CHOOSE SD CARD” and select the microSD card you have inserted.
Step 4 – Write OS to the SD Card: Click on “WRITE” in the Raspberry Pi Imager. This will download the OS (if not pre-downloaded), write it to the microSD card, and validate the installation.
Step 5 – Insert SD Card into Raspberry Pi and Boot: After the writing process is complete and the SD card is safely ejected from your computer, insert it into your Raspberry Pi’s SD card slot.
Connect your Raspberry Pi to a monitor, keyboard, and mouse, and then power it up. Your Raspberry Pi should boot into the Raspberry Pi OS, ready for use.
This process provides a straightforward way to get your Raspberry Pi set up with its official operating system using the Raspberry Pi Imager, which simplifies downloading and writing the OS to the SD card.
Conclusion
In summary, raspi-config is a versatile and user-friendly tool, making it easier to manage and configure a Raspberry Pi, especially beneficial for beginners and those developing hardware-based projects. This journey through troubleshooting highlights the importance of regular system maintenance and the cautious use of administrative privileges. Keeping the Raspberry Pi OS updated, verifying installation paths, and understanding the implications of root access are practices that extend beyond this single issue. They are part and parcel of responsible and effective system management. As you continue to explore and innovate with your Raspberry Pi, remember that such challenges are opportunities to learn and grow in your computing journey. With each issue resolved, you’re not just fixing a problem but also building a stronger foundation in the fascinating world of computing and Raspberry Pi.