
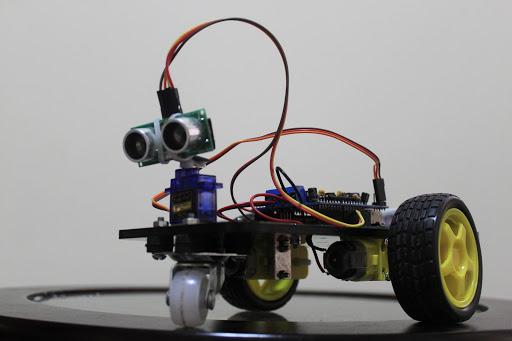
To Make Obstacle Avoiding Robot Arduino Based
Obstacle avoidance robot is a kind of intelligent machine which has the ability to sense obstacles or objects coming towards his path and has the ability to change its direction while any such object comes in his path. In this tutorial, we are going to demonstrate about the construction of this machine and the necessary lumps required for its construction.

Materials Needed:
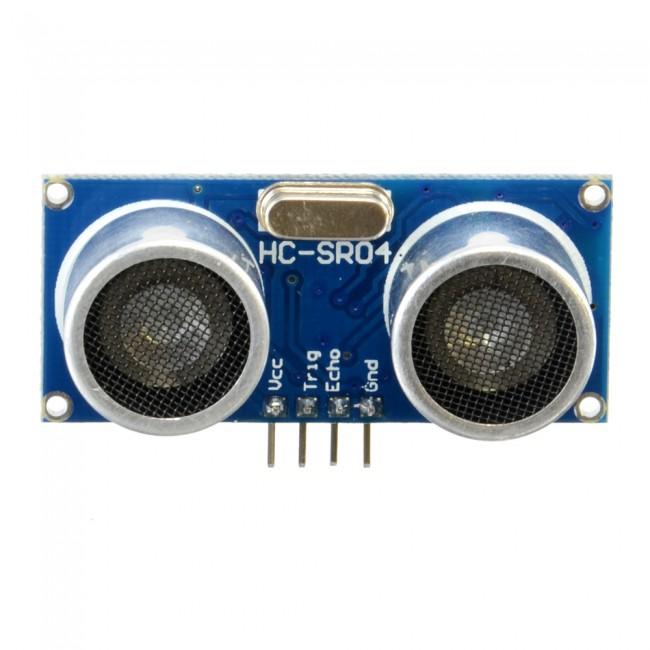
Ultrasonic sensor HC SR-04: Ultrasonic sensor HC SR-04 is used to detect the distance of object via ultrasonic rays, when these rays are emitted and when they collide with any object coming in its path it bounces back this ability enables this robot to avoid obstacle when it moves.

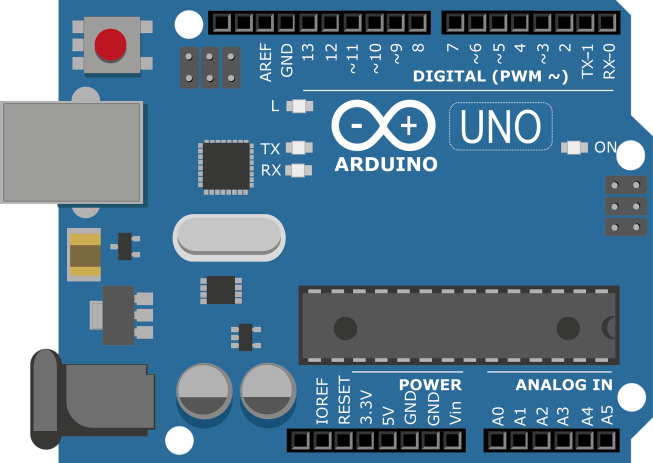
Arduino UNO
Arduino UNO is a microcontroller which plays a role of bridge between electronics and software. We can easily load programs or instructions onto it.

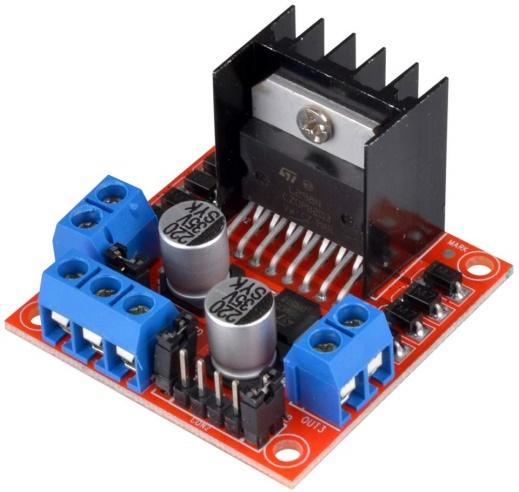
Motor driver module L298:
Its an high voltage multi watt circuit contains almost 15 pins and capable of accepting many TTl Logic Levels.

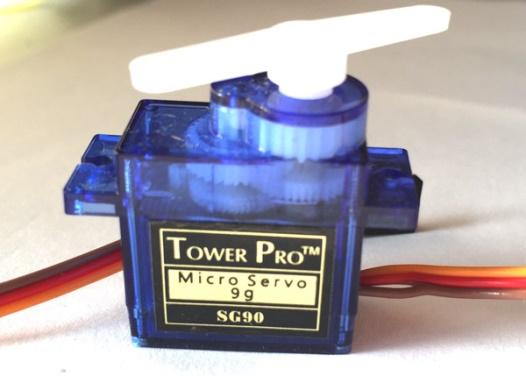
SG90 Servo Motor:
A device that contains servo capable of rotating at 180 degrees. Actually sensor is fitted with this servo so sensor together with this servo rotates and emits rays which help sensor to detect objects at every angle.

- Chassis Plate
- 2 DC motors 5V.
- 9V/12V battery.
- SG90 Servo Motor
- Breadboard
- Jumpers.
- Two toy car wheels with one ball caster.
- Single stranded wires.
- Glue gun
- Screw Driver
- Nuts
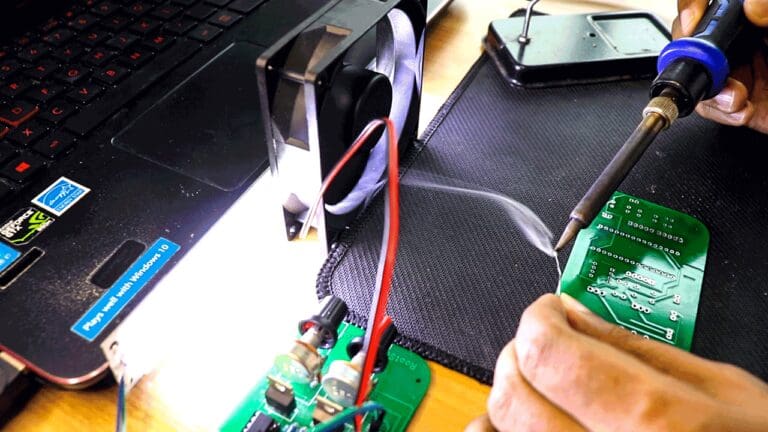
- Soldering Iron
Steps you have to follow to construct this machine:
Step 1 Connections
First of all we have to connect ultrasonic sensors and motor driver module L298 with Arduino .
Ultrasonic Sonar sensor:
- VCC → breadboard +5V
- Trig → Arduino analog pin 1
- Echo → Arduino analog pin 2
- GND → breadboard GND
Motor driver:
- +12V → Lipo battery (+)
- GND → Lipo battery (- )
- Provide 5V to arduino
- Inp1 assure to arduino pin 7
- Inp2 assure arduino pin 6
- Inp3 assure arduino pin 5
- Inp4 assure arduino pin 4
- OUT1 assure Motor 1
- OUT2 assure Motor 1
- OUT3 assure Motor 2
- OUT4 assure Motor 2
Servo Motor
Connect orange wire to arduino pin 10
Connect red wire to breadboard +5V
Connect brown wire to breadboard GND

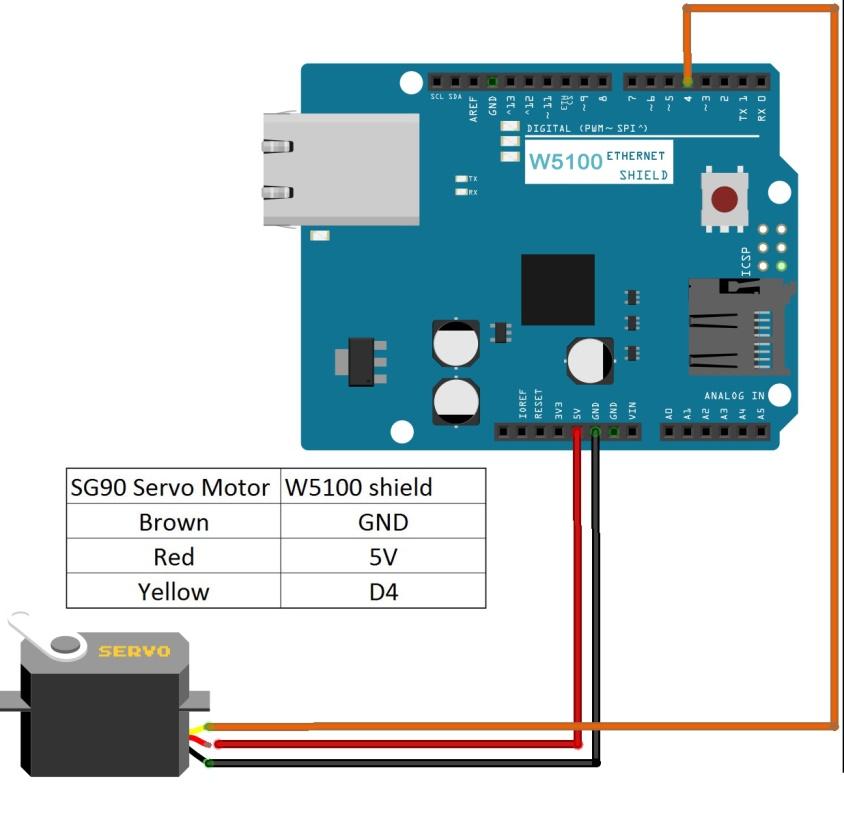
By following given circuit diagram mount your wires accordingly.


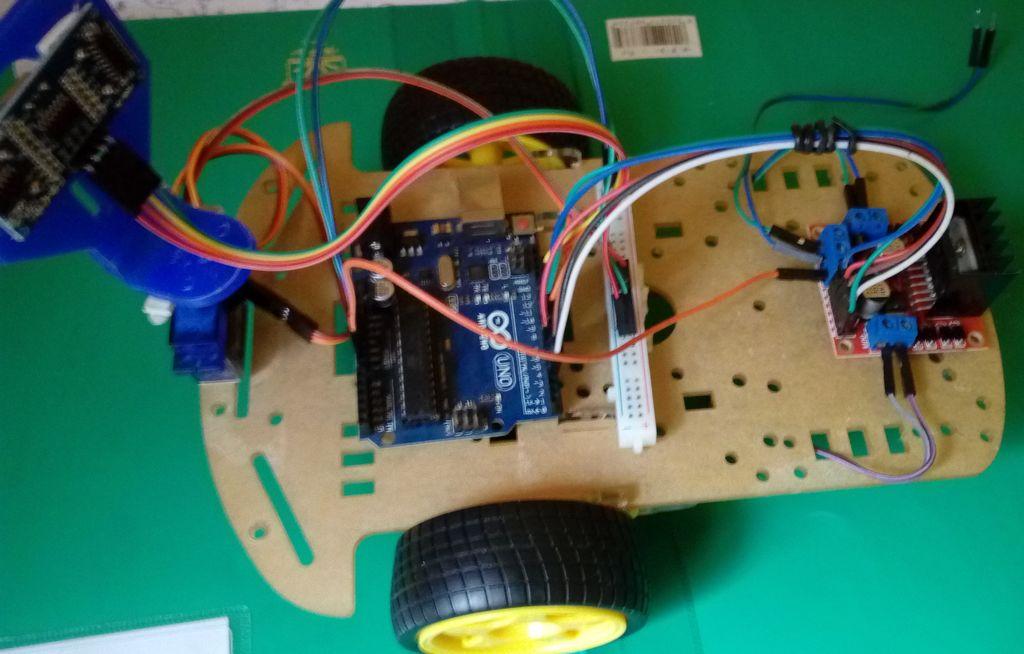
Step 2 Setting up an Chassis Plate:
Chassis Plate
After connecting electronic circuits, set up a chassis plate where you connect wheels at sides and ball caster at front. Now solder metallic wires with motor and mount it on wheels and fix it with screw-on chassis. Exactly like that given in the picture.
After wheels mount whole electronic circuit to chassis in a proper manner so you can enable your machine sensors to run properly.

Step 3 Coding:
For this you don’t have to install an additional library for Arduino, the only thing you have to do is paste this code to Arduino IDE and run to board.
int trigPin = 9;
int echoPin = 10;
int revright = 4;
int fwdleft = 7;
int revleft= 6;
int fwdright= 5;
int c = 0;

void setup() {
  //Serial.begin(9600);
   pinMode(5, OUTPUT);
   pinMode(6, OUTPUT);
   pinMode(4, OUTPUT);
   pinMode(7, OUTPUT);
   pinMode(trigPin, OUTPUT);
  pinMode(echoPin, INPUT);
  // put your setup code here, to run once:

}

void loop() {
  long duration, distance;
  digitalWrite(trigPin,HIGH);
  delayMicroseconds(1000);
  digitalWrite(trigPin, LOW);
  duration=pulseIn(echoPin, HIGH);
  distance =(duration/2)/29.1;
  //Serial.print(distance);
  //Serial.println("CM");
  delay(10);


  if((distance>20))
 {
  digitalWrite(5,HIGH);
   digitalWrite(4,LOW);
   digitalWrite(6,LOW);
   digitalWrite(7,HIGH);
 }

  else if(distance<20)
 {
   digitalWrite(5,HIGH);
   digitalWrite(4,LOW);
   digitalWrite(6,HIGH);
   digitalWrite(7,LOW);

 }
}
After coding test your robot hopefully it will run successfully.
Have a nice day.
Hitesh Kumar
Admin Bilogger.com
Student Of Computer Science
Sindh Pakistan
If you want to know about robotics and future of AI you must read our blog
Read https://bilogger.com/future-of-artificial-intelligence/


Well describe and well written.
❤